
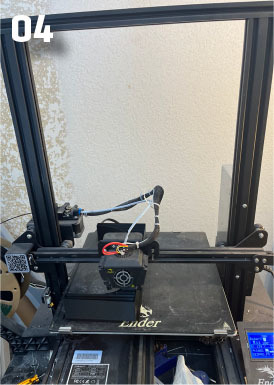
Put technology to work for you By Antonio Watkins [email protected] | Photos courtesy of Antonio Watkins As seen in the February 2023 issue of Model Aviation. In this article, I want to describe some of the technology that I use when designing and building model airplanes. When I was a child, I would cut neighbors’ grass to earn money to buy model kits. Little did I know, I could have built model airplanes from scratch, but my local library did not have books on model airplanes, and the internet was several years away. I understand that there are people who might not like building from scratch and want things now, but many of us like the satisfaction of knowing that we built our airplane from scratch and it flies. There is nothing wrong with buying an ARF, and I recommend one as a first model. You will learn a lot from ARFs and, if you follow the instructions, you will have an airplane that flies well and can last hundreds of flights. Some people will choose to scratch-build from the beginning. If you go that route, make sure you choose a tried-and-true design and follow the building instructions. If you’d like, you can even buy prebuilt airplanes from friends. That is another great way to go. As an adult, I have the internet with access to tons of information. I can use CAD programs to model my design and test it in a simulator, all without having the airplane in my hands. I can laser-cut the parts, 3D-print the parts, and even 3D-print molds to make composite parts. I can also use a CNC machine to cut parts. You might think that the machines that do all of these things are out of your price range, but let me assure you that they are not. To design my airplanes, I use Fusion 360 CAD. You can download it for free on the Autodesk website. Most CAD software is free for modelers. If you are new to CAD, there is some learning involved, but it is not difficult. There are some limitations to the free version of Fusion, but it does what I want and more. Fusion 360 is a cloud-based CAD program. If you want all of the bells and whistles, you can purchase a oneyear license. SOLIDWORKS is another excellent CAD software. It is $10 a month for hobbyists. If I am going to 3D-print a part, I will model the part in Fusion 360 because I can make a mesh file and 3D-print it. Fusion 360 will only let you export a few kinds of files. 3D printing is not new technology. It has been around since the 1980s, but it was more expensive then. Today, you can purchase a good 3D printer for less than $200. When it comes to 3D printers, I like to use the Creality Ender Series of printers. They are inexpensive and offer several models, even for beginners. Creality has a large end-user base, and if your printer is not printing right, you can get answers fast. Another brand of printers that I like is Anycubic. When 3D-printing parts, you can use several different types of filaments. When I am 3D-printing molds, I use PLA. Since I live in Arizona, I do not like to use 3D-printed parts because of the extreme heat. I usually 3D-print molds and make composite parts, which are much stronger and can take the heat. Do you need software to 3D print? Yes, you do, but most of the available software is free. I use a program called Ultimaker Cura. It is free and simple to use. When you purchase a 3D printer, look to see whether it has a large fan base. Many good 3D printers are available. There is a learning curve to 3D printing as well, but it is not difficult. Always ask for help if you need to.
How to 3D Print
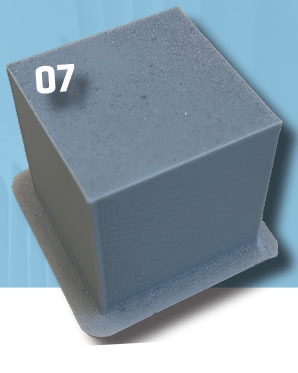
Let’s take a look at how to go about 3D printing. If you do not have any proficiency in CAD, go to YouTube and watch a series of videos called "Learn AutoDesk Fusion 360 in 30 Days for Complete Beginners," by Product Design Online. After you complete the lessons, you will be able to design some extremely complex models. Other videos that you should watch are those posted by Learn Everything About Design, which can also be found on YouTube. They cover designing complex shapes, and even discuss designing shapes for RC airplanes. When you’re ready to 3D print, open Fusion 360 and create a small cube. After you have the cube modeled, save it. Export the cube as a mesh file to your computer. If you have not already done so, download the free Ultimaker Cura software. Open the file you saved as a mesh file. The mesh file will open automatically in Cura. Tutorials on how to use the Cura slicer program can also be found on YouTube. After your file is open in Cura and you have the settings programmed, go ahead and slice it. Slicing is converting a 3D model into a set of instructions for the 3D printer. The program will convert your file to G-code, which is how your 3D printer will understand what it needs to do. After your project is sliced, save it to the storage card that came with your 3D printer. Insert this storage card into your 3D printer. With your printer set and the storage card inserted, print the cube. In a little while, you should have a plastic model of the part that you designed in Fusion 360. This is a basic object, but the principles you used to model the cube and print it are the same ones that you will use to print model airplane parts and molds. It is not complicated. After you go through the process a couple of times, you will have a good understanding of how it works.CNC Router
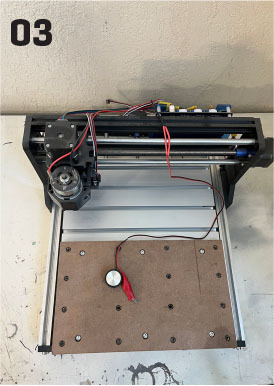
Another piece of technology you can use is a CNC router. CNC stands for computer numerical control. You can find small ones on eBay by searching for 3018 CNC. The 3018 is the size of the CNC’s bed (30 × 18 cm). They are relatively inexpensive as well. You can find them from $125 up to thousands of dollars. I have a 3018 machine that I bought from a company called SainSmart. Make sure that the one you buy has software to run it so that you don’t have to purchase it separately. Many of the 3018 machines run on GRBL. It is a free, open-source software with a worldwide following. You will need to download a CAD program, such as Easel, to use GRBL. You will draw your design in Easel. Easel will then send the CAD design to a free software called Candle, which converts the file into G-code. That code is loaded into your GRBL-based CNC machine. The machine will then be ready to cut out your part. Some projects can take thousands of lines of G-code or more. CAM stands for computer-aided machining. The hardest part with CAM is learning the speed of the bit and how fast to feed the tool. Do your research before buying a machine. When I first bought my CNC machine, it was a Mach 3. I upgraded my CNC machine with an extension kit. It is now a 3040. I bought my extension kit from SainSmart as well. It was easy to install and gives me a greater working area. The extension kits are also inexpensive. You can find them for roughly $25. I bought a new controller and made it a GRBL machine. I also bought an offline controller to control the machine. My computer does not have to be connected to the machine to start carving. This was an inexpensive conversion. The controller board and offline controller were approximately $80. I use my router when my laser is not the right tool to cut out an airplane part. I use a router to cut out rocket fins.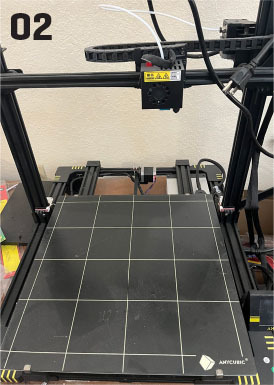
Laser Cutters
Another piece of inexpensive technology that you can buy, and one of my favorite machines, is a laser cutter. You can use it to cut your parts. When I was a kid, I would look at the Edmunds Scientific Catalog and dream of owning a laser. Well, that is no longer a dream. My first laser was an Aufero Laser 2 made by Ortur. At roughly $350, it is more expensive than many. It has a 5-watt optical output diode laser and cuts balsa and plywood like butter. Five watts is not a great deal of power, and you have to make several passes on some thicknesses of wood, but you are cutting wood with a beam of light. How cool is that? The Aufero Laser is a popular beginner’s laser. You will learn a lot from using this laser. One thing that I stress when using a laser is to wear a good set of eye protection goggles. You can damage your eyes by looking at the laser. The Aufero Laser comes with a light protector on the laser head itself, but I also wear protective goggles for the laser’s light. The Aufero laser does not have all of the bells and whistles that the more costly lasers have, but you learn the basics. After you can operate the Aufero 2 Laser, you will comfortably be able to move on to more power. In the beginning of your laser journey, you’ll just want to cut, but you must learn about power and speeds. There is a small learning curve with a laser. Some companies have their own software, but most users prefer a software called LightBurn to do projects. You can buy a license for Lightburn for roughly $60 and it will give you the latest upgrades, or you can use the free version. You can import a picture into the software, use the trace tool, and it will draw your part in LightBurn. You can even draw in LightBurn with its user tools.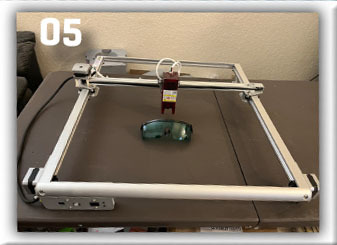


Comments
Hope to get to use ythe tool
Hope to get to use ythe tool you provide.
Add new comment