


Where's the CG?
Written by Louis Joyner Free Flight Duration Column As seen in the November 2015 issue of Model Aviation.
CG stands for center of gravity. It is the point at which the model balances level front and back. Model plans often show its location either as a distance or percentage of chord back from the leading edge of the wing. But why is it where it is? What happens when you move it?
To answer those questions, we need to look at two factors that affect the longitudinal stability of a model: the neutral point (NP) and the static stability margin (SSM). As its name implies, the NP is the point where the model is neutrally stable. The NP is typically located slightly behind the wing’s trailing edge on a typical Free Flight (FF) model.
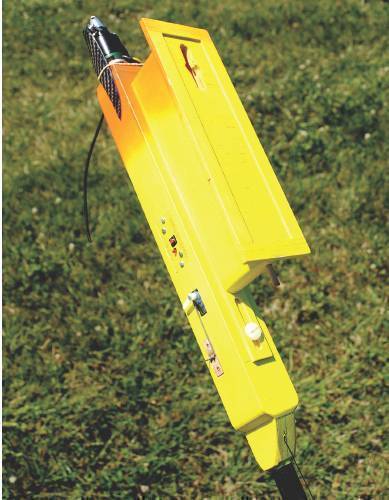
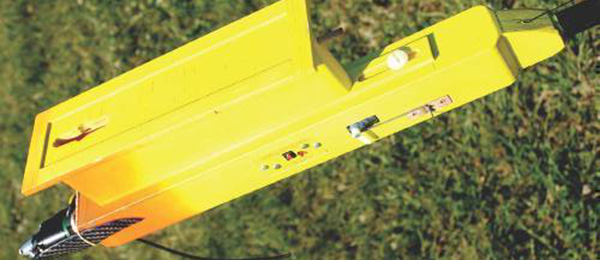
Above: Loosening two 1/4-20 screws on Dale’s model allows the pylon to be moved forward or back. Removing the wing allows access to the front screw; the rear screw goes into a slotted tab attached to the rear of the pylon.
The SSM is the measure of distance, in percentage of the average wing chord, that the CG is located in front of the NP. Moving the CG forward increases SSM; moving it back decreases SSM. Move the CG back too close to the NP and the model becomes unstable and will crash.
The SSM is tied to decalage—the difference between wing and stabilizer incidence. As the SSM increases, decalage needs to increase as well. In other words, as we move the CG forward, we need to increase decalage, typically by shimming up the rear of the stabilizer.
Let’s consider a typical power or electric model with no auto surfaces. You could get the model to glide with a forward CG and lots of decalage. But under power, the higher speed increases lift and the model is liable to loop. That is why power models are traditionally trimmed for the powered portion of the flight by adjusting decalage. This usually results in a minimal amount of decalage to reduce the looping tendency.
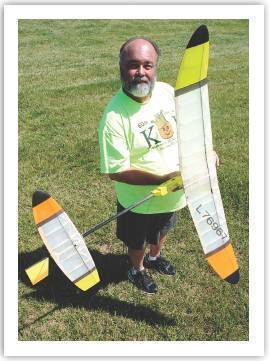
Left: Dale Elder’s Nats-winning A and B Electric model features a movable pylon for easy adjustment of the CG. The elegant elliptical wing and stabilizer were inspired by Bob Hunter’s Satellite from a half century ago.
After the climb is sorted out, the glide is adjusted by moving the CG. This same technique can work for electric-powered models, Catapult Gliders, or any type of FF model that has a fast climb and does not use auto surfaces. (Auto surfaces allow the climb and glide flight phases to be independently trimmed without adjusting the CG.)
It is important to remember that some model adjustments, such as decalage, rudder offset, and wing washin or washout, are more effective at high speeds, while others are more effective at slow speeds—CG, stabilizer tilt, and thrust offsets.
CG changes can make a difference in a model’s glide, while having little effect on the climb. The Sunday before the start of the 2015 FF Nats was calm, allowing modelers to test and adjust their models for maximum performance. I watched Dan Berry flying his Super Pearl E-36 head-to-head with several others flying the same design.
On a 5-second motor run, Dan’s model was getting considerably higher, but the other models were outgliding his. Perhaps Dan’s model had been adjusted for more typical wind and thermal contest conditions.
To improve the glide for the calm evening air, Dan began moving the CG back, reducing the SSM. He did this by relocating the model’s radio tracker from the pylon to the tailboom a few inches to the rear. Over a series of flights, Dan kept moving the tracker farther back until it was in front of the stabilizer.
The glide improved with no effect on the power pattern. (I estimate that the CG moved roughly 6% toward the rear.) Dan shimmed the side of the wing to decrease stabilizer tilt and open the glide circle.
Because moving the CG to the rear reduces the SSM, it will reduce the model’s longitudinal stability in wind or thermal conditions. If you trim a model for the best glide in calm conditions, the model will often stall when flying in more turbulent air. One solution is to add nose weight as wind and thermal activity pick up. The nose weight will have little effect on the model’s climb trim, but it will reduce the chance of stalling in the glide.
A few years ago, George Batiuk showed me what he called “the old Ukrainian trick.” This consisted of attaching a spare wing wire (roughly 4 grams) to the front of an F1B Wakefield when the wind and thermals got up. It provided an easy fix for stalling in turbulent air, did not affect the climb trim, and was easy to add or remove.
On the plans for his 1997 Model of the Year, Ukrainian flier Igor Vivchar showed the CG at 58% for “small wind” and at 56% for “strong wind.” Some F1B and F1G front ends allow room to fit removable weights around the rear bearing housing. Think of it as a giant aluminum or brass wheel collar.
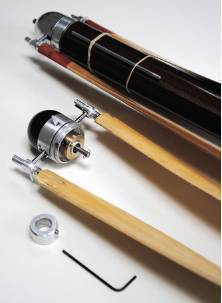
Removable weights on this F1B Rubber model allow the CG to be moved forward for windy conditions. The brass one weighs approximately 8 grams and the aluminum one is roughly 4 grams.
Another way to adjust a model’s CG is by moving the wing fore and aft. A book from the 1930s summed it up: “If the model dives, move the wing forward; if the model stalls, move the wing back.”
Harry Grogan and Dale Elder have been working on a series of electric-powered models equipped with pylons that can easily be moved to adjust the CG. “I do weight and balance calculations to determine where the balance point will be,” says Harry. “In three years of testing on one model with a movable pylon, the wing moved a number of times, but eventually ended up where it started.”
The movable pylon system Harry and Dale use is simple. The built-up pylon has two slots in the bottom, one near the front and the other in a tab that extends from the rear of the pylon. A hole in the top of the pylon allows access to the forward screw.
The slots permit approximately 11/4 inch of travel. Two nylon screws clamp the pylon to the fuselage, with 10-24 screws used for E-36 and 1/4-20 for the larger A and B Electric models. The screws go into drilled and tapped 1/4-inch plywood crosspieces. For any type of movable wing system, it is important to have reference marks on the fuselage and to keep notes of the best wing position for each weather condition. “Even 1/16 of an inch can make a difference,” said Dale.
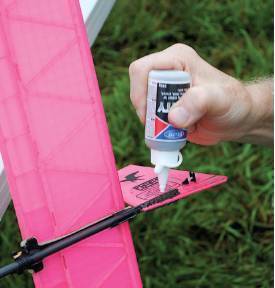
A product used by model railroaders called Liquid Gravity also works for fine-tuning a FF model’s CG. Simply sprinkle it onto slow-curing CA glue.
If you want to learn how to accurately determine a model’s NP, as well as the relationship between decalage and SSM, I recommend Peter King’s “Longitudinal Stability Explained” in the 2014 Symposium, available from the National Free Flight Society (NFFS). Peter’s paper also explores the effect of inertia on stability. He shows that it helps to keep the tail light.
What Weights?
Mark Freeland, owner of Retro RC and now of Campbell’s Custom Models, showed me a new product he found for fine-tuning a model’s CG. Called BD-38 Liquid Gravity, the tiny nontoxic pellets are used for weighting model trains or plastic display models. The pellets can be sprinkled onto slow-curing CA glue or other adhesive. One US source for the British product is Horizon Hobby.
Another easy-to-use weight is adhesive-backed lead tape used for weighting golf clubs. The tape is easily cut with scissors and comes in 1/2-inch and 1-inch widths. One online source is Golfsmith.
SOURCES:
NFFS www.freeflight.org
Retro RC
(248) 212-9666 www.retrorc.us.com
Horizon Hobby
(800) 338-4639 www.horizonhobby.com
Golfsmith
(800) 813-6897 www.golfsmith.com
This Month's Issue

Join the AMA
![]()


2 comments
Execellent article.
CG
Add new comment