


Horizon Hobby Hangar 9 Van's RV-4 30cc ARF
Written by Dan Gaston An enjoyable homebuilt aircraft Product Review As seen in the June 2018 issue of Model Aviation.
Specifications
Model type: Semiscale ARF Skill level: Intermediate Wingspan: 85 inches Wing area: 1,551 square inches Length: 73 inches Weight: 17 to 19 pounds Wing loading: 25.3 ounces per square foot Power system: 30cc gas or electric equivalent Radio: Spektrum DX18 transmitter; Spektrum AR9020 receiver; eight Spektrum A6180 digital metal gear servos Construction: Balsa and plywood Needed to complete: Power system; radio gear; fuel or batteries Flight duration: 10 to 12 minutes Price: $449.99Pluses
• Covered in UltraCote, which means any repairs will match precisely. • Beautiful fiberglass cowling, wheel pants, spats, and cuffs. • Scale hinging and no exposed servos. • Included cockpit details and painted pilot bust. • Rock-solid flight capabilities. • True-running and heavy-duty 4-inch spinner included. • Included decal sheets for four schemes.Minuses
• A couple of mistakes in the assembly manual. • Accessibility of ignition and radio batteries.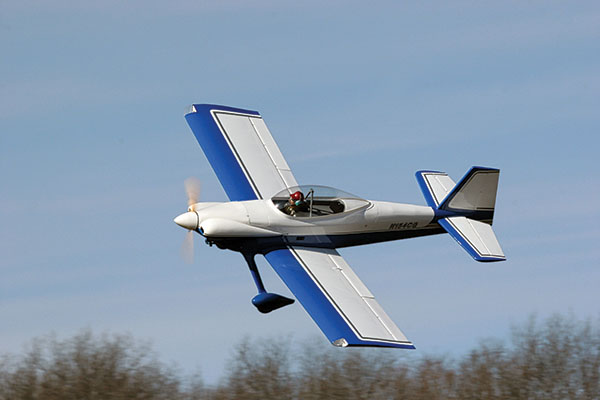
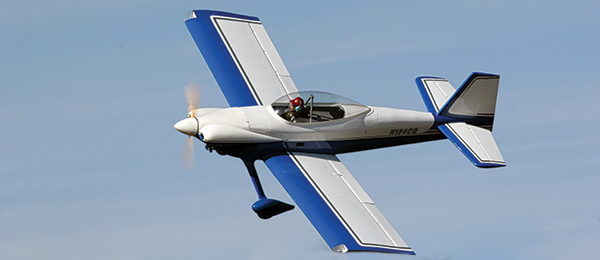
The Hangar 9 RV-4 on a low, fast flyby. This view shows how clean the design is. The model flies well and had no problems operating from a grass runway.
Bonus Video
Product Review
The Van’s Aircraft line of homebuilt, full-scale airplane designs is an extensive one with a long list of satisfied customers. With proven designs that cover a range of private pilots’ needs and desires, it’s no wonder they are so popular. In that extensive line is one design that, in my opinion, is the aviation world’s version of a hot rod. Luckily for us, Hangar 9 has chosen to bring to the market an ARF version of that little hot rod—the Van’s RV-4. Featuring an 85-inch wingspan and designed for 30cc gas engines (or equivalent electric motors), this is a big model, but not so large that it requires a van or trailer for transport. Although aerobatic, it won’t give a true 3D model a run for its money. But as a sport airplane, it’s got the additional appeal of being scalelike in appearance. With an airplane this pretty, any RC pilot should be content to rip around a local airfield for years to come, but might I suggest something more? The Hangar 9 RV-4 is an ideal airplane with which to enter your first RC Scale contest. For starters, it has the size and weight to relegate all but the worst wind to “no factor” status. Because it’s aerobatic, you won’t have to fly a boring routine of traffic-pattern maneuvers. If your excuse for not competing in RC Scale has been, “All I have is an ARF,” that is no longer a legitimate excuse. The 2017 AMA RC Scale Nats was filled with ARFs—heck, they even allow them at Top Gun now. Don’t let RC Scale competition be one of those things that you could have or should have done. Go to the website of the National Association of Scale Aeromodelers (NASA; the AMA Scale Special Interest Group) to find out more. After removing all of the contents from the apartment-size box, I was immediately impressed by the completed scalelike hinging on all of the control surfaces! The list of niceties goes on—not the least of which is a beautiful fiberglass cowling with paint that perfectly matches the fuselage covering. Well done, Hangar 9!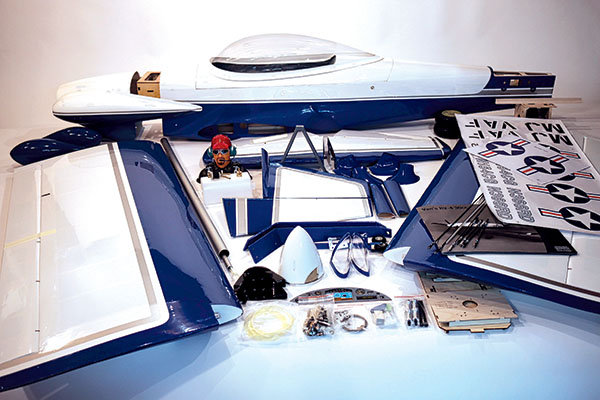
This photo emphasizes how well the many painted fiberglass parts match the covering on the RV-4.
Next, I set about inventorying everything to see what additional items I needed to purchase from my local hobby shop. When that list was complete, I sat down and thoroughly read through the instruction manual. The manual for the RV-4 is done in the usual Hangar 9 fashion, which means it’s a nice booklet loaded with pictures and written instructions. The manual begins with outfitting the wing halves, which is nothing more than installing two servos and their associated linkage in each half and epoxying the aileron horns in place. Before you mix the epoxy to install the aileron horns, gather the elevators, rudder, and their associated horns and glue all of them at the same time. That way, everything is ready to go when you get to that step. The well-illustrated manual contains no fewer than 30 photos to guide the owner through the process of wing preparation. A small, but significant, mistake was found in the manual where it states to drill out the flap control horn with a 3/32 drill bit. The proper bit size is 1/16 for a slop-free linkage setup. On the subject of the flaps, the concealed linkage and servo setup procedure outlined in the manual might seem unorthodox, but follow it and you will see that it works well. The final wing assembly steps are the addition of the flap linkage shroud and wingtip light lens. For this I used ZAP Formula 560 glue, which I also later used to secure the canopy to the cockpit. The wingtip lights are fully functional. Because of time constraints, I was unable to utilize them for this review, but they will be hooked up in the future. Moving onto the fuselage, I began the radio installation by varying from the manual when it came to servo layout. The manual shows the rudder servo flanked by the two elevator servos, with all three output shafts toward the front. With a 3-inch tiller bar for the pull-pull setup on the rudder servo, I was concerned about how well this would work. I installed the rudder servo with its output shaft to the rear, removed all but the necessary elevator servo output arms, and ended up with a roughly 1/16-inch clearance, no matter the control inputs. Next was the installation of the vertical stabilizer, which is simply epoxied to the fuselage. The manual suggests that you mix 3/4 ounce of 30-minute epoxy for this procedure. I assure you that it can be secured with far less. The horizontal stabilizers slide over a carbon-fiber spar tube and are secured to the fuselage with 8-32 button-head machine screws. I found another mistake in the manual for the tail wheel installation. If a hole is drilled in the bottom of the rudder at the suggested 45/8 inches aft of the hinge line, this hole will be merely decorative. I installed the tail wheel assembly and used the tiller arm to locate the holes for its mounting. The main gear installation—with all of the swoopy streamlining fiberglass bits—is actually straightforward. I first coated the bare plywood beneath the landing gear legs with 30-minute epoxy, knowing that exhaust has a way of seeping into this area and softening the wood. To secure the landing gear fairing to the cuffs, which are, in turn, secured to the fuselage at one end and the wheel pant at the other, I used a great product called Foam-Tac adhesive. Foam-Tac is a thick, clear glue that fills gaps well and remains flexible. I get mine through West Michigan Park Flyers. The difference that these wheel pants and fairings make in the model’s appearance is stunning. At this point, I slipped the cowling on to get a peek at the completed look. I was not disappointed. I gathered all of the necessary items and set about mounting the engine, which normally is a rather involved process. From placing the included (and much appreciated) drilling template against the firewall, to tightening the final engine-mounting bolt on the Evolution 33cc engine, total elapsed time was approximately 20 minutes. What’s more, the throttle linkage was even simpler.
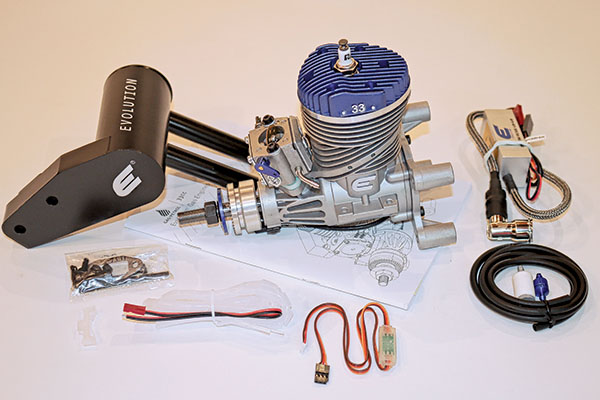
Evolution gas engines are built on traditional model engine architecture, providing a level of familiarity for someone accustomed to a glow engine.
The muffler installation, however, was quite another story. No problems were encountered with the model or any of the equipment—it’s simply an involved process to fit a cowling over an installed muffler. I was provided an Evolution Pitts-style muffler for this review. All that’s required to mount it to the engine is two bolts. That’s the easy part. It’s nothing out of the ordinary—just the many measurements, rechecking those measurements, placing and removing the cowl, and eventually attacking that gorgeous cowl with a Dremel tool to make clearance cutouts. Of course, all of this is unnecessary if you’re going the electric route.
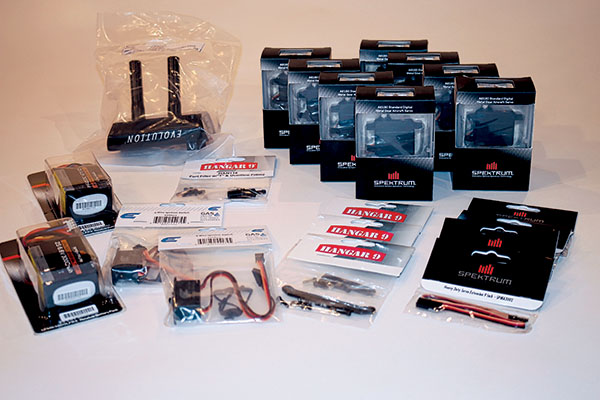
An optional Pitts-style muffler, LiFe batteries, aluminum servo arms, servo extensions, switches, a fuel filler, and Spektrum metal gear servos round out the equipment used in this review.
To obtain the balance point of 61/16 inches behind the leading edge, it was necessary to place the two 3,000 mAh 2S LiFe batteries against the rear of the bulkhead to which the engine mount box is mounted. I also had to secure 9.5 ounces of weight to the engine stand-offs. If I mounted the batteries at the forward edge of the engine box as shown in the manual, the required dead weight would have been less. To access the batteries for charging would require removing the spinner, propeller, and cowling. There is a hatch on the bottom of the fuselage just aft of the landing gear through which I can access the batteries. To make it possible to leave the batteries secured in the fuselage, I’m utilizing a balance lead extension in addition to a long charge lead. At this point, after only a few evenings of simple assembly, everything is ready for the maiden flight other than the initial break-in runs of the Evolution 33cc engine. This break-in was carried out by following the instruction manual to the letter.
Flying
Much trepidation goes along with a first flight and this was no exception. I soon discovered that whatever amount of time I spent fretting about the maiden flight was wasted. This airplane proved itself stable and true from the moment the takeoff roll began. After the usual minor trim adjustments, the Hangar 9 RV-4 felt as comfortable as something I’d been flying for a while. After the obligatory photo passes were completed, it was time to open up the tap a bit and see what the RV-4 was capable of. Even with the Evolution 33 running somewhat rich as it continued its break-in, large loops, Immelmann turns, and hammerheads were all possible. When broken in and tuned accordingly, this engine should prove to be more than enough for the 17-pound airplane. Rolls, both axial and opened up into a barrel style, are easily accomplished and made me look far better than my skills dictate. Inverted flight is another easily accomplished feat for this airplane. I can sum up the entire flight envelope of the Hangar 9 RV-4 in just one word: solid. It feels like a near-perfect blend of size, weight, power, and agility. As pleasurable as any first flight might be, the airplane must still be brought back down for its first landing. It’s as simple as lining it up with the runway, bringing the throttle down after clearing the threshold, then giving it the slightest bit of elevator for a perfect flare. The flaps were used on subsequent flights, and they were indeed effective with little pitch change. The flaps add a new, fun dimension to your flying, but if you decide to take the plunge into Scale competition, they also represent 10 free mechanical option points.Conclusion
The Horizon Hobby Hangar 9 Van’s RV-4 proved to be an enjoyable model to fly and a perfect option for anyone interested in getting started in RC Scale competition.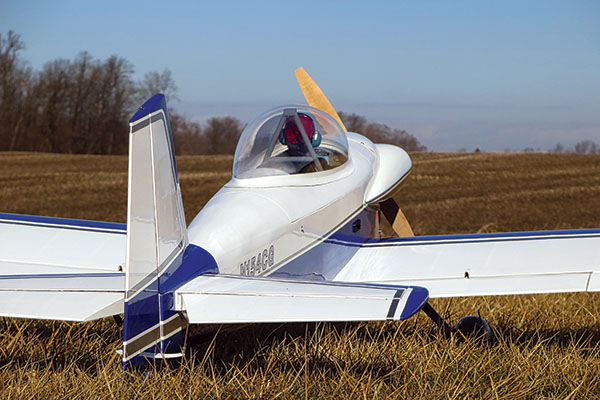
The author chose the simplest of the available decal schemes to allow the airplane’s lines to speak for themselves.
—Dan Gaston [email protected]
Manufacturer/Distributor:
Horizon Hobby (800) 338-4639 www.horizonhobby.comSources:
Spektrum (800) 338-4639 www.spektrumrc.com Foam-Tac (914) 699-3400 www.beaconadhesives.com West Michigan Park Flyers (616) 667-1809 www.wmparkflyers.com NASA www.nasascale.orgThis Month's Issue

Join the AMA
![]()


Add new comment