


Painting Pilot Figures

Painting Pilot Figures
Basic tips and techniques
Photos courtesy of
Scale model airplanes are greatly improved with scale pilot figures. Many excellent companies can provide a civilian or military pilot for your RC model. Beyond realistic options, many offer cartoon characters ranging from skeletons to Snoopy.
No matter what you choose, we all want a lightweight pilot that looks great! Vacuum-formed pilots made from plasticine sheets are fading in favor of models made of resins and hard plastics. The days are gone when Williams Brothers had a virtual monopoly on the company’s scale pilots.
Some companies will paint the pilots for you. Yet, just as there is great satisfaction in building RC airplanes, there is satisfaction in a well-painted pilot.
Clothing on pilots today is phenomenal and less toylike. I was in Toledo, Ohio, last year for the annual Toledo R/C Swap Meet & Expo and was standing before a row of well-dressed 1/5-scale pilots. I jumped when one of the helmeted pilots turned to look at me. Okay, he was programmed to look left and right, but the realism was excellent.
 Here is the pilot figure as it arrived from Real Model Pilots. The 3D-printing left horizontal lines.
 The goggles were filled with clear 5-minute epoxy and set at an angle to dry. The pilot’s beard was a black wash (10:1) dabbed onto the chin, around the eyes, and into the fur around the face.
Paints range from enamels to oils. A sophisticated pilot can be airbrushed to add realism; however, realism can be achieved through some easy-to-master painting techniques. Many pilots today are 3D-printed, leaving horizontal ridges. This article and these photos will show you how to paint a pilot bust. The main focus tends to be the face, especially the eyes; however, other accessories really "dress up" a pilot—pun intended.
- The pilot figure in the photos was purchased from Real Model Pilots in the U.K. It is 1/5 scale, so it is approximately 3 inches tall. Measure carefully in advance. Some pilot figures fit better than others. I once had to saw off a pilot’s outstretched arm that was waving, remove the right side of his chest so that he could fit in the cockpit, and reglue the pilot together again. He survived.
- To smooth the 3D-printed lines, I sanded it lightly then applied a slurry of Perfect Plastic Putty from Deluxe Materials, a water-based filler. (This is particularly important on the pilot’s cheeks and the top of his cap.)
- Sand with 600-grit paper or sanding sticks to smooth out the pilot figure’s features. Wipe it down with rubbing alcohol to "wash" away dust and grit.
- Apply a base coat of paint. I sprayed the figure with matte black Krylon rattle can spray paint. Be sure that materials can mix properly. I believe some of the chemicals in the Krylon worked their way to the surface of the covering paint after a couple of weeks.
- Paint the eyes first. I used a gray-white paint—not pure white—then added the black cornea, the blue iris, the black pupil, then a dot of white for reflection. I used Testors enamel paint.
- Paint the teeth. Add a tiny gray separating line between uppers and lowers and in the rear corners. If you can add a light wash of 1:10 black paint over the head, the shadows in the teeth might appear.
- Paint the face the flesh color you prefer. To avoid brushstrokes, thin the paint and apply it dry and lightly. This is called dry-brushing. Remove all of the paint from your brush except for a faint trace. Be patient. Plan on at least three dry-brushed coats. Thin coats do dry quicker but can run.
- Pink: Add a tiny bit of red to your flesh paint and apply the pinked-up version on cheeks, chin, inside the eyes next to the nose, nose end, and bottom lip.
- Gray: Give the guy a beard, barely using black by the dry-brushing technique described in step 7. It should be slightly gray. Less is more.
- Paint the coat and cap using the dry-brushing method. Do not show any brushstrokes. You’ll ruin a brush, but it’ll be worth it. Keep that brush for dry-brushing projects. I dab the brush on a paper towel and smear it around until it leaves what looks like a dusty trail.
- Paint the straps and goggles. Dry-brush the inside edges of the goggles the color of the cap, blending to black in the middle. If the cap is black, use a slightly lighter shade of gray. Avoiding solid black is a common artist’s rule.
- Consider adding a well-diluted black wash over the pilot to weather it, especially the clothing. I like a mixture that is 10 parts thinner and one part paint. Apply lightly and allow everything to dry. The wash does a good job of melting brush strokes into one continuous tone of color. Tip: Do not paint anything silver yet. (Dulling spray turns silver into gray.)
- Overspray the model with a matte clear spray—the duller the better!
- Dab clear fingernail polish on pupils and teeth. I dabbed a glob on waxed paper and applied it with a toothpick.
- Paint anything that needs to be silver, such as buttons and buckles.
 After sanding with 600-grit sandpaper and sticks, the author coated the face with Perfect Plastic Putty and lightly sanded it smooth.
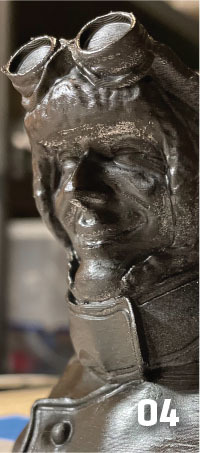 A primer coat was sprayed on the model. Black works well for under any potential dings or chips.
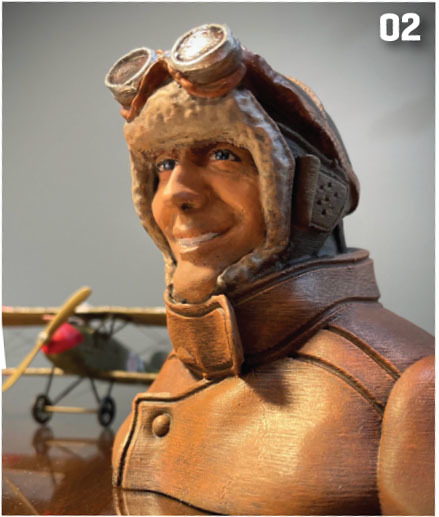
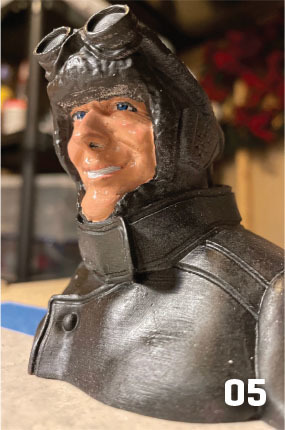 The eyes were painted completely first. Note the faint pinkish hues on the lower lip, nose, and cheeks. The black eyeliner and nostril edges were painted last.
 This photo shows the lines in the pilot’s coat. The black is from the primer and a wash was applied after it was finished.
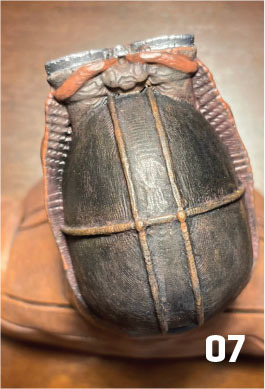 The top of the cap was dry-brushed with a charcoal gray. The silver on the goggles was painted last.
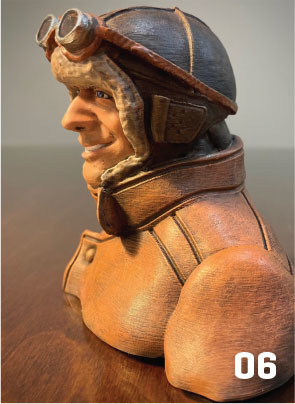
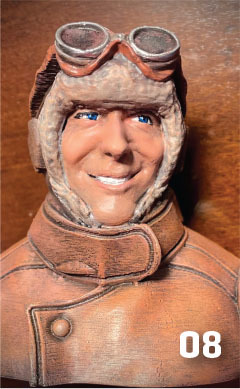 The author’s completed pilot figure is ready for service in the airplane.
After painting the pilot figure’s clothes, I found a painting of a World War I pilot on the cover of a 1917 Collier’s magazine. This was also the coloring of pilots’ clothing I had seen that matched what I wanted to do for my RC airplane. I decided to paint the cap black and lighten the brown to the caramel color.
I am sheepishly admitting to painting the coat and cap twice. It saves time to plan. If you want to revisit your model, this gives you hope that one day it can be repainted to look even better.
Finally, consider each pilot figure a learning experience. A Williams Brothers scale, plastic pilot was a great experiment. It looked great several years ago, but as I continue to explore different techniques, I’ve enjoyed the improvements—even if I’m the only one at the field without a cartoon character in the cockpit!
SOURCES:
This Month's Issue

Join the AMA
![]()


1 comments
Painting pilot figures
Add new comment