
Written by Greg Gimlick
A durable and inexpensive racing machine
Product Review
Photos by the author
As seen in the May 2016 issue of Model Aviation.
Specifications
Model type: Electric RTF quadcopter Skill level: Intermediate to advanced Propeller size: 6040 clockwise and counterclockwise Size: 250 racing class Diagonal: 280mm Length: 8.5 inches Width: 10 inches Height: 3.19 inches without antenna or 4.45 inches with antenna Weight: 20.7 ounces with camera and battery Power system: Four 2,204 to 2,300 Kv high-output brushless motors; four Custom Compact BL-Heli 20-amp ESCs Flight battery: Hyperion G6 HV 60C to 80C 3S 1,800 mAh LiPo Flight controller: NAZE Spec 32-bit Flight Controller 7DOF (with BMP sensor) Video transmitter: 5.8 GHz autoscan 32-channel VTX w/race-band VTX selectable 20 milliwatt/200 milliwatt output and tuned 5.8 GHz; CloverLeaf Skew-Planar antenna Camera: 600TVl 1/3-inch CMOS high-quality FPV camera Flight duration: Five-plus minutes Street price: $299.99 Pluses • Fully assembled plug and play. • Programmable frequencies with LED indicators on VTX. • Remote controllable, stabilized camera gimbal. • 8° forward-tilt motor mounts. • Tough carbon-fiber construction. • Ready for optional GPS modules. • Low-voltage alarm. • Terrific flight characteristics. • Incredible crash survivability. Minuses • Requires PWM input to remotely control gimbal angle. • Fidgety on-screen display programming with no documentation.Product Review
I’ve gotten the bug for 250 FPV racing and my expectations were high when I ordered the Vengeance 280. I’ve had good experiences with Hyperion motors in the past, so the bar was already high when I opened the box. I was not disappointed when I saw the contents. It was obvious right from the start that it was as close to being ready to fly as possible. Everything was nestled securely in custom-cut foam packaging, so the box can double as a carrying case. The assembly was neat and tidy. No wires needed to be secured or tidied before going to the field. Everything was sandwiched between the top and bottom frames so the pieces would be protected from whatever abuse I might inflict upon the aircraft. My first impression was good!Assembly
There isn’t any assembly to be done other than to secure the camera platform and install your receiver. The camera/gimbal assembly is attached to a carbon-fiber platform that attaches to the top frame of the Vengeance with five rubber isolators. This is a standard method for mounting a camera and I recommend adding a couple of small zip ties for insurance. I run these through the center of the isolators and leave them loose enough to not interfere with the purpose of the rubber mounts. The purpose is simply to keep the platform from coming completely loose in the event of a crash. If you don’t take this precaution and it does come loose, the camera will pull the connector out by the wires and it could be damaged. As with anything, you should check the security of all of the screws, and there are many of them. Adding your receiver is the next step. The decision here is whether you’re going to use a satellite or full receiver. That might be determined by whether you want to remotely adjust the angle of the camera gimbal. That requires a PWM signal as opposed to the PPM signal from just using the satellite. I tried mine both ways and ended up using a full receiver so I could change the camera if I wanted. There are connections provided for Spektrum satellites, Futaba S.Bus, and a standard receiver block. A connector block is also provided. The manual lists all of the suggested settings for control throws, etc., for each major radio brand. If yours isn’t listed, it’s easy to interpret the data and apply it to your own situation.Image
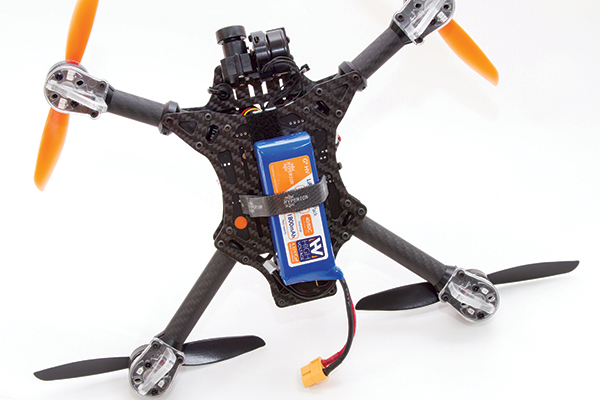
The author’s flight battery is secured to the bottom of the quadcopter with Velcro and “one wrap.”
Image
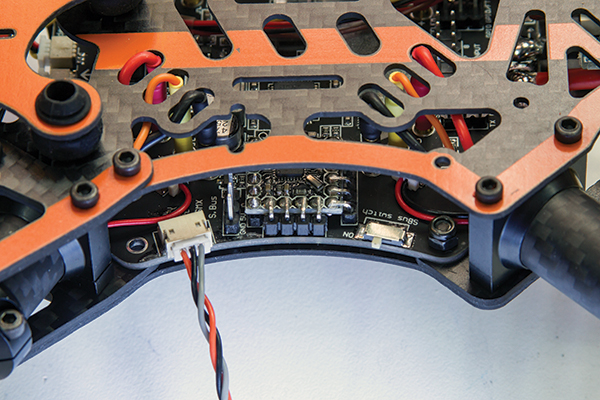
The connectors for the Spektrum satellite or Futaba S.Bus system are easily accessible and clearly labeled on the flight controller.
Layout
The flight controller is a nicely designed device that has everything clearly labeled and laid out in an orderly fashion. The instruction manual has an excellent picture of the board, labeling all the pertinent items (check for updates because the first manual had a couple of misprints). At first glance, it appears that it’s an “all-in-one” board, but that’s not the case. I see that as a plus for the Vengeance 280. It does incorporate the on-screen display board, but the video transmitter (VTX) board is a separate assembly mounted above and to the rear of the quadcopter. The ESCs are mounted inside of the carbon-fiber arms and connected to each corner of the flight controller with plugs. No soldering is necessary if you need to replace an ESC. All dip switches and connectors are clearly labeled and accessible through cutouts in the frames. In other words, you don’t have to remove 50 screws to make simple changes! Whoever designed this had apparently experienced the frustration of having to completely disassemble a quad to make a change. Nicely done! The VTX is a highlight of this machine. As it comes, it’s set to transmit a 25-milliwatt signal, but that can be changed to 200 milliwatts by cutting a jumper. The biggest feature for me was finding a set of dip switches to change the frequency and LEDs to indicate the settings. More often than not, these transmitters come with no obvious way to determine the exact frequency it’s transmitting. No guessing here!Image
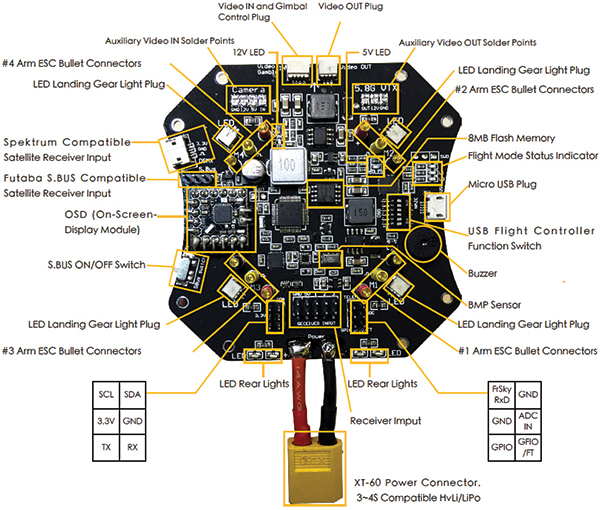
The Flight Controller is laid out and clearly labeled in the manual.
CleanFlight
The Vengeance 280 is based on a NAZE Spec 32-bit Flight Controller 7DOF (with BMP sensor) and is ready for tweaking with the CleanFlight GUI interface. Don’t change any of the default settings before you test-fly your machine. It has been set to fly as designed and I found that to be adequate. There are some suggestions in the manual if you want to increase the speed or sensitivity after your initial flights. The only things you’ll need to initially adjust are the settings for your particular receiver. If you decide to use a satellite instead of the full receiver, you’ll need to bind it using the command line and not bind it with an external receiver, then connect it to the Vengeance. Aside from that, everything is straightforward. Ensure that your channel mapping is correct and see that everything moves the appropriate lines in the receiver tab of the GUI. Remember to use the “save” function at the bottom of each page before moving to another tab. If you don’t, your changes won’t be saved. Do all of your programming with the propellers removed from the Vengeance 280. Remember to return the dip switches to the Flight Mode setting before going to the field.Image
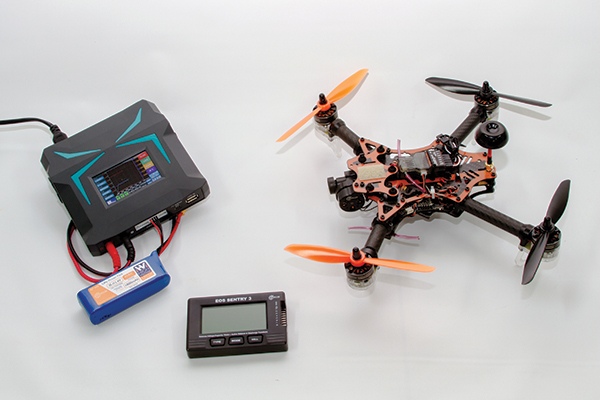
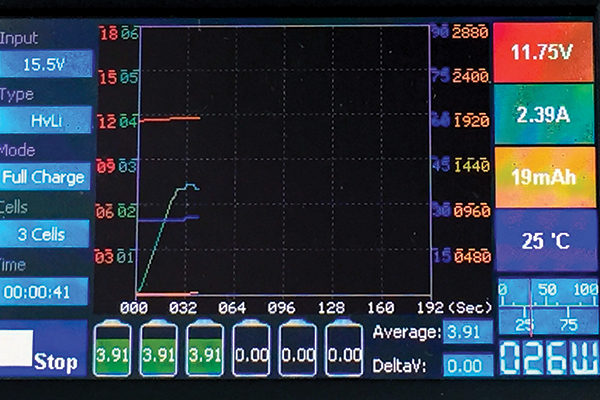
The Vengeance 280 is ready to go while the iMaxRC 150 charges the HV LiPo battery pack.
Image


Comments
Add new comment