
When most pilots think of building a model aircraft, balsa comes to mind. Foam is becoming a very popular building material of choice. Like balsa, foam is very affordable and easy to use. On November 12, 2015 as we talked with Keith Sparks about how to build with foam. Listen to the podcast below.
Recorded Podcast
Building With Foam
By Keith “Sparky” Sparks [email protected] Photos by the author As seen in the October 2015 issue of Model Aviation There are three types of foam construction: slab construction, sectional construction, and panel construction. In this edition of my three-part series on foambuilding techniques, I’ll address shaping sheet foam, which I refer to in my book, Building with Foam, as panel construction because there are several types of foam sheets. Sheet foam is basically extruded styrene foam and is commonly called Depron or fan-fold foam. Depron is manufactured for the craft industry in several thicknesses and densities. A quick online search will find several dealers. Note that because of volumetric shipping charges, ordering more than you need could actually save you money. An alternate source for this type of foam is poster board found at most department stores. These boards must be soaked in water to remove the paper coating, and are typically low quality. The name fan-fold foam has been given to 1/4-inch thick blue foam sold at home improvement stores. It is used as home insulation beneath the siding or brick. The foam is sold in 50-foot lengths folded over to form a block, hence the name fan-fold. Extruded foam sheets behave much like balsa when it comes to shaping. The sheets actually have a grain depending on the direction in which they were extruded. The grain can usually be seen if the surface is viewed at a high angle. Your best bet is to cut a corner off the sheet and bend it over a small piece of tubing in two directions. The proper grain direction will yield a smooth surface on the inside. Mark the grain direction on the sheet to refer to while you cut parts for your models. The tools you need to shape foam might already be in your shop. Tubing of various radii, such as PVC pipe, metal conduit, and even fi rm paper tubes, will work in a pinch. After you start forming sheet foam, you will learn what works best for you. The reason for the different tube sizes is because forming a tight radius has to be worked toward—more so with the thicker sheets. For instance, a sheet of fan-fold foam will need to be coaxed with a 4-inch, then 3-inch, tube before trying for a 2-inch radius. Sheet foam has a memory and it wants to return to its original flat shape. For this reason you have to allow for the foam to spring back some for a better fit on the model. Forming a curve in a small panel can be done by rolling it over a piece of tubing with downward pressure from your palm. Allowing your fingers to apply the pressure will produce an inconsistent curve, not to mention dents from your rings (if worn). Another method is to place the panel on a firm sheet of foam rubber and roll the tubing over it like a rolling pin. Start with light pressure at first and increase until you have the desired curve. When dealing with large or long panels, we have to approach it differently. Grasping the edge of a long panel is difficult to do with only eight fingers available. Using a length of angled aluminum to hold the panel against the tubing not only extends our grasp, but evenly applies pressure to the edge. This also gives a straight edge and a radius that is closer to the edge-saving material. Naturally, the size of the radius allowed is dictated by material thickness (such as with balsa). This does not mean you cannot laminate thinner sheets. If you need a larger sheet formed, such as for an entire fuselage, start with a large forming tube as described, then carefully roll it as you would paper. After it has been rolled tightly by hand, gently apply rubber bands or plastic wrap to hold it. Grasping the corners from the inside of the tube allows you to slightly tighten the roll. Allow the tube to sit for a day or two to “cold form.” When the rubber bands are removed, the tube will spring back slightly. Compound curves are difficult to form in sheet foam. Some claim success using boiling water and a firm ball, but the potential danger is not worth the effort. The gas that allows the manufacturer to form this material while it is hot has escaped by the time we receive it. Even if we bought a fresh roll of this material from the mill to form parts using heat to shape it, we would have to use it within weeks. With its low heat tolerance, conditions similar to those in a lab would be necessary as well. Your best bet is to borrow from the textile industry and cut pleats in the foam and draw them together much the way hot air balloons are assembled. This is what I did to construct my F-86 Cartoon Scale model.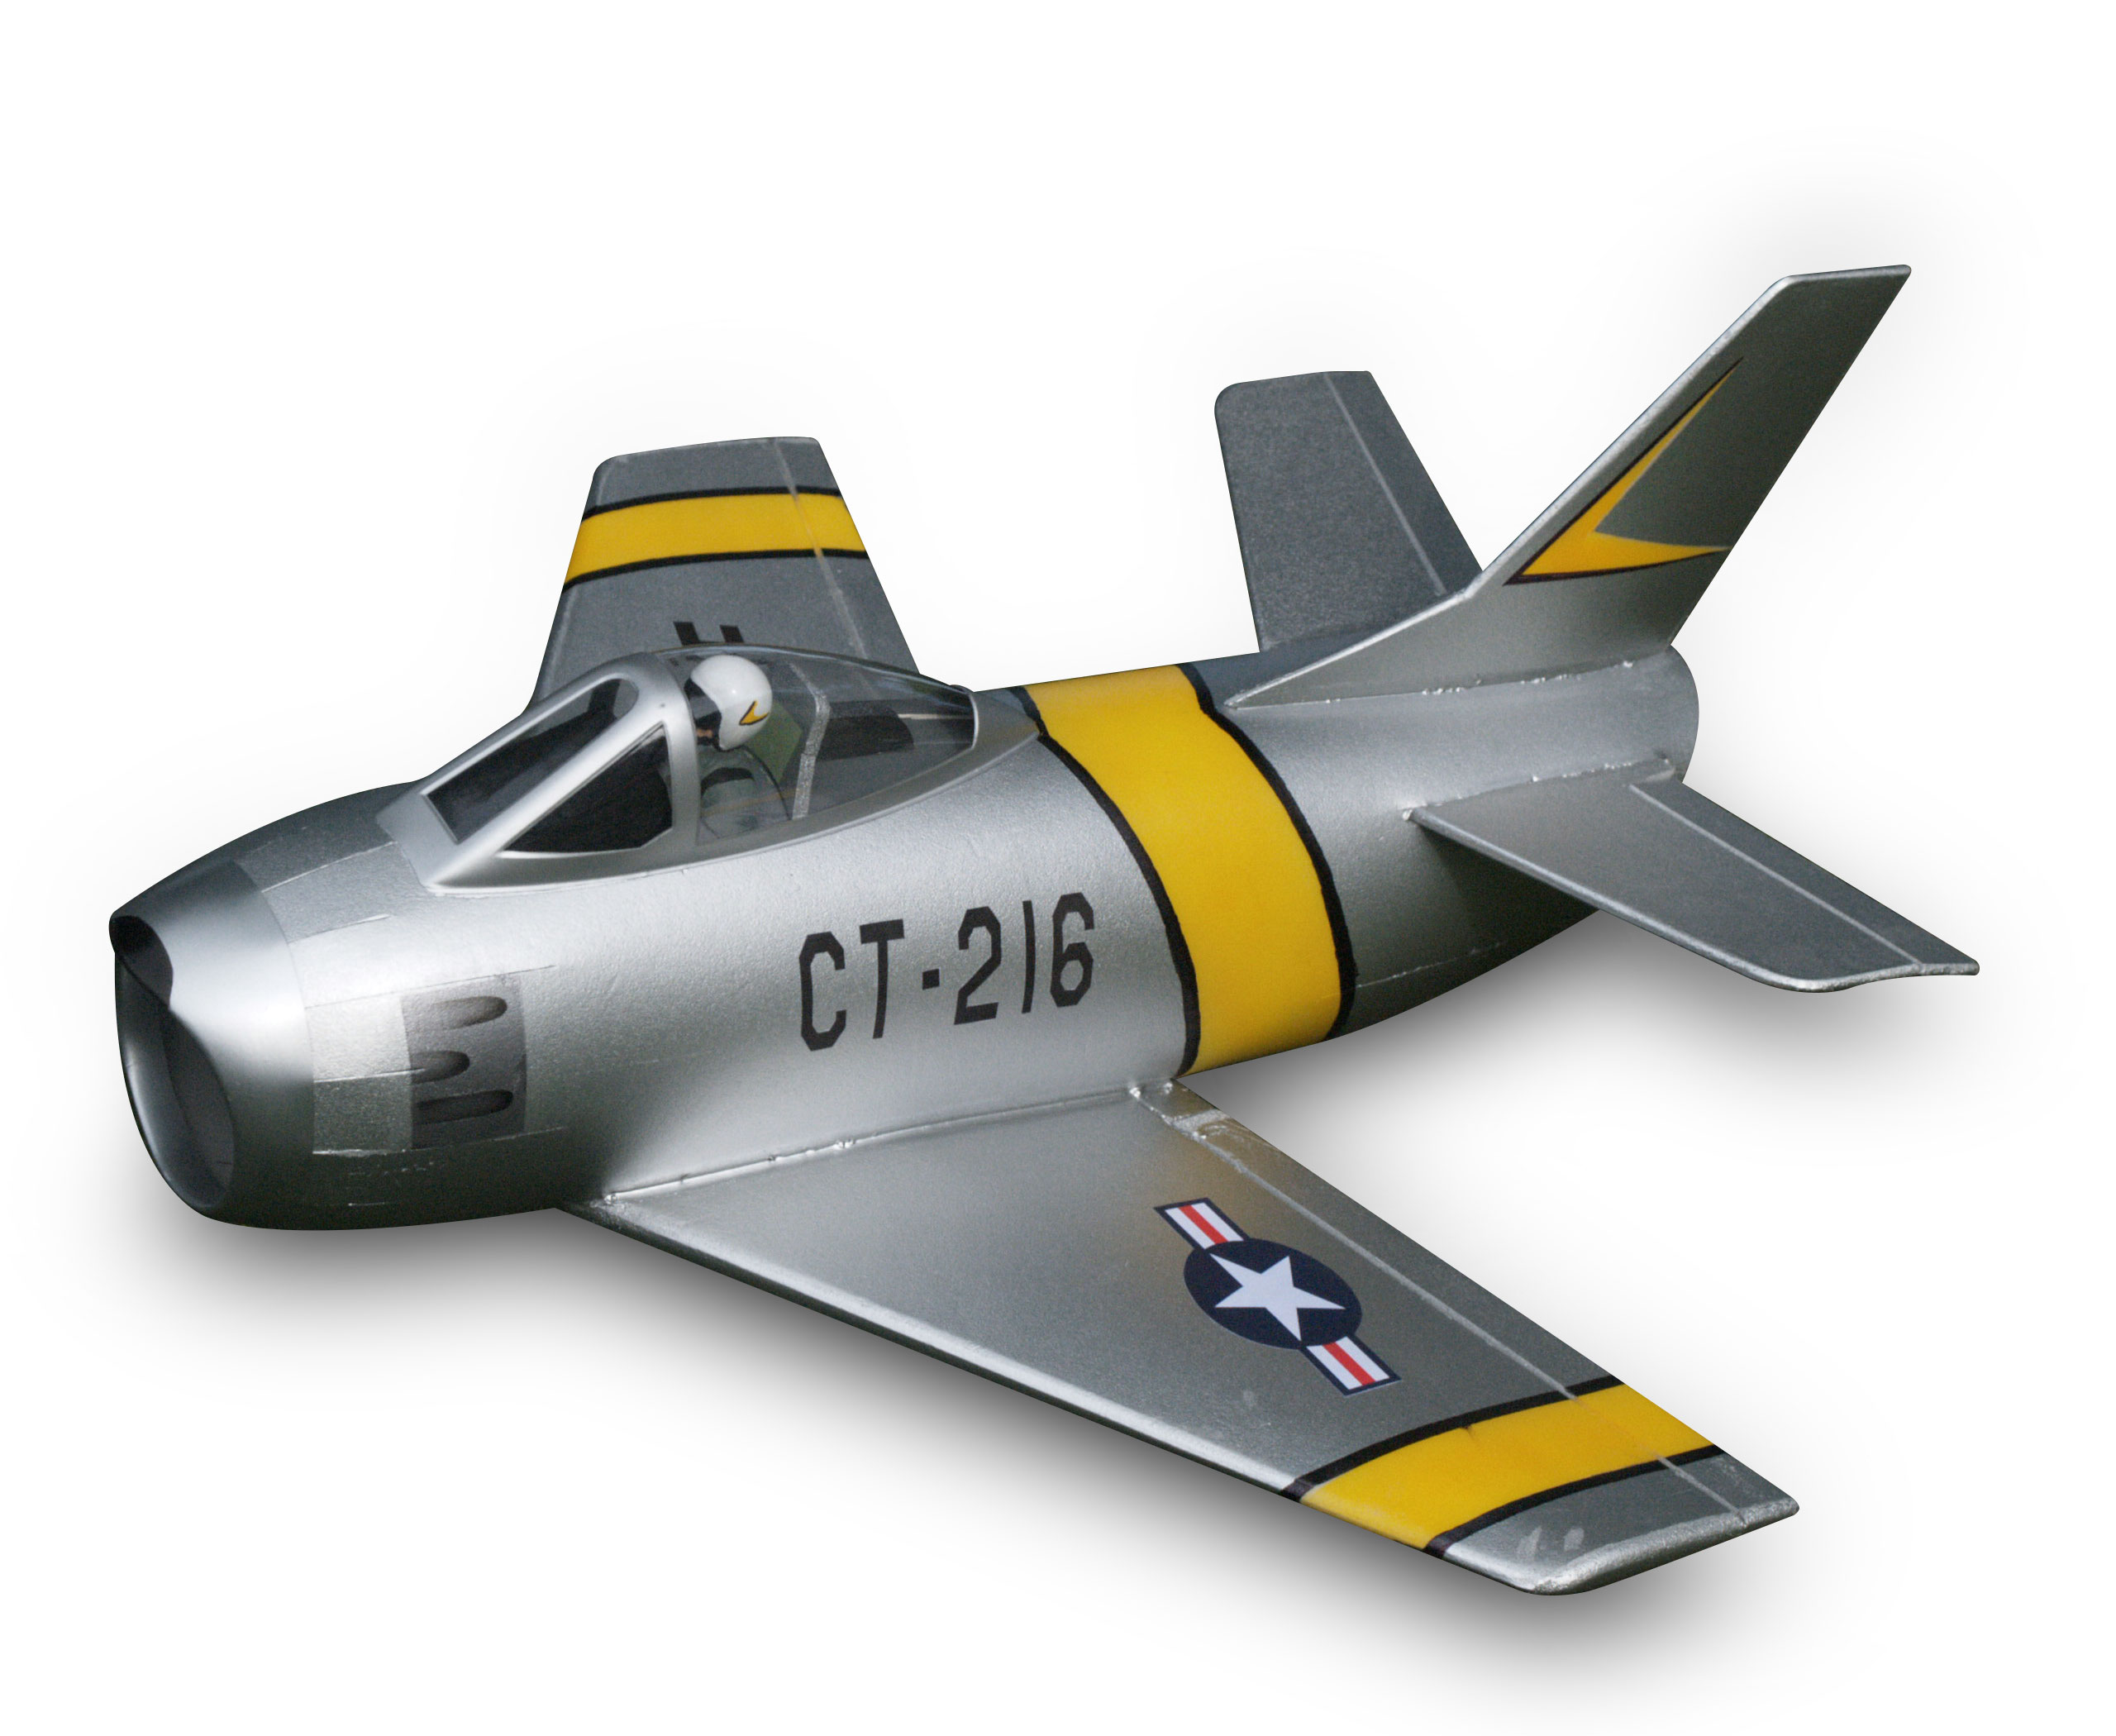
This little F-86 was made using 3mm Depron foam. The nose and tail ends were tapered using pleats to make the tube’s diameter smaller and result in a slight compound curve. Remember to buy a number of foam sheets. One project will lead to the next, and having plenty to work with will only sharpen your skills. Take your time, don’t be afraid to experiment, and enjoy the hobby. —Keith Sparks
[email protected]
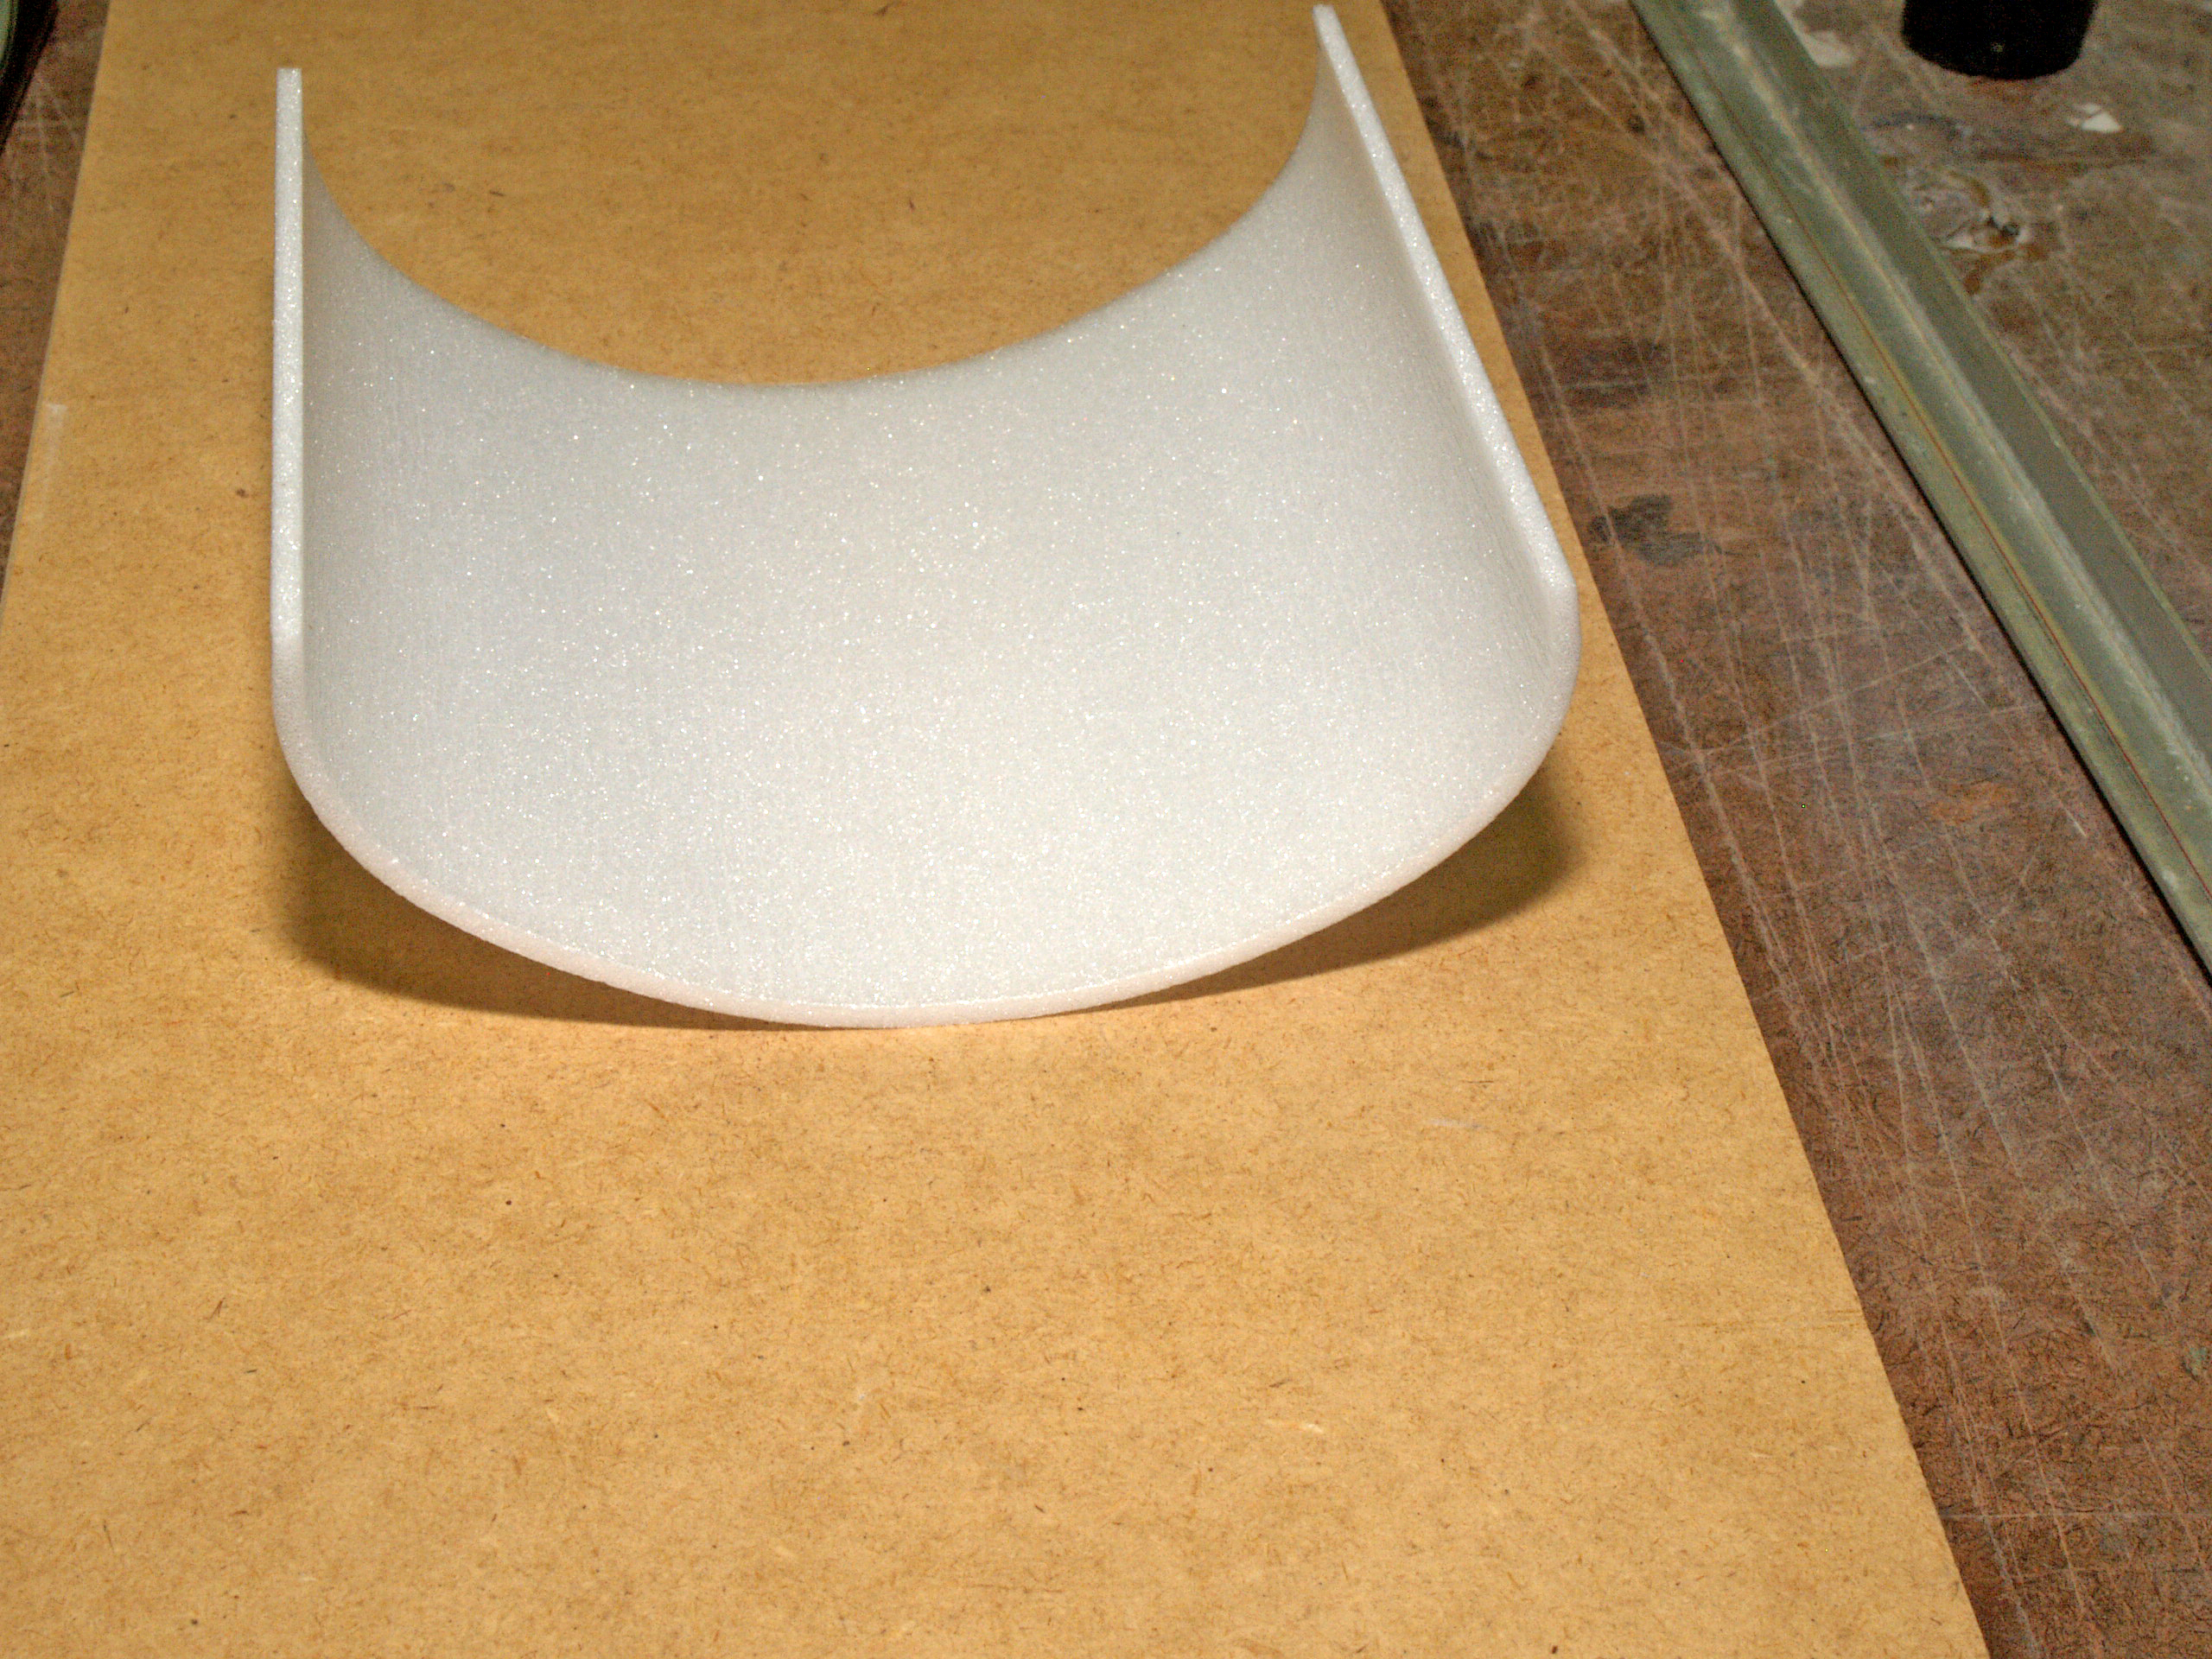
Determining grain direction
A small sample is needed to find the grain direction of sheet foam. Note the wrinkles or surface imperfections when formed in the wrong direction. Recording the proper direction on the sheet will save material later.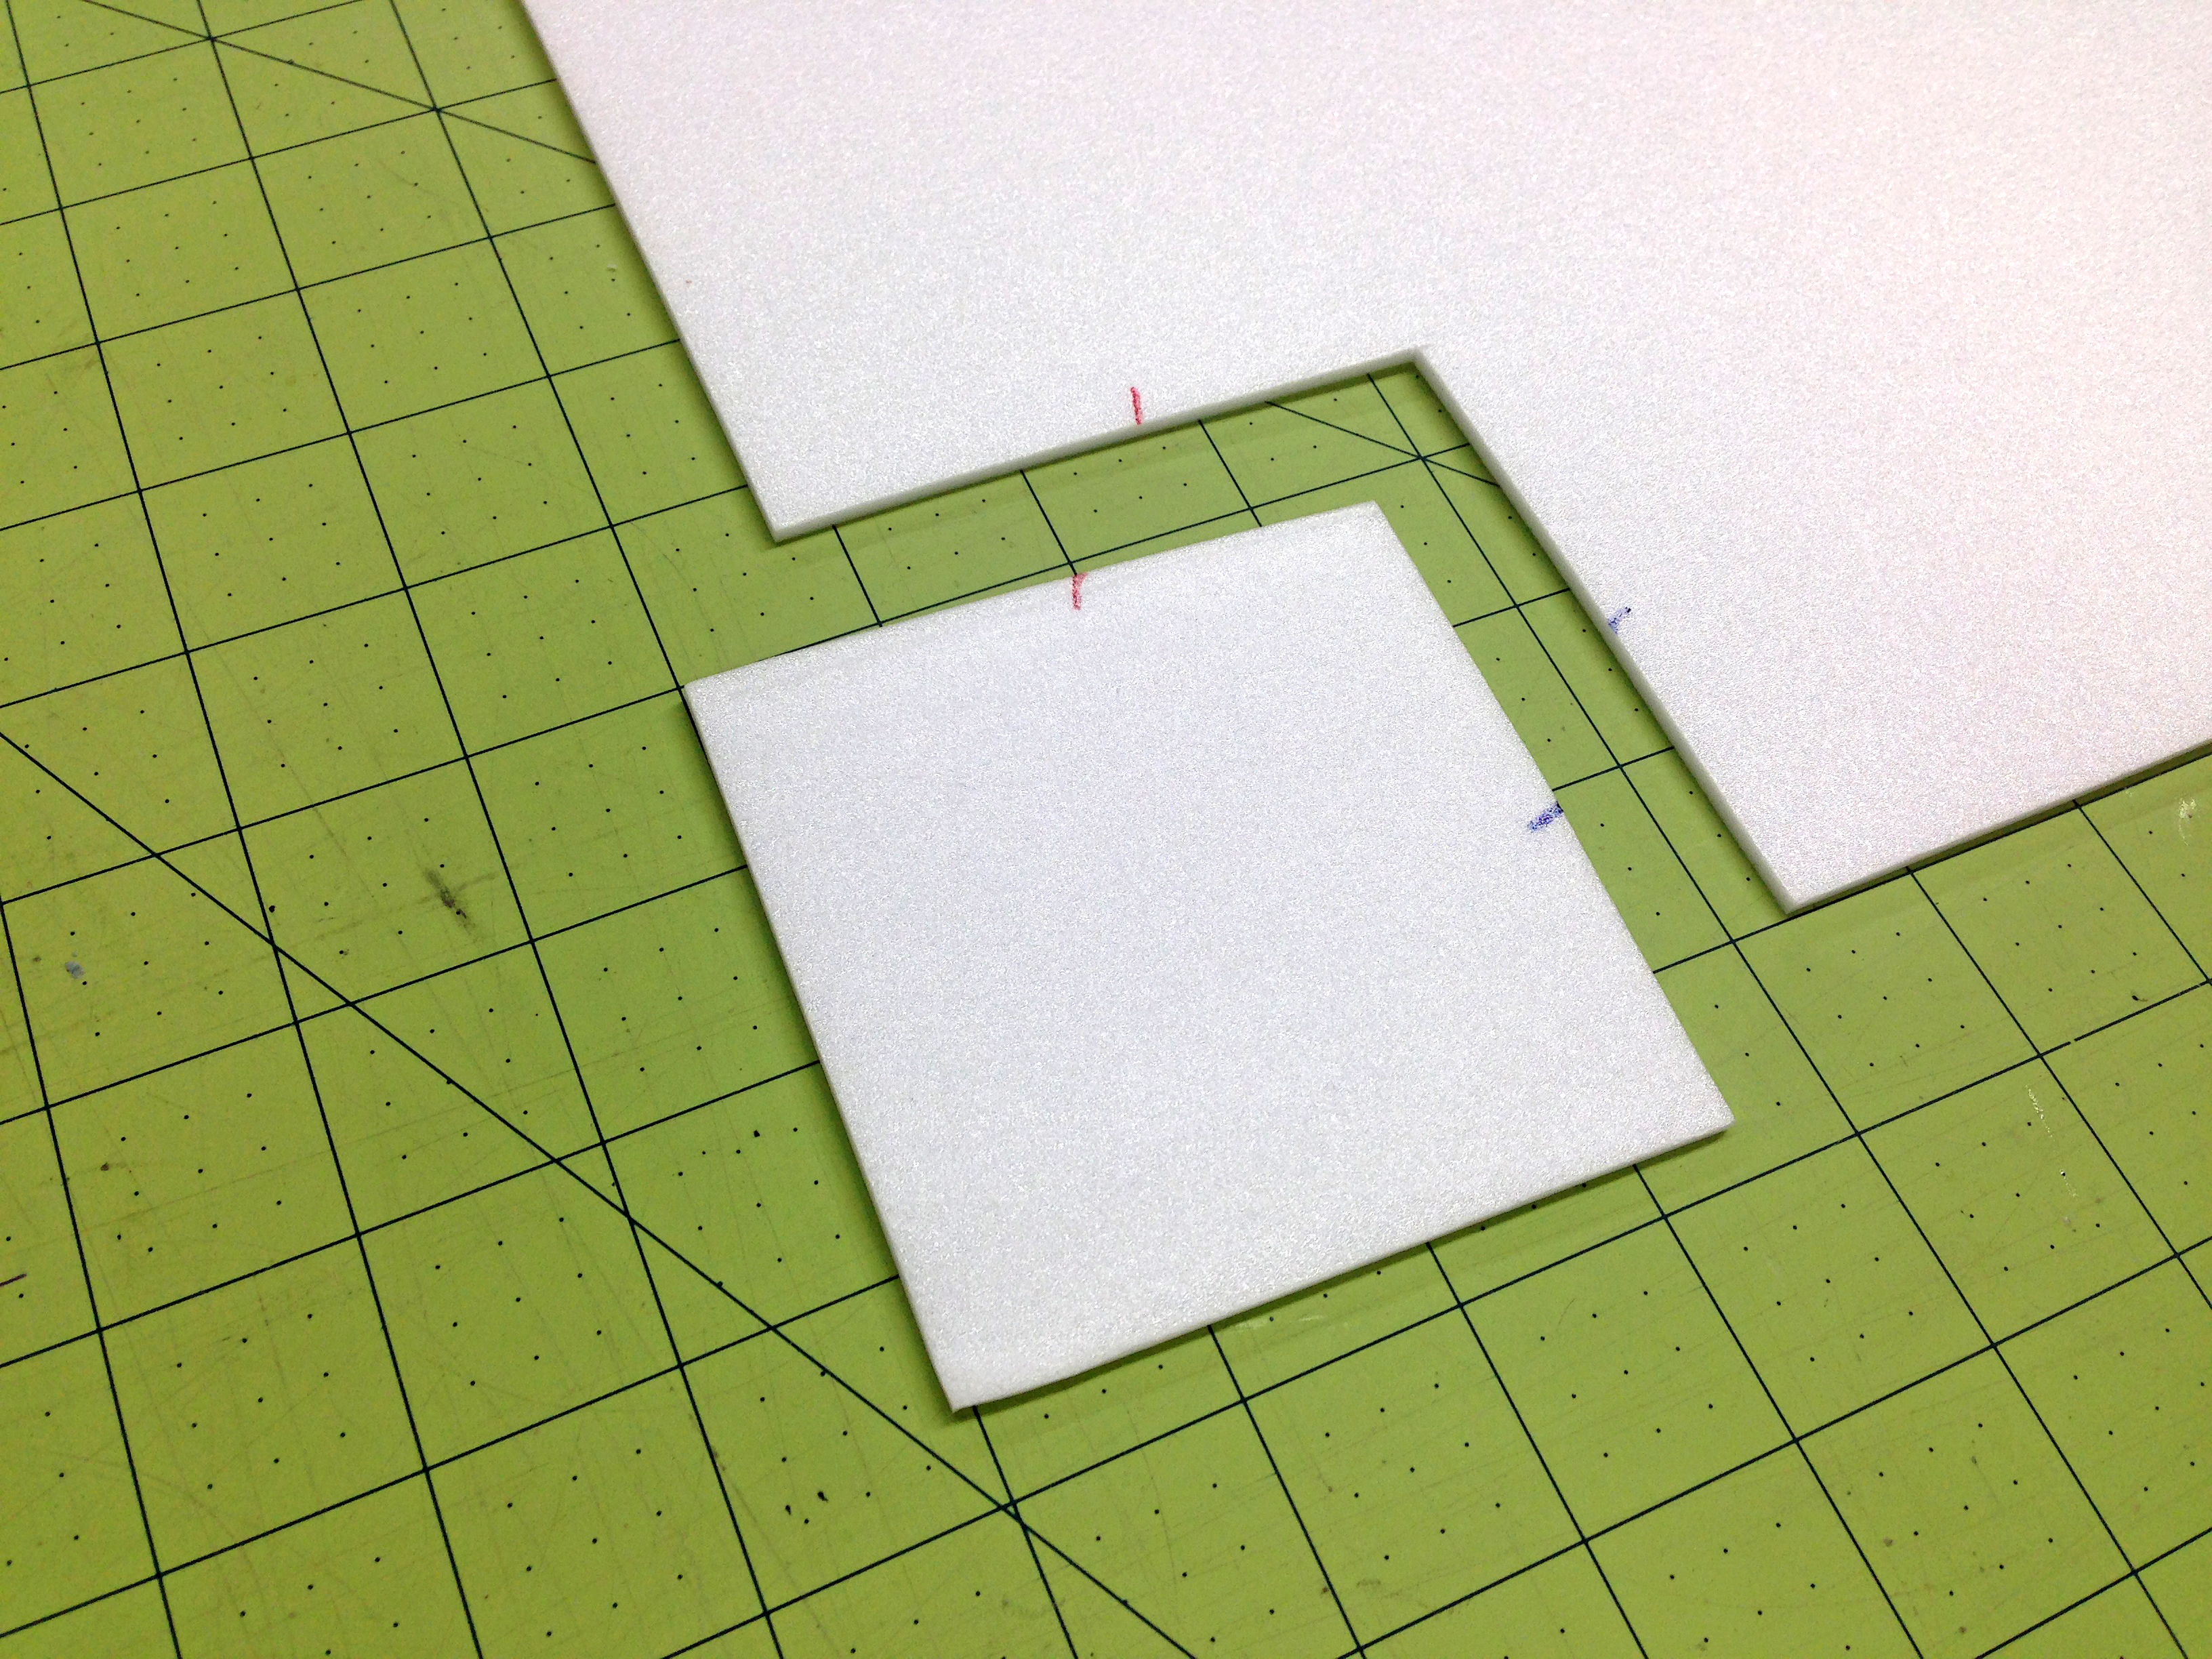
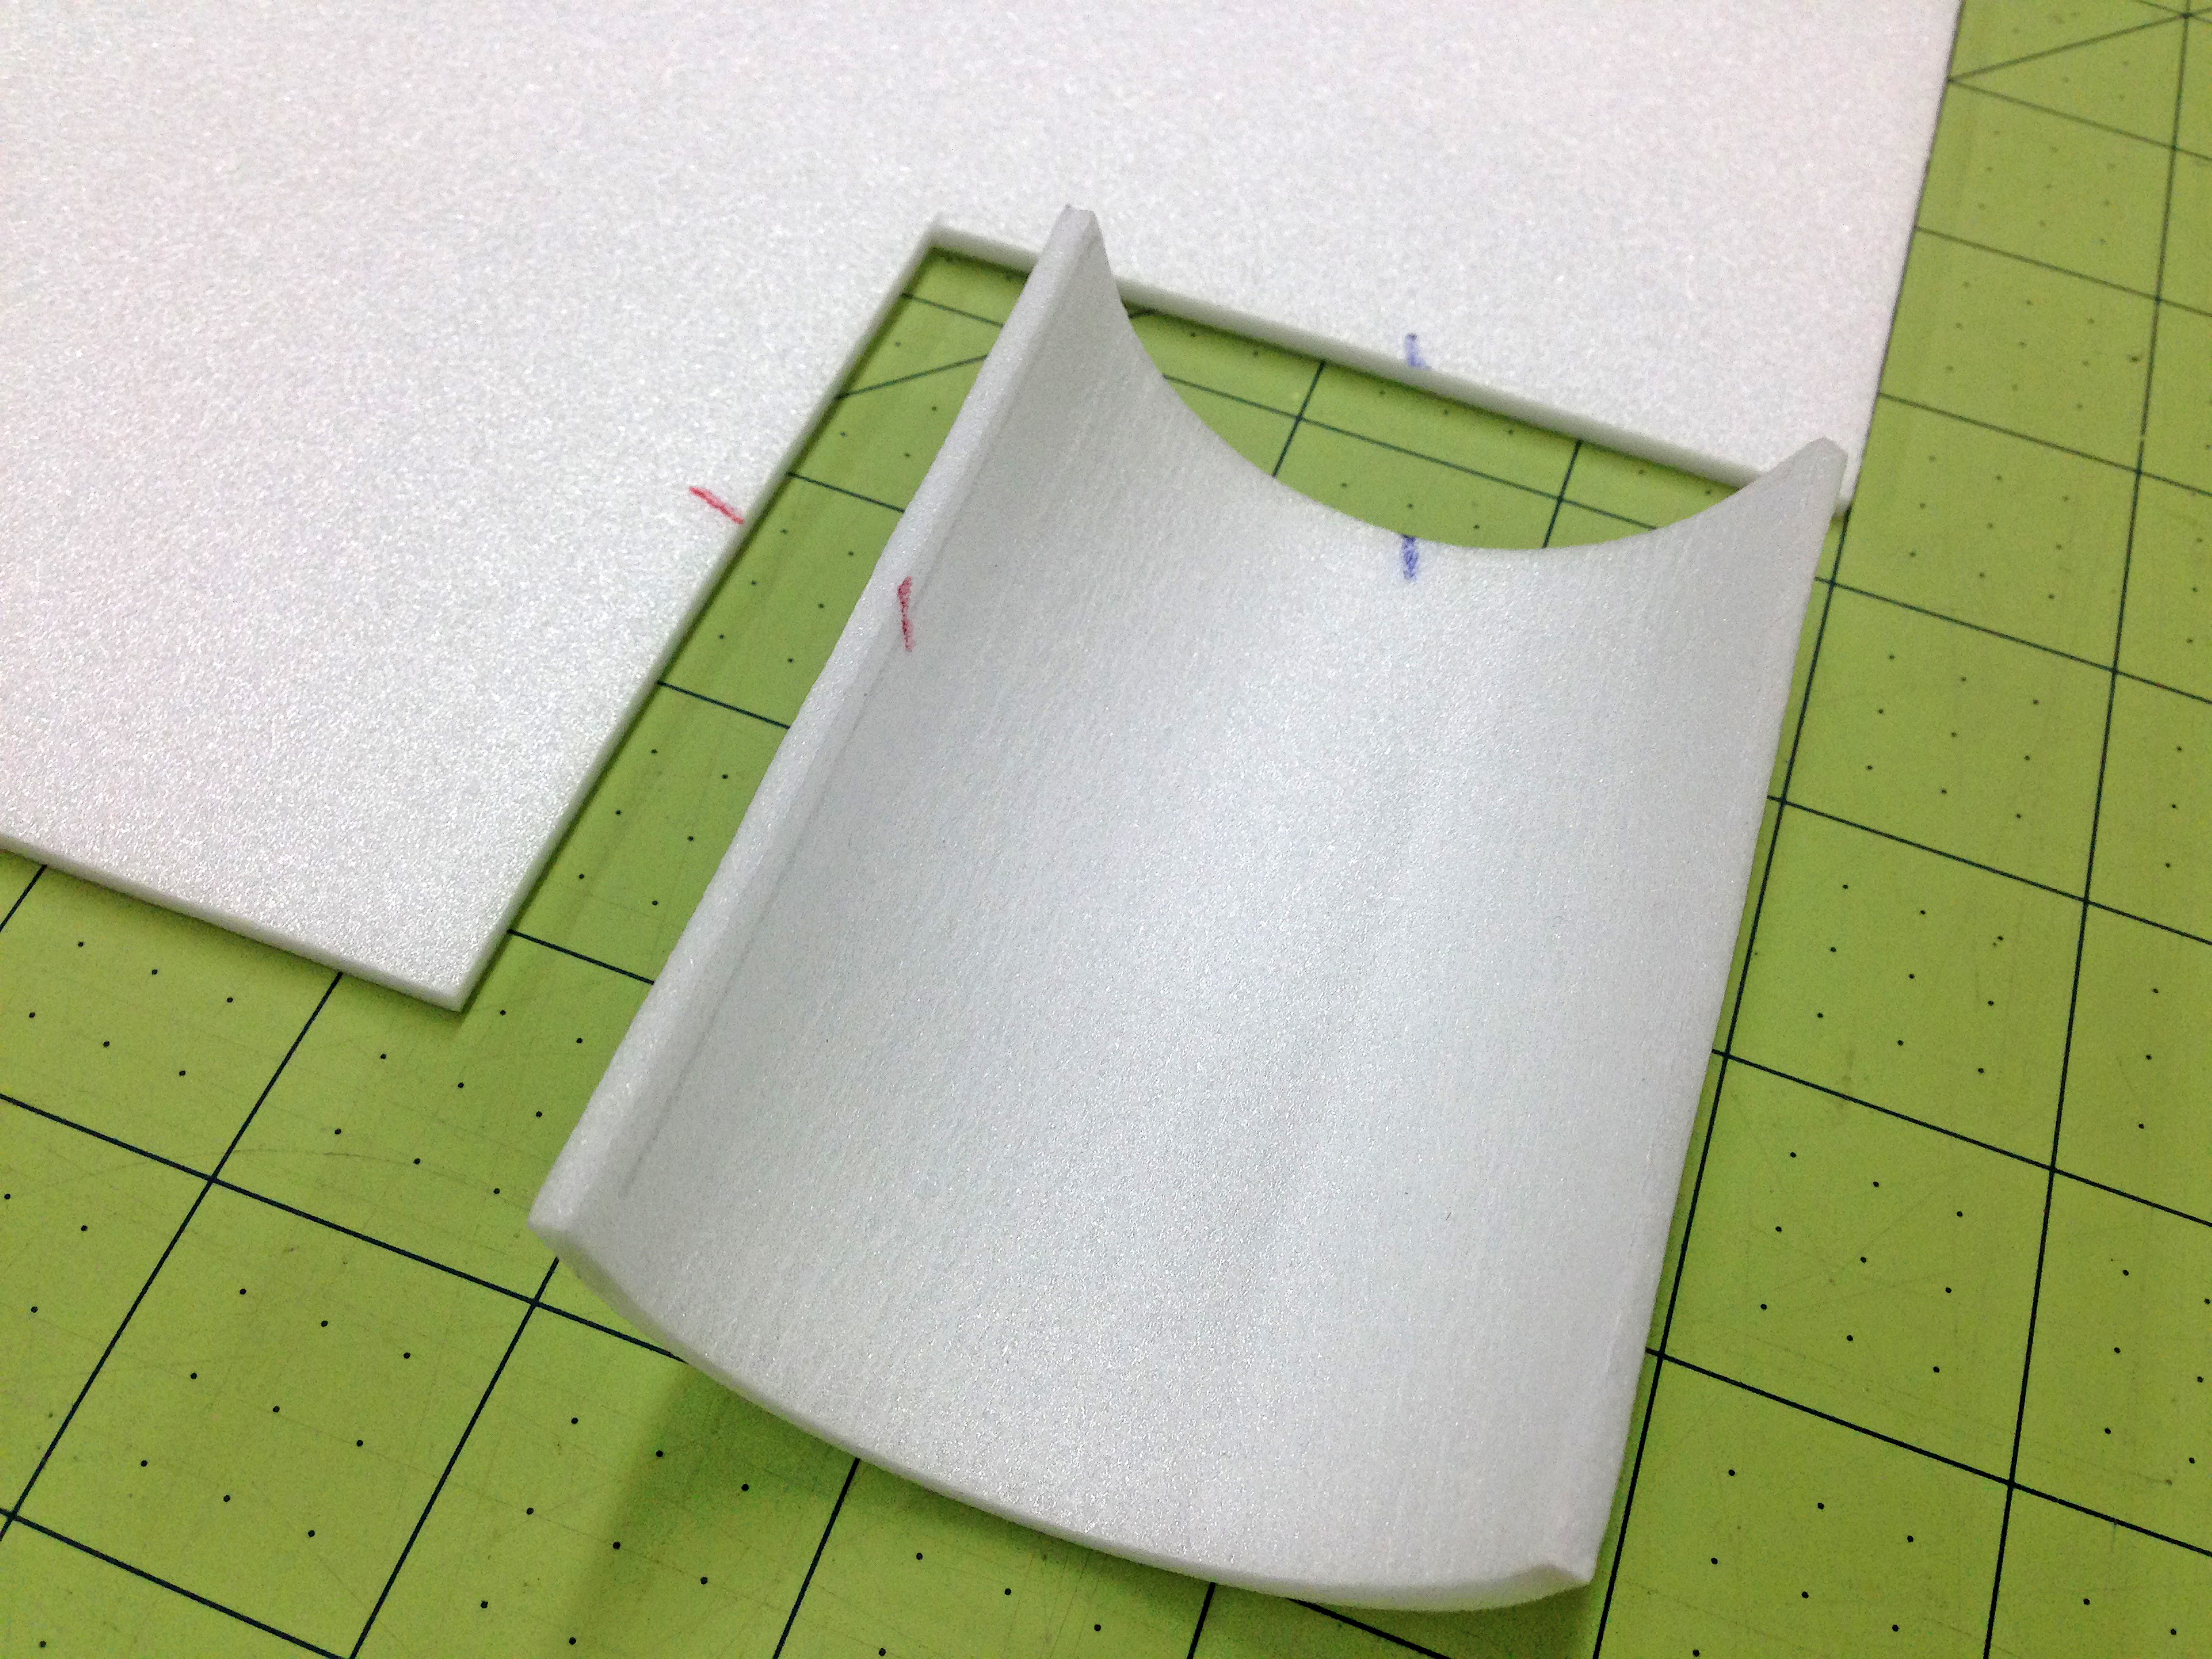
Grasping the edge
To grasp the edge of the foam sheet, a tube and strip of angled stock is used to apply even pressure to the edge. Until you get a feel for how this works, placing the foam all the way into the angled stock is suggested.
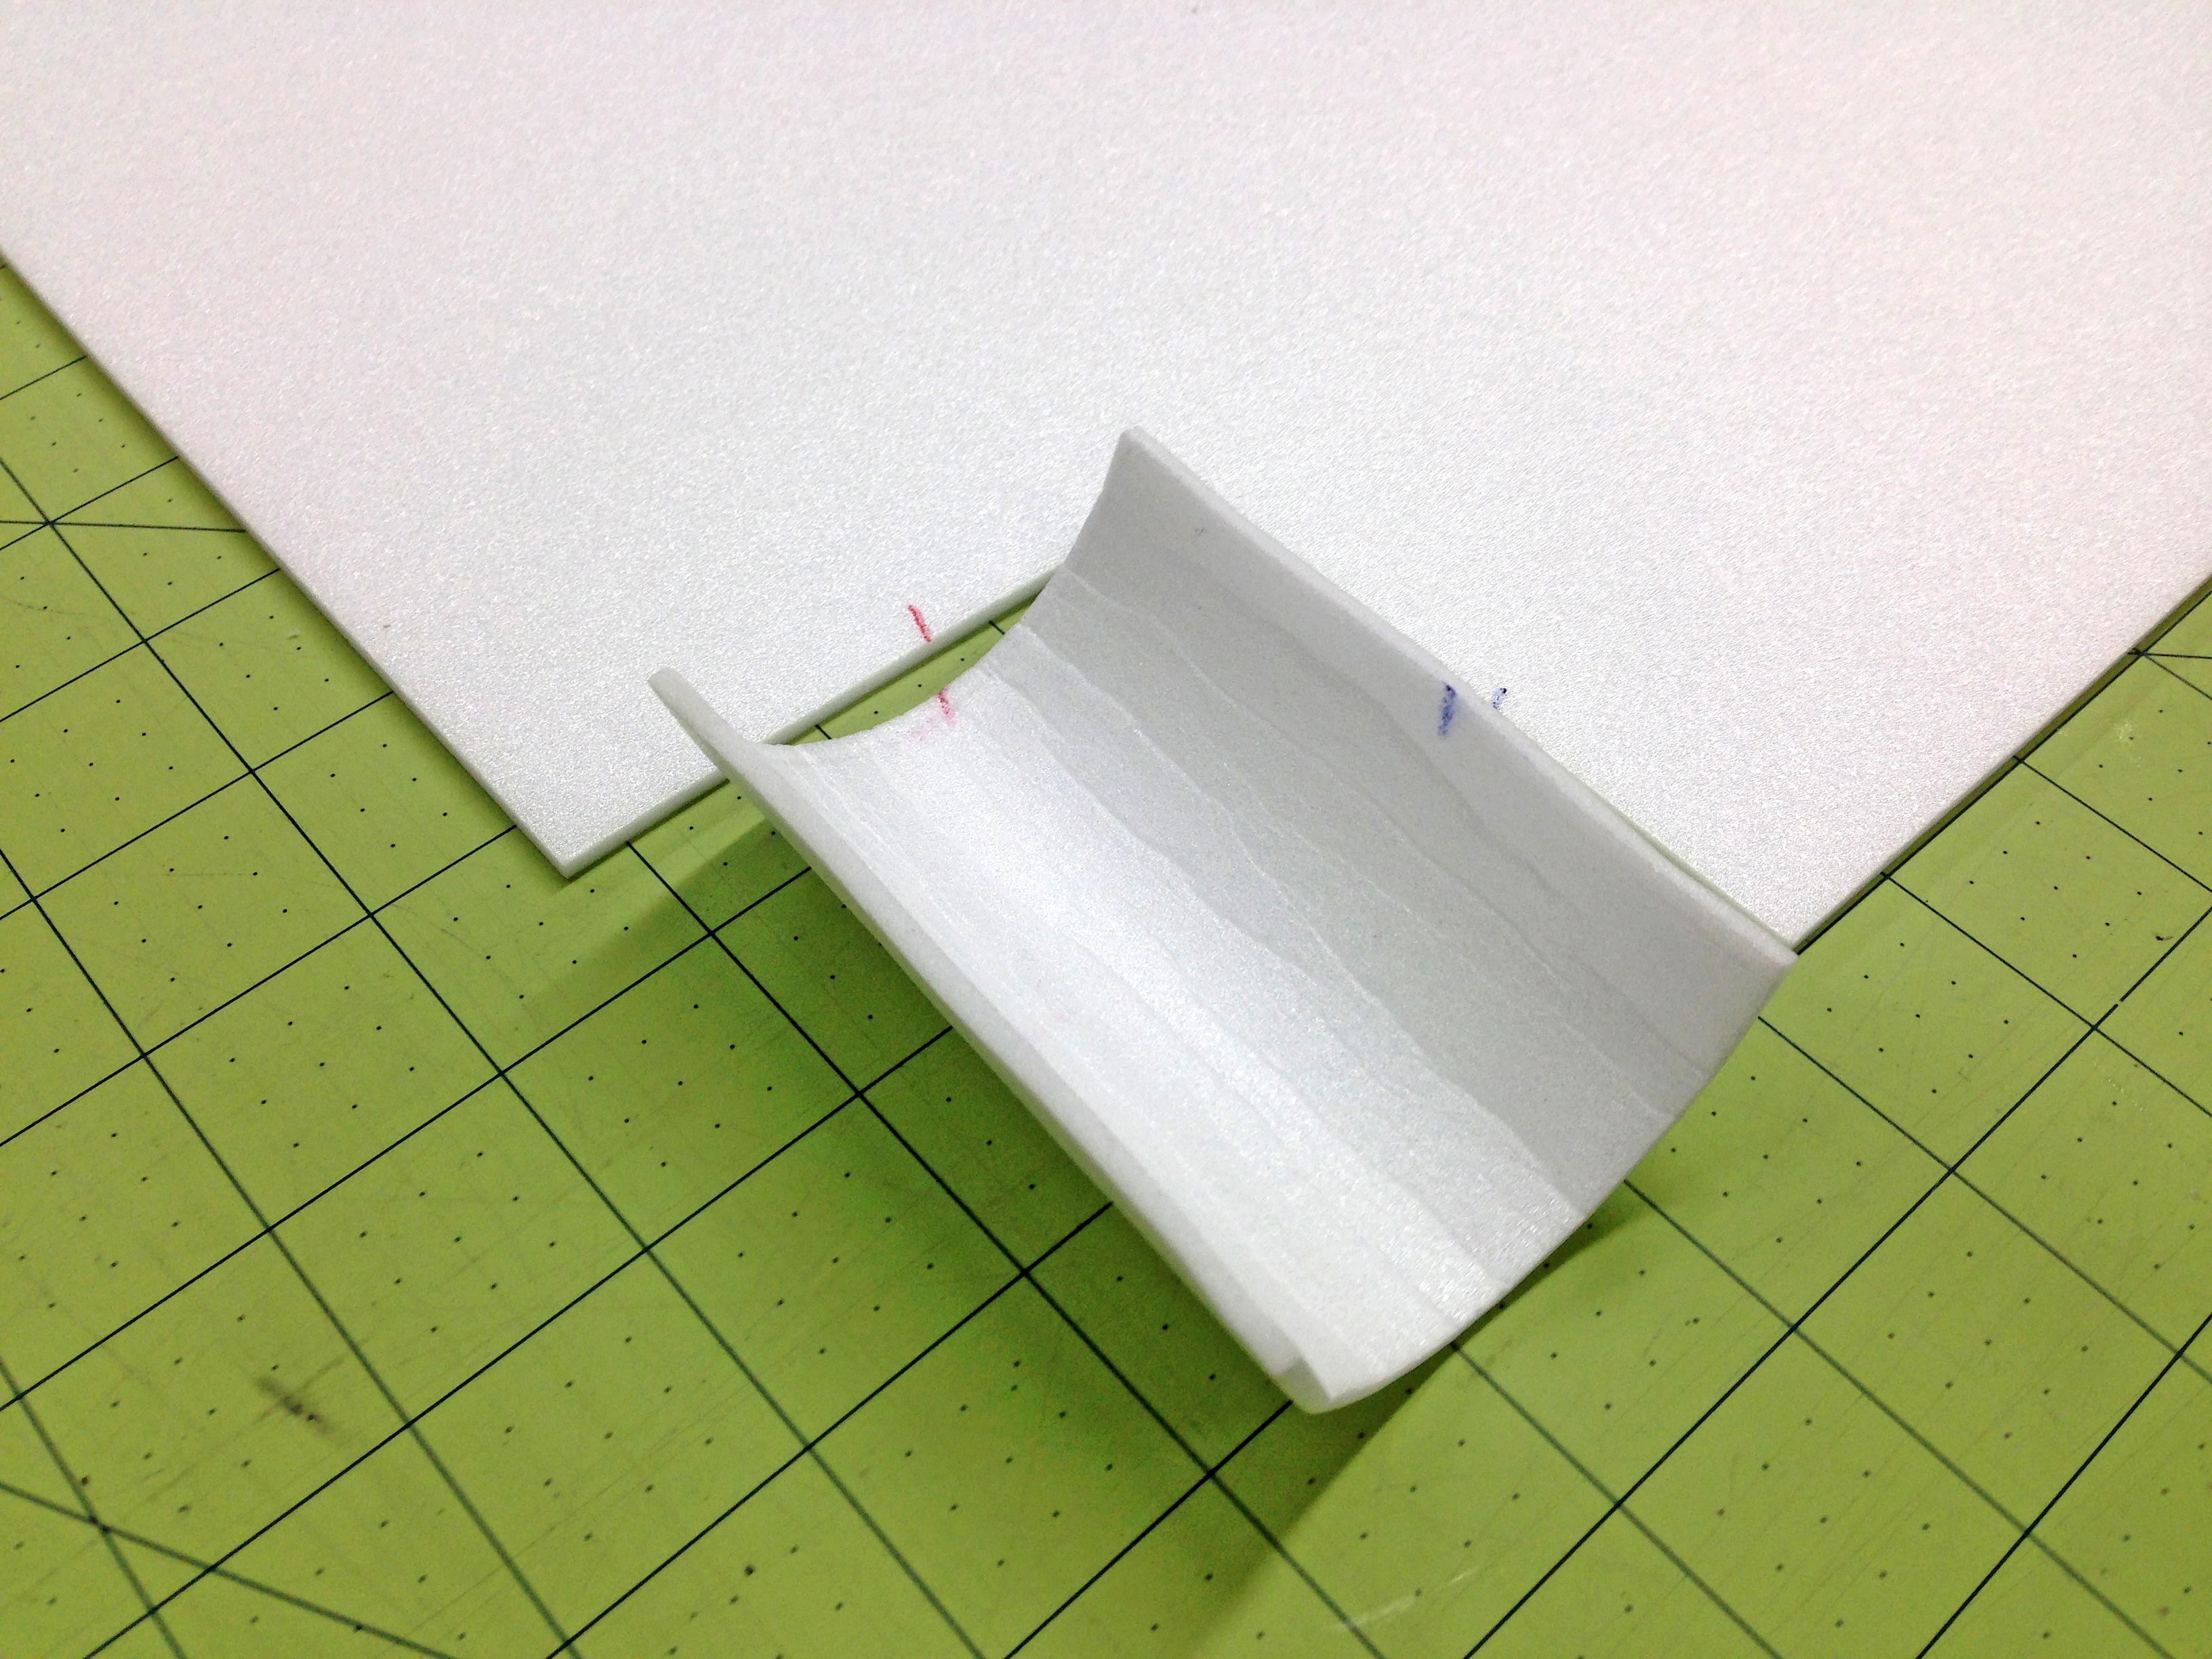
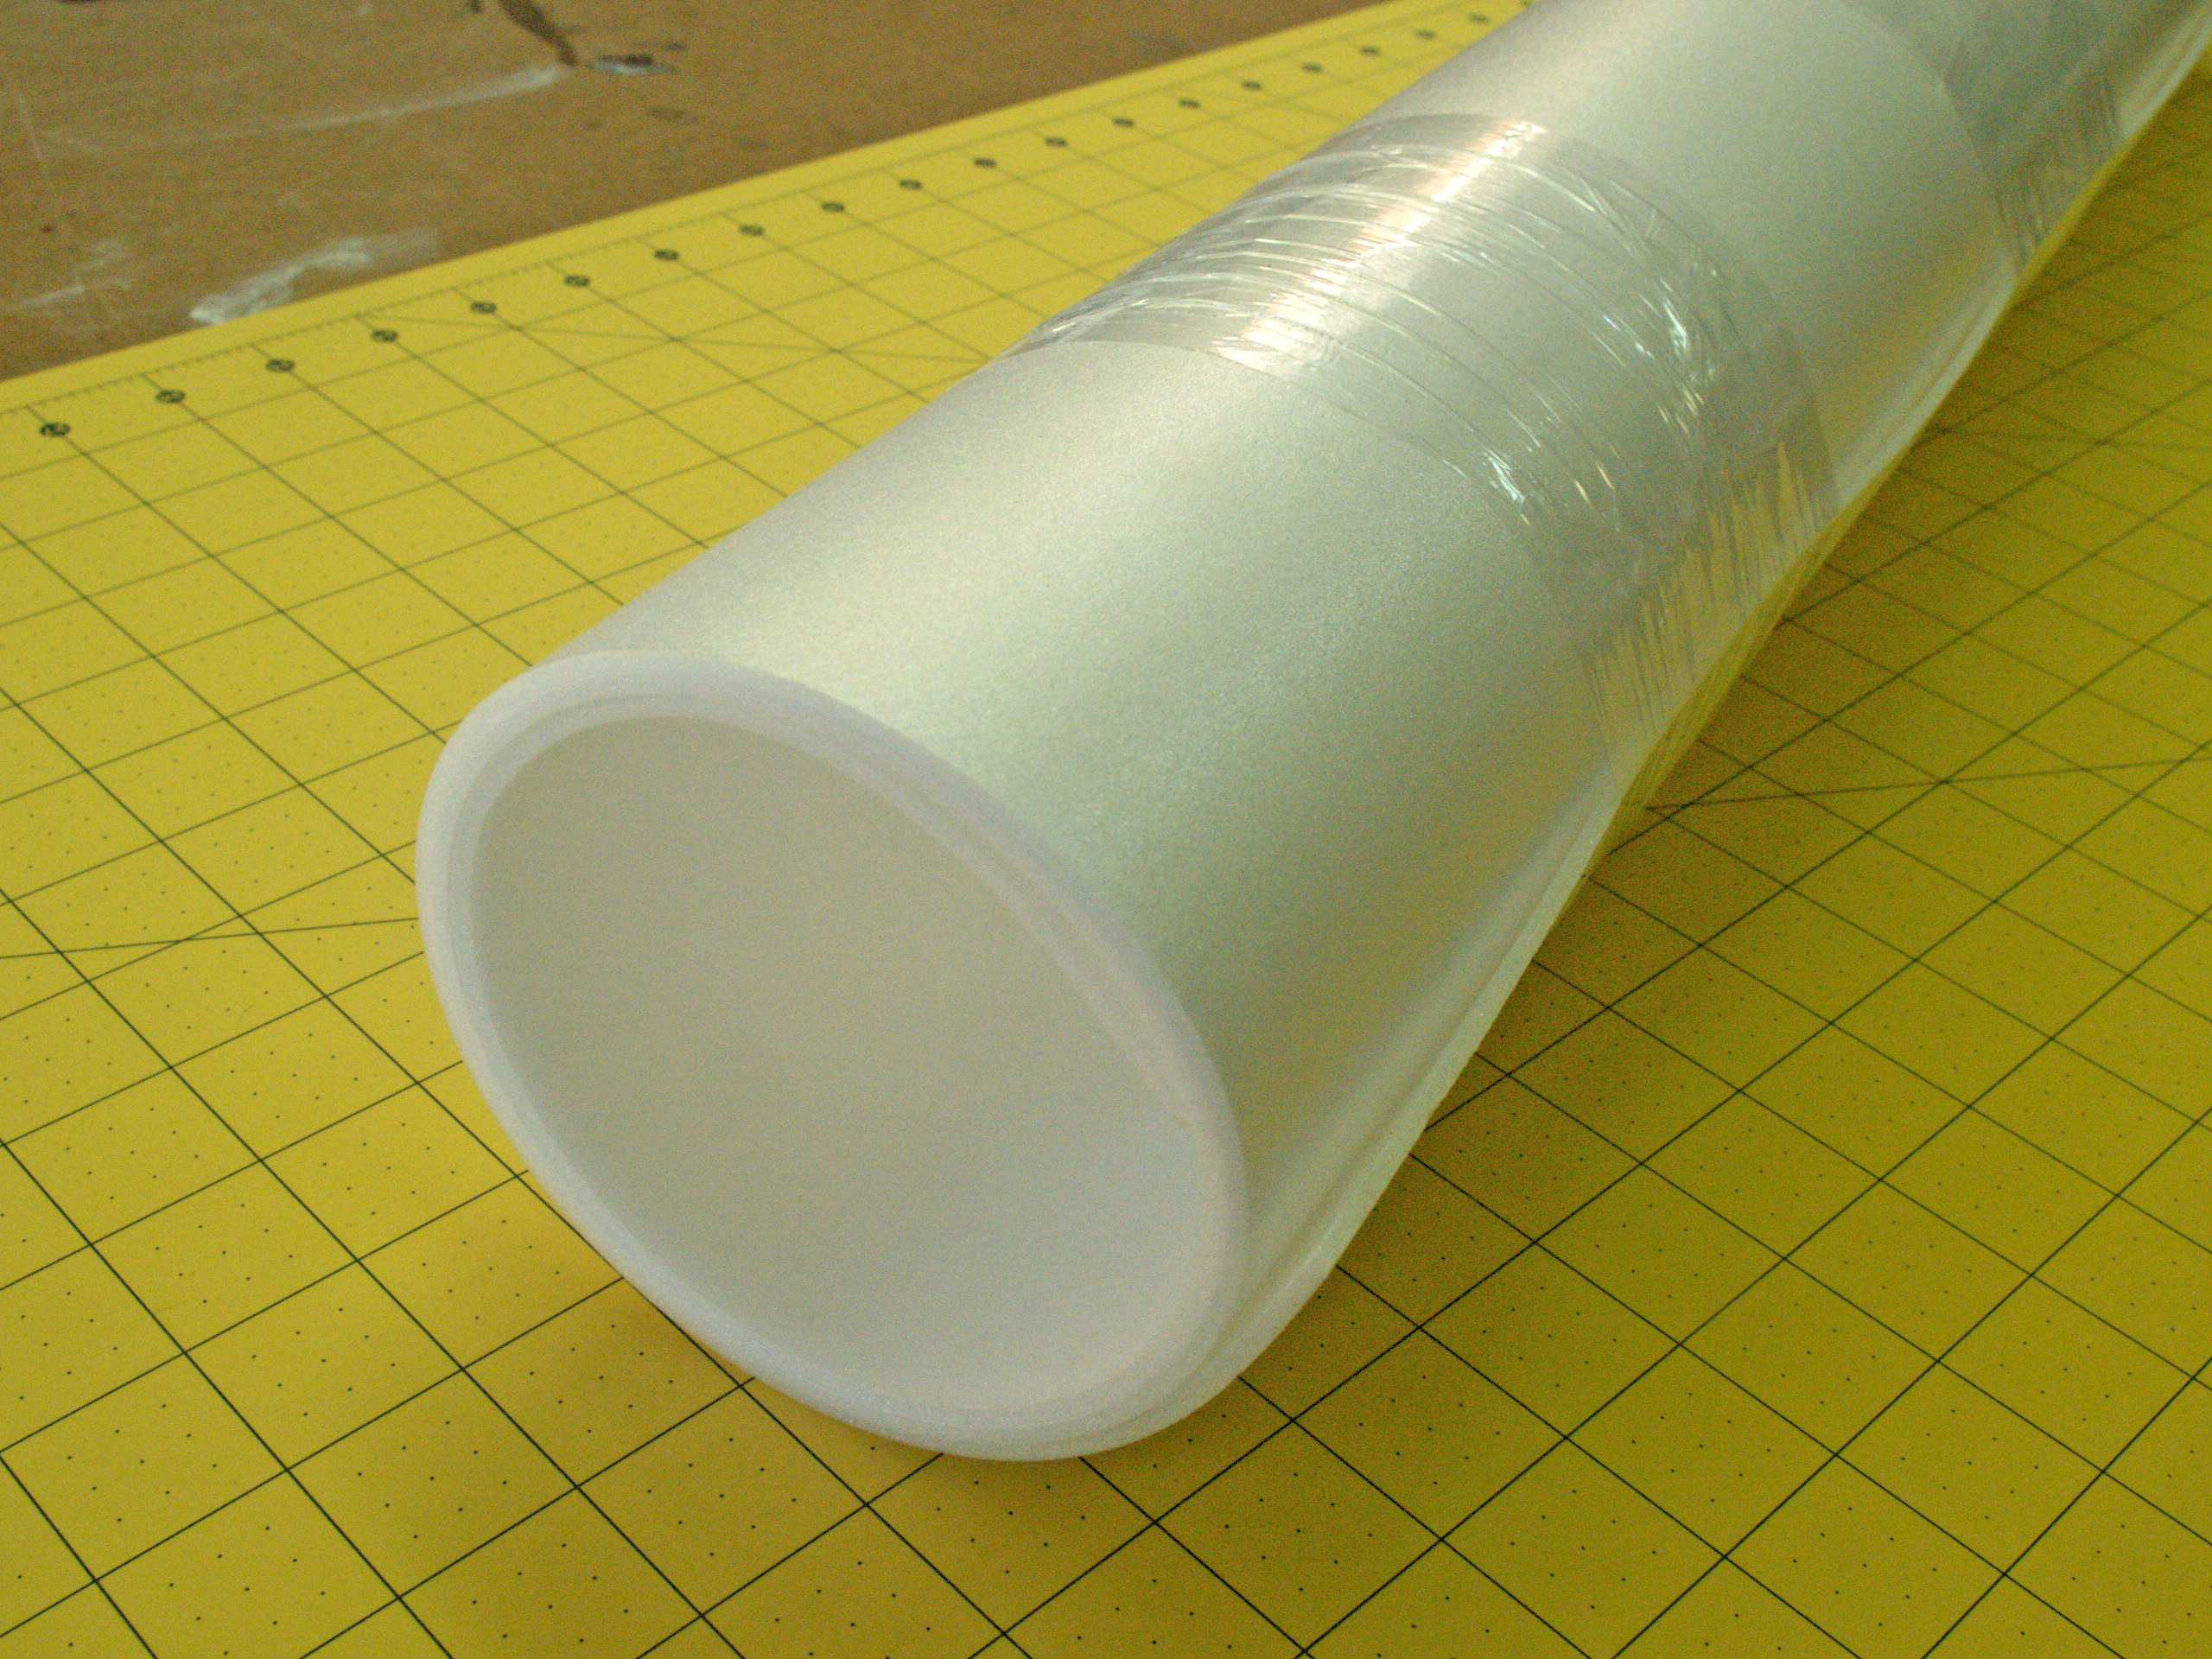
Cold forming
Rolling sheet foam into a tight tube and letting it sit for a day or two will cold form the material, Compound curves and make fuselage construction easier.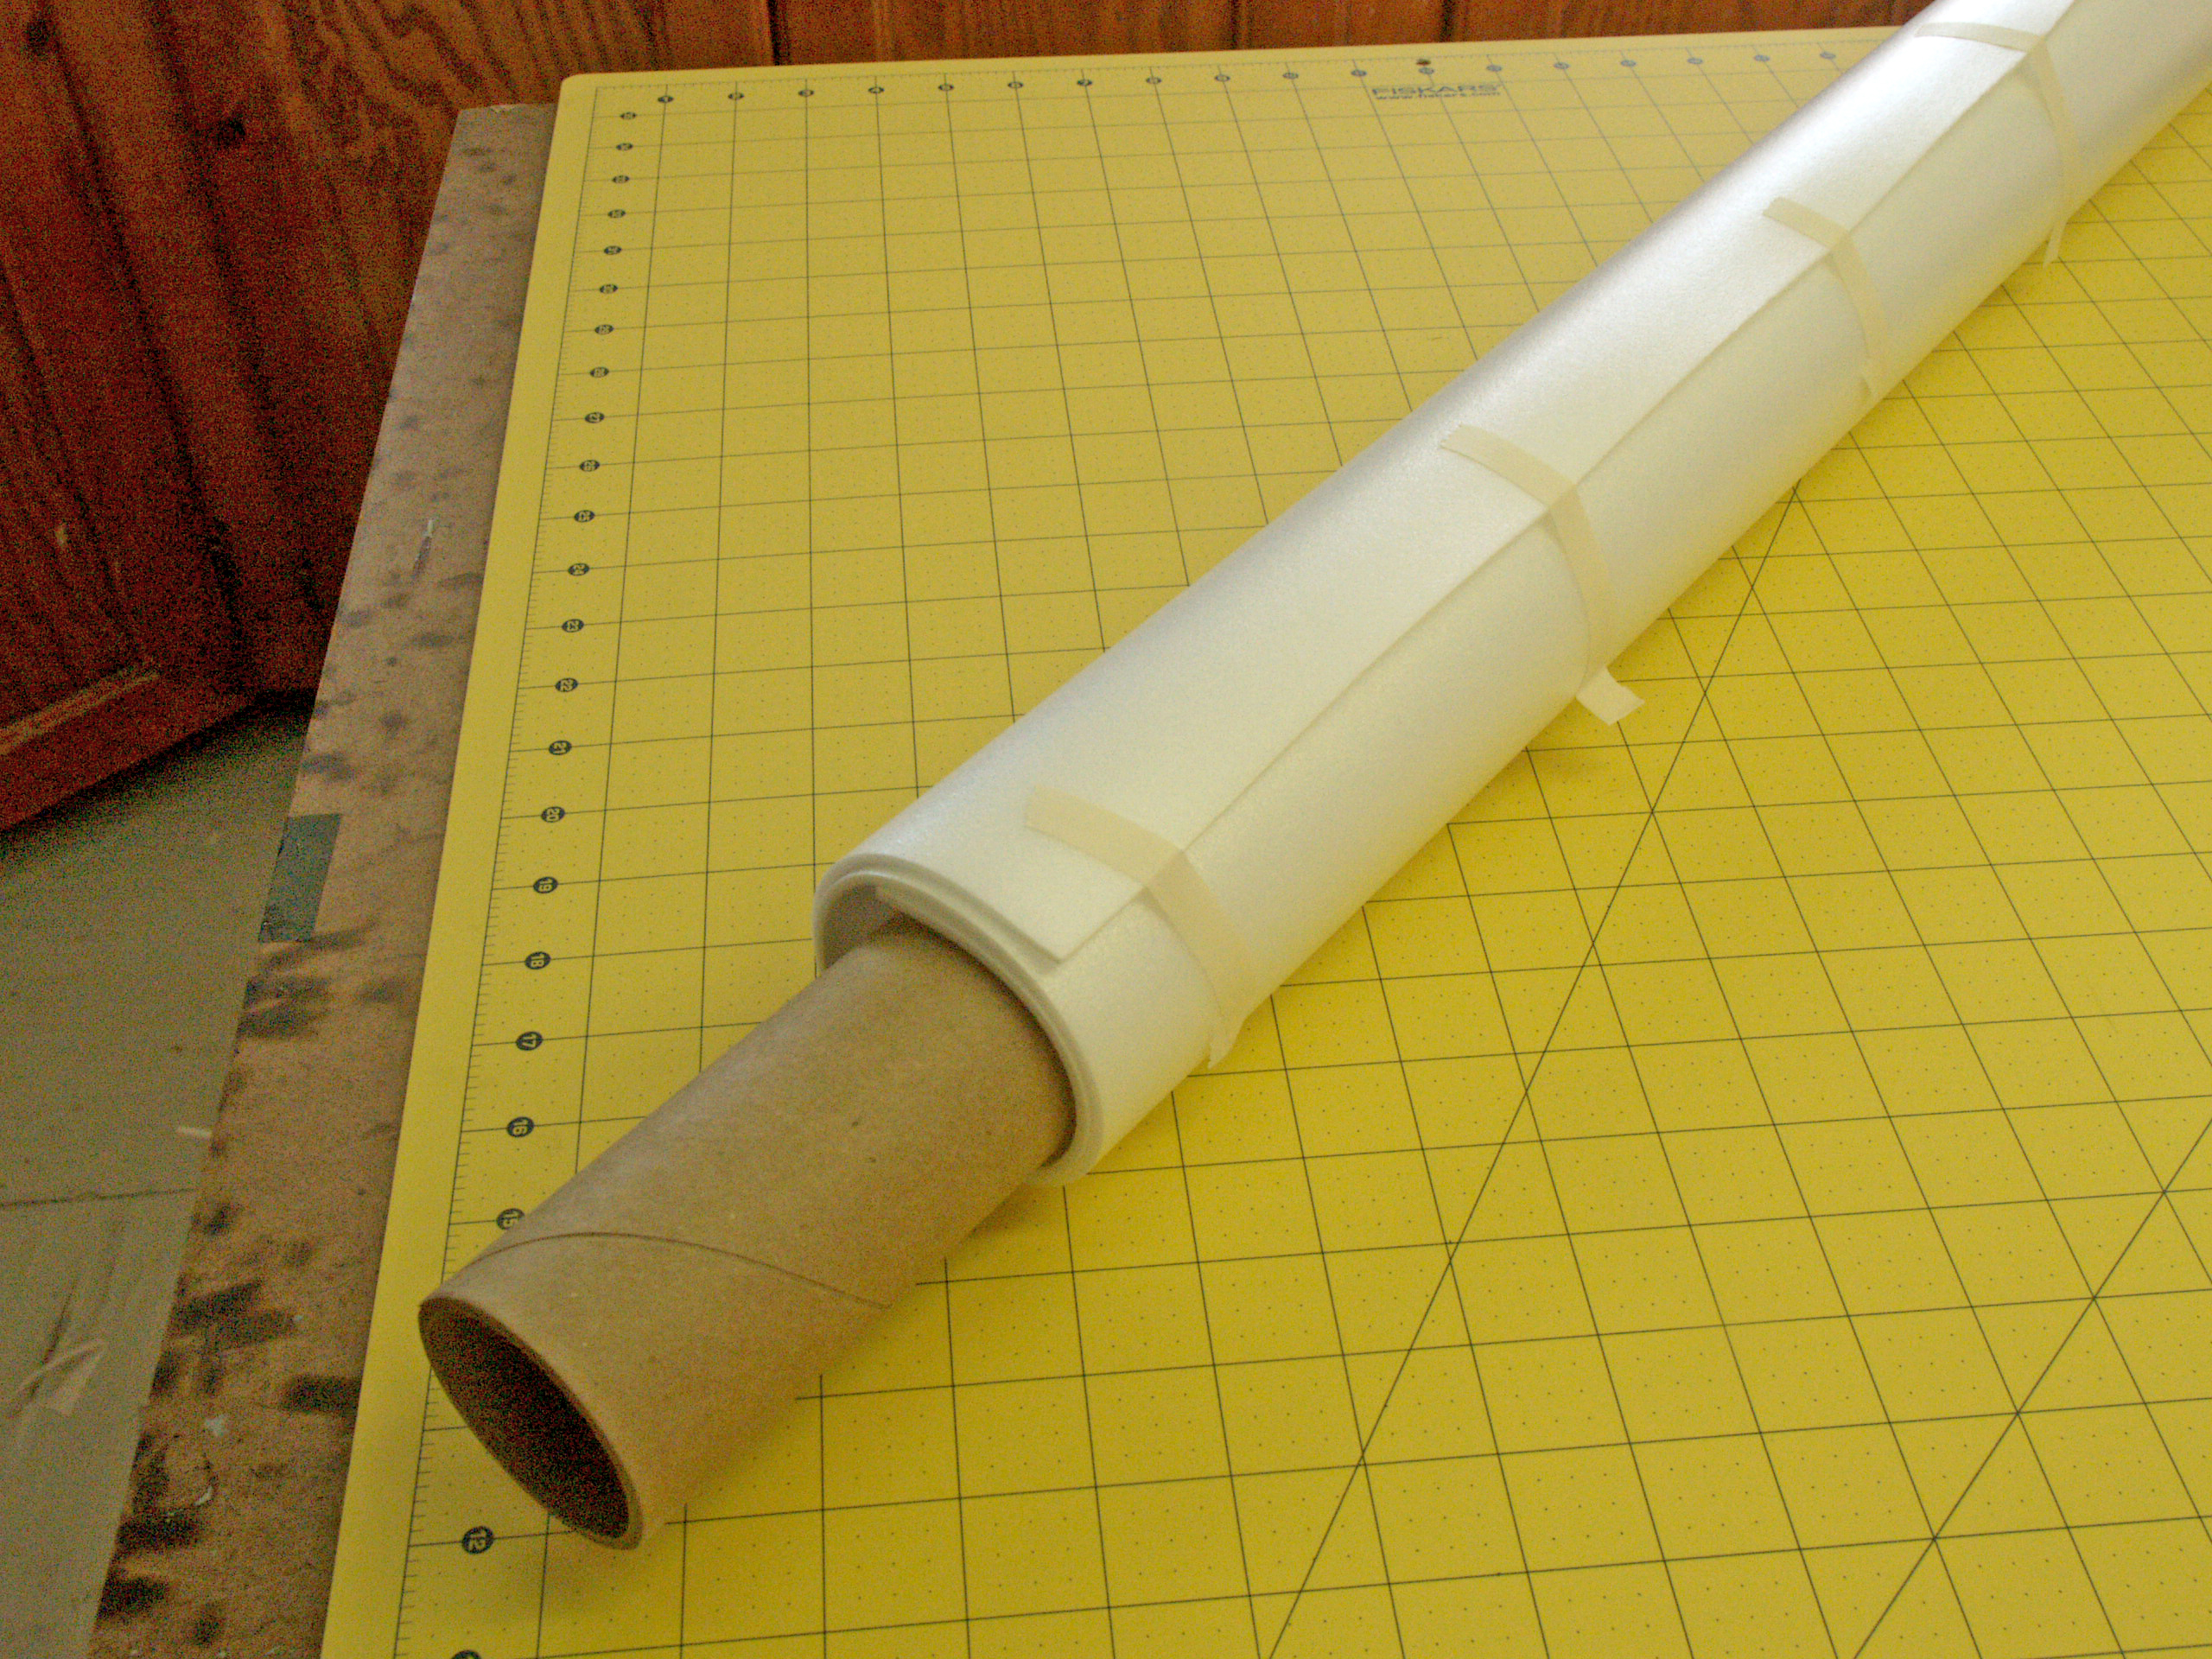
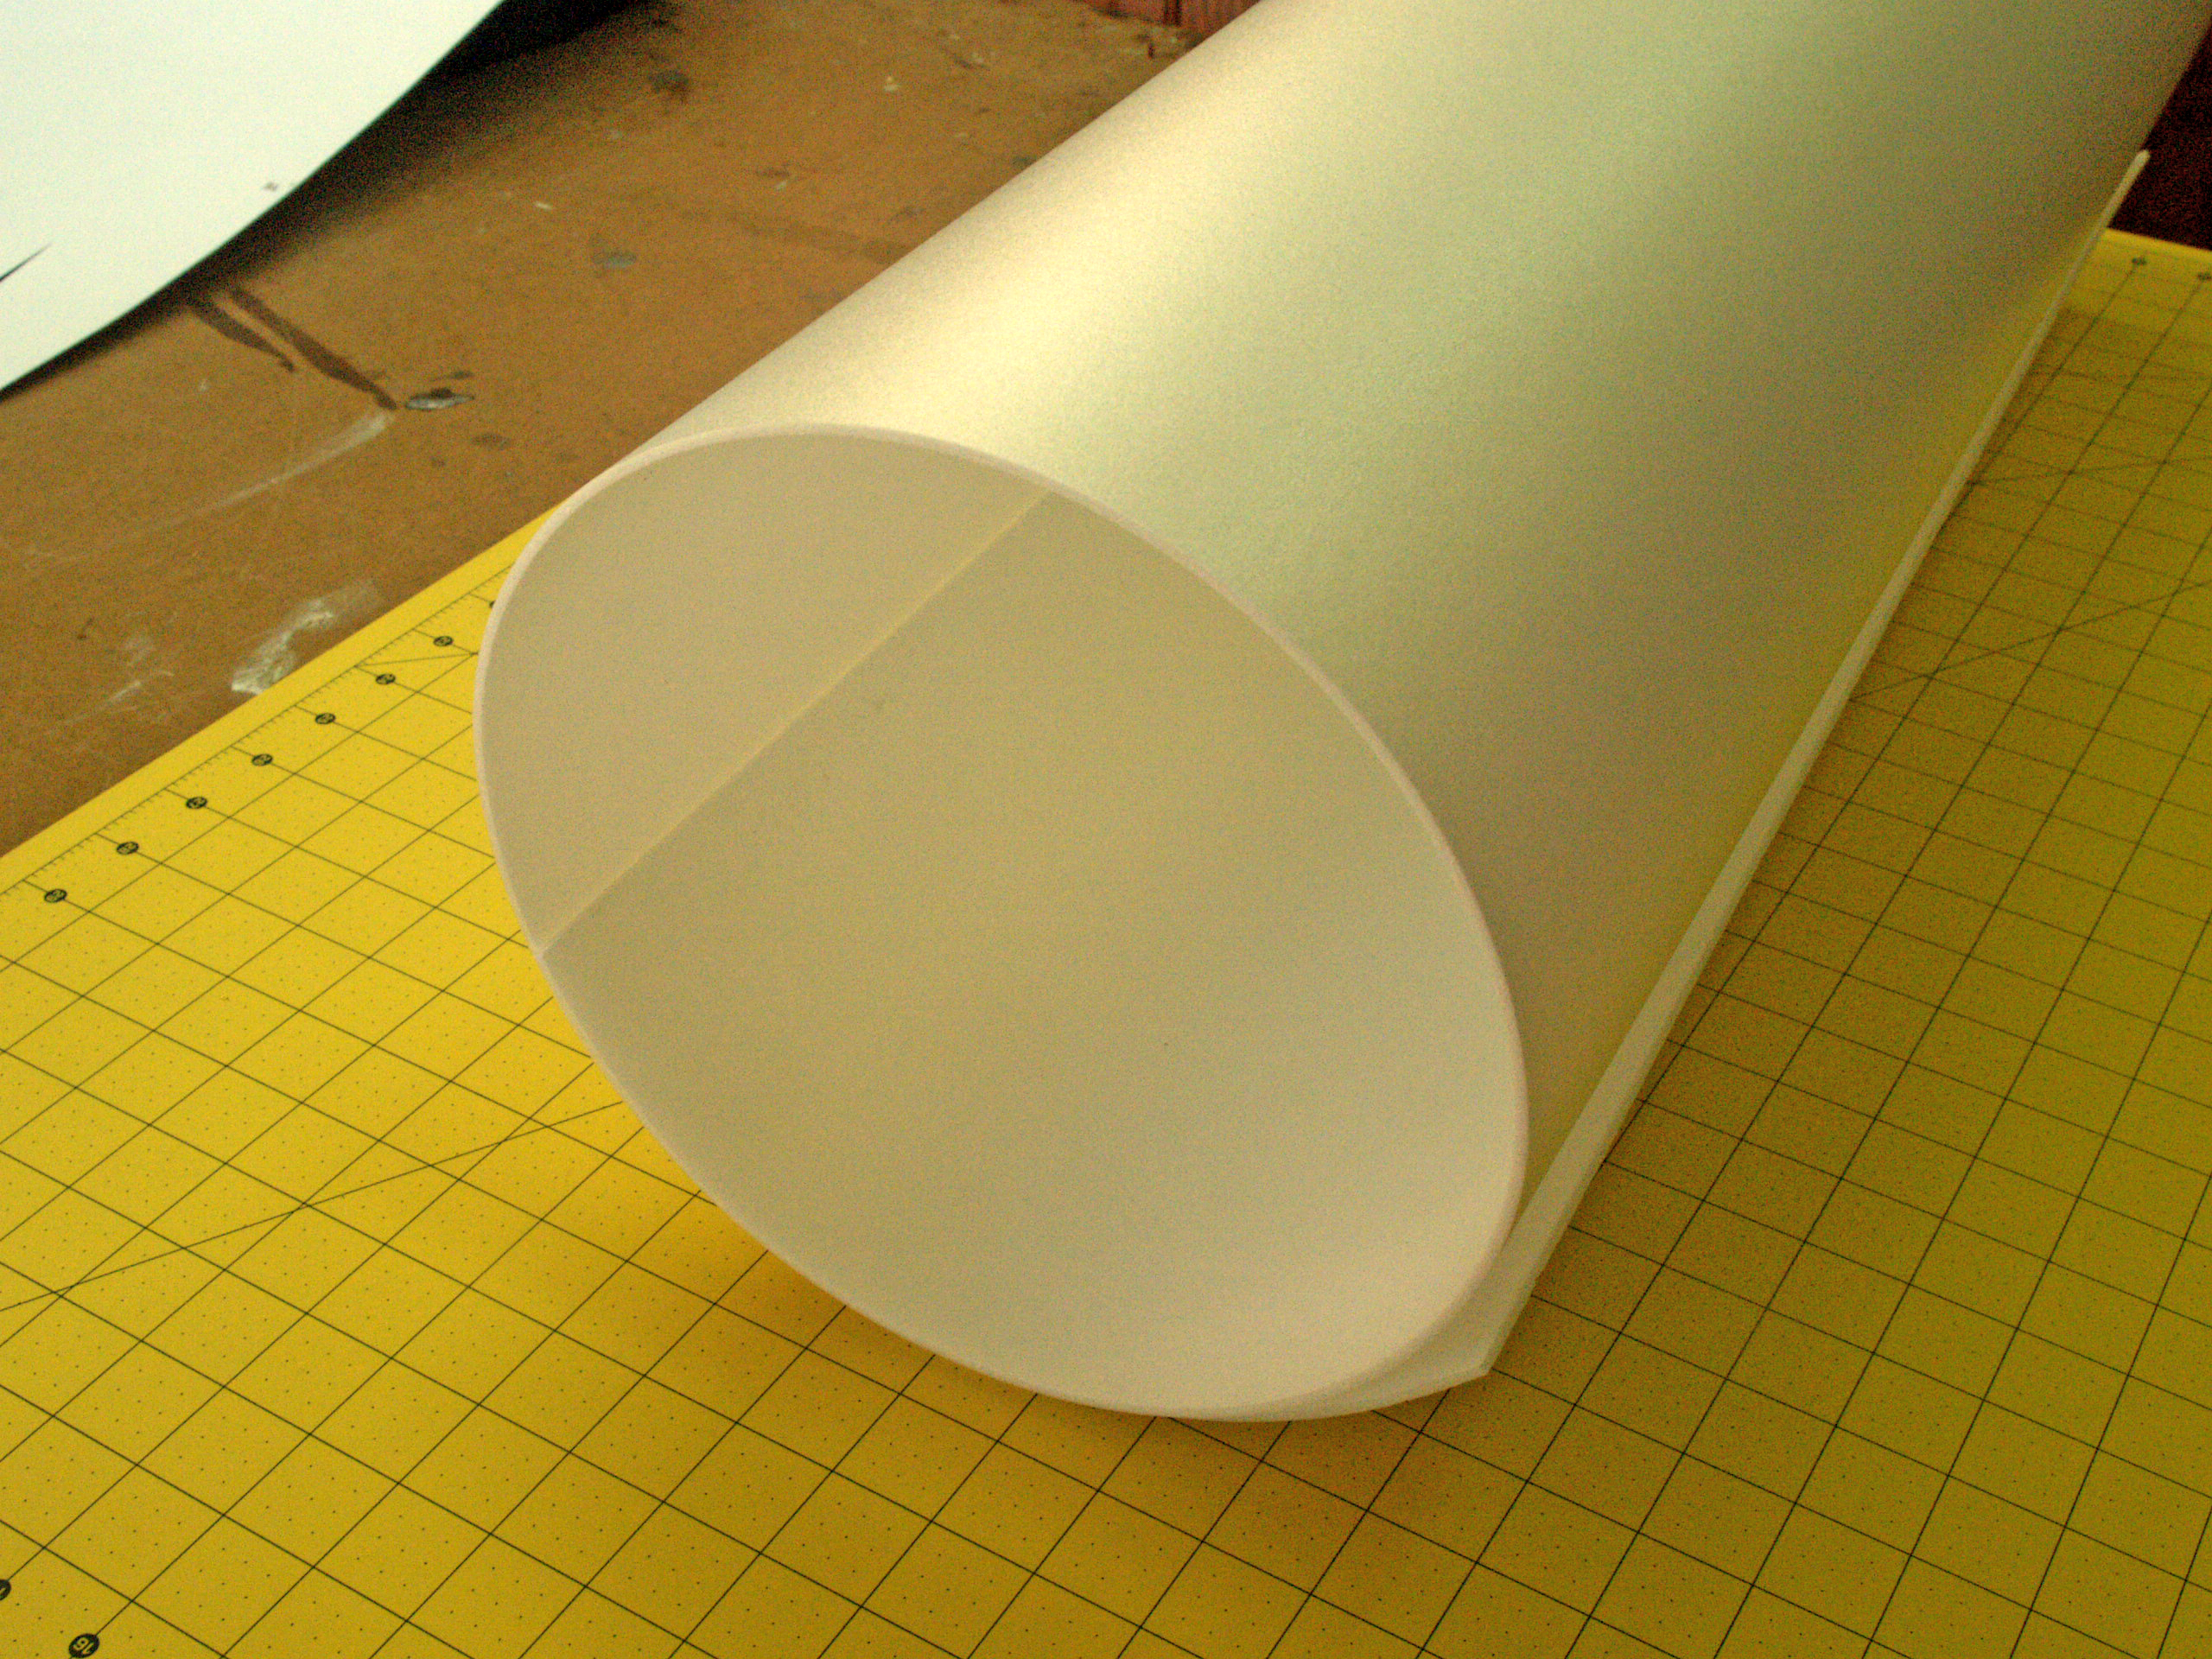
Compound curves
Cutting pleats in sheet foam may be the best way to form a compound curve. This method is tedious, but the result is a lightweight fuselage.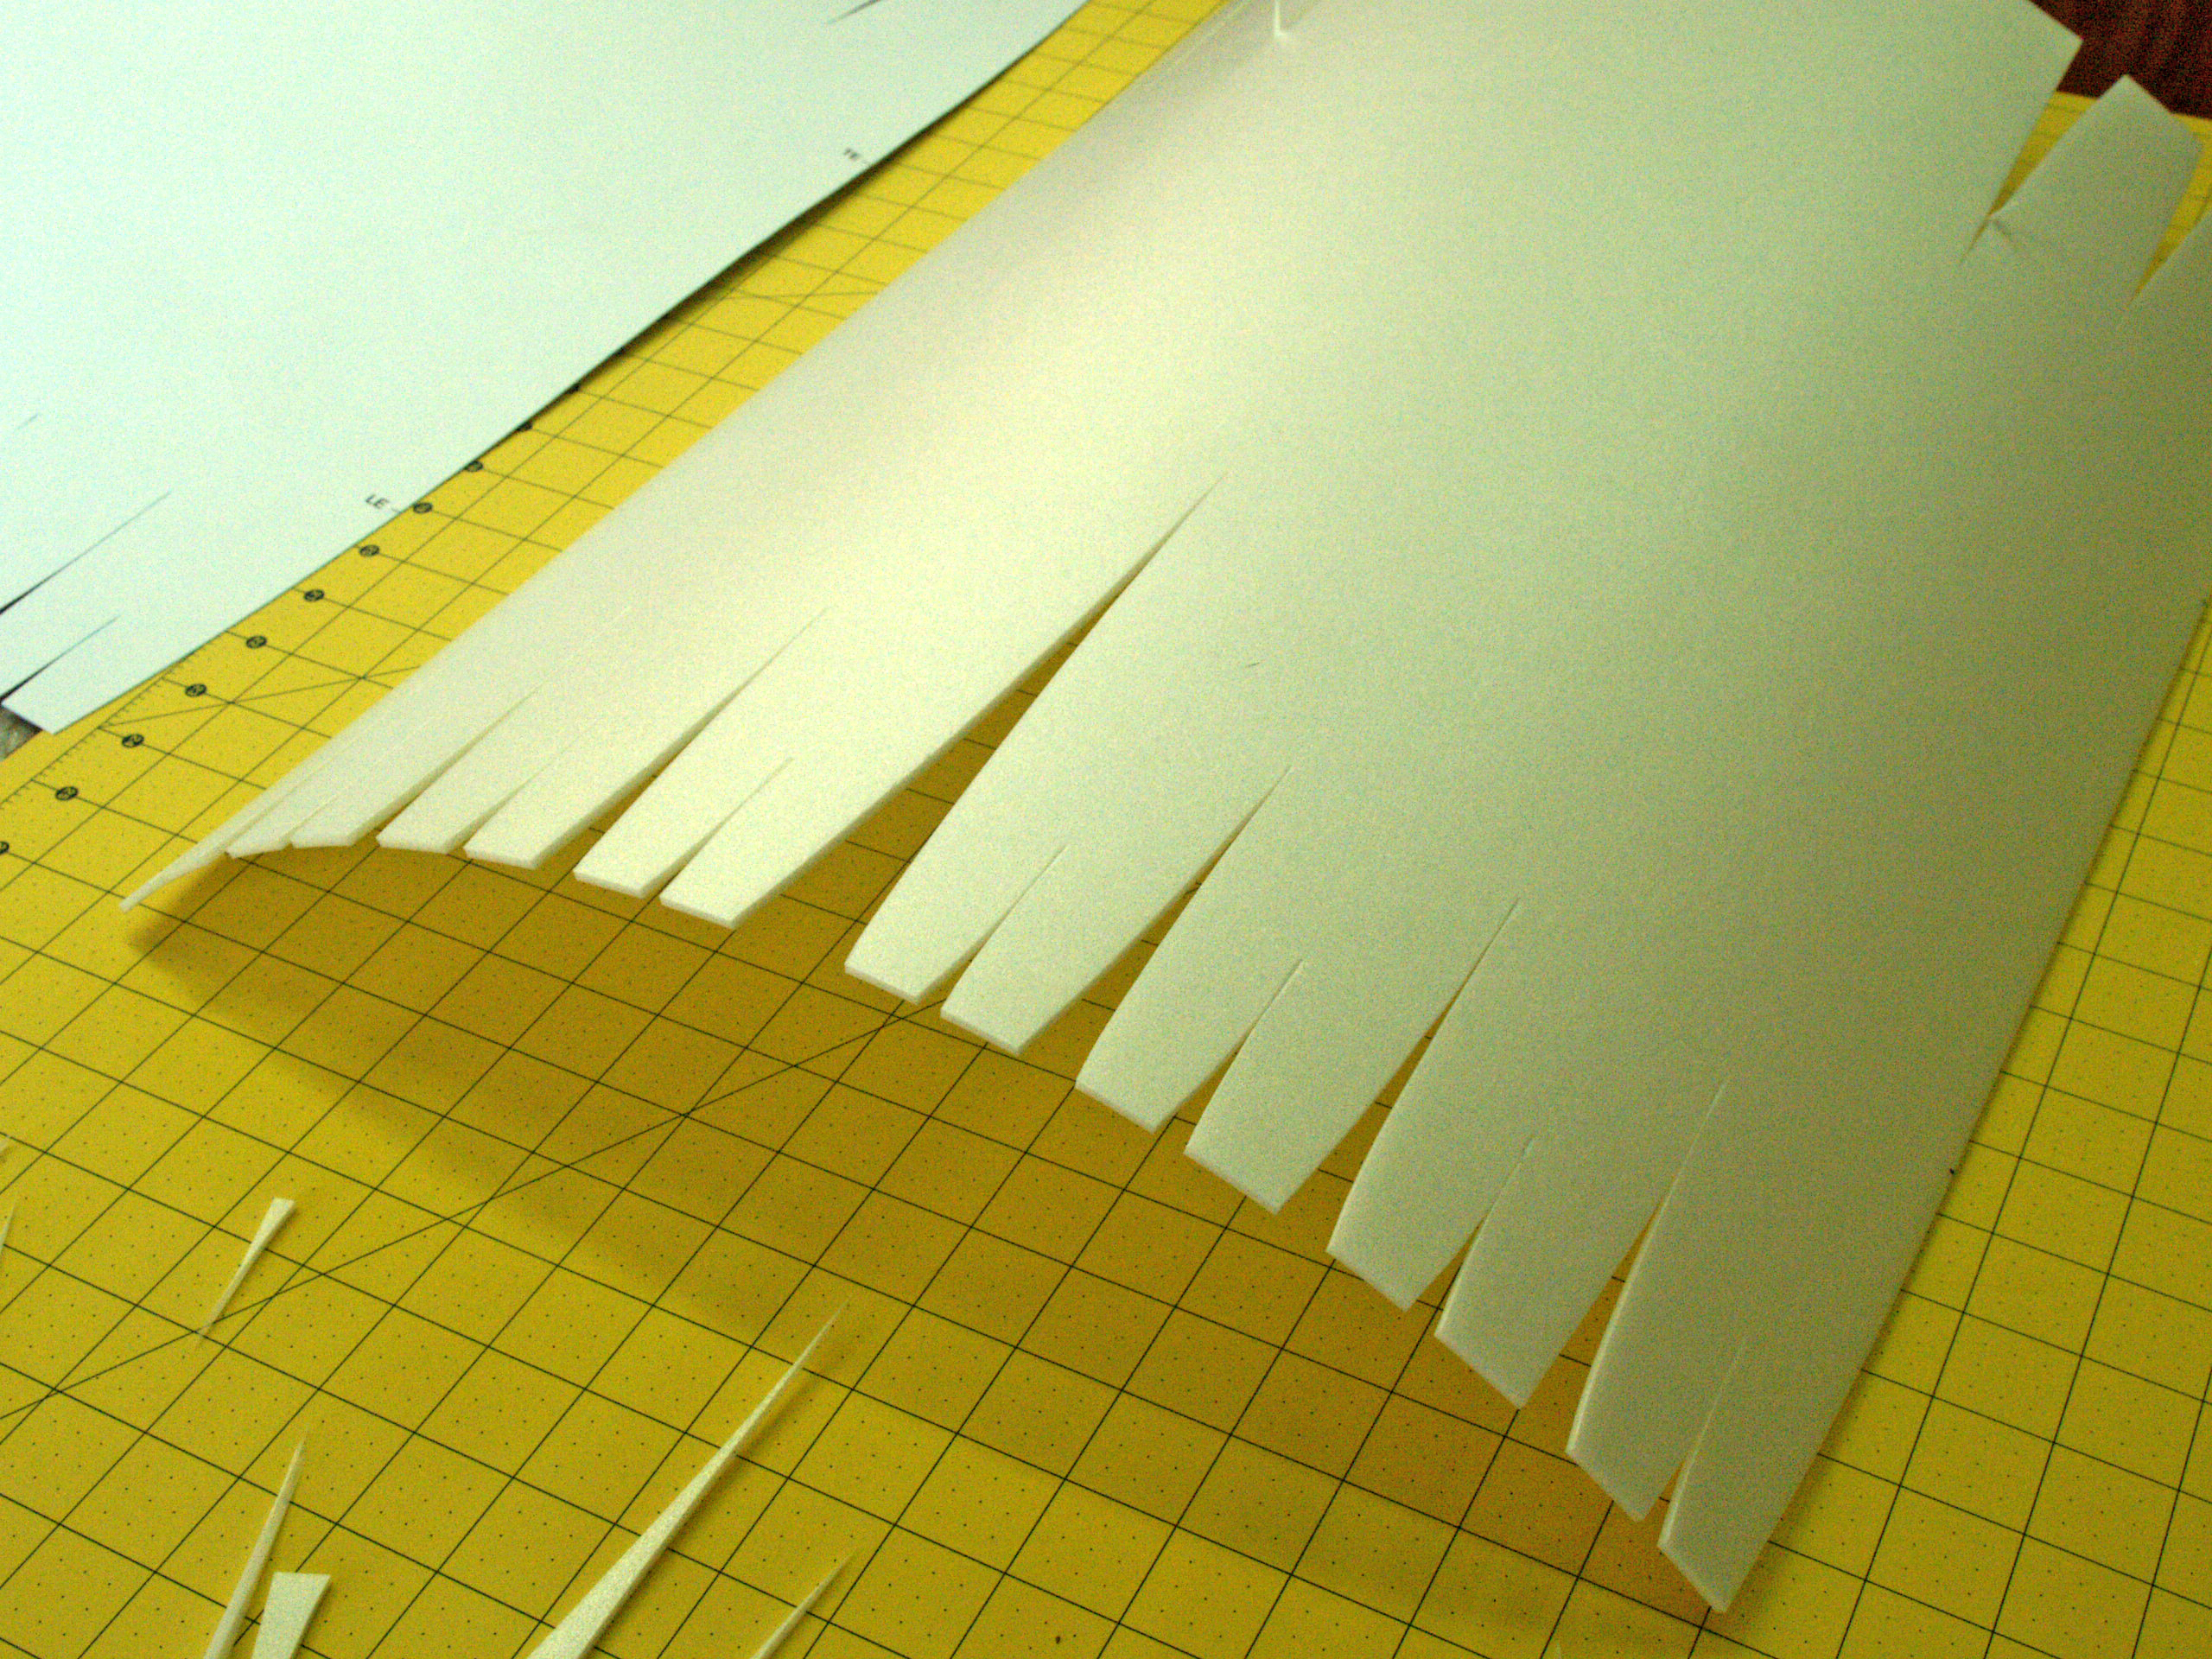
Mind your fingers
Remember to only use the palm of your hand to shape foam this way and be careful if you are wearing rings.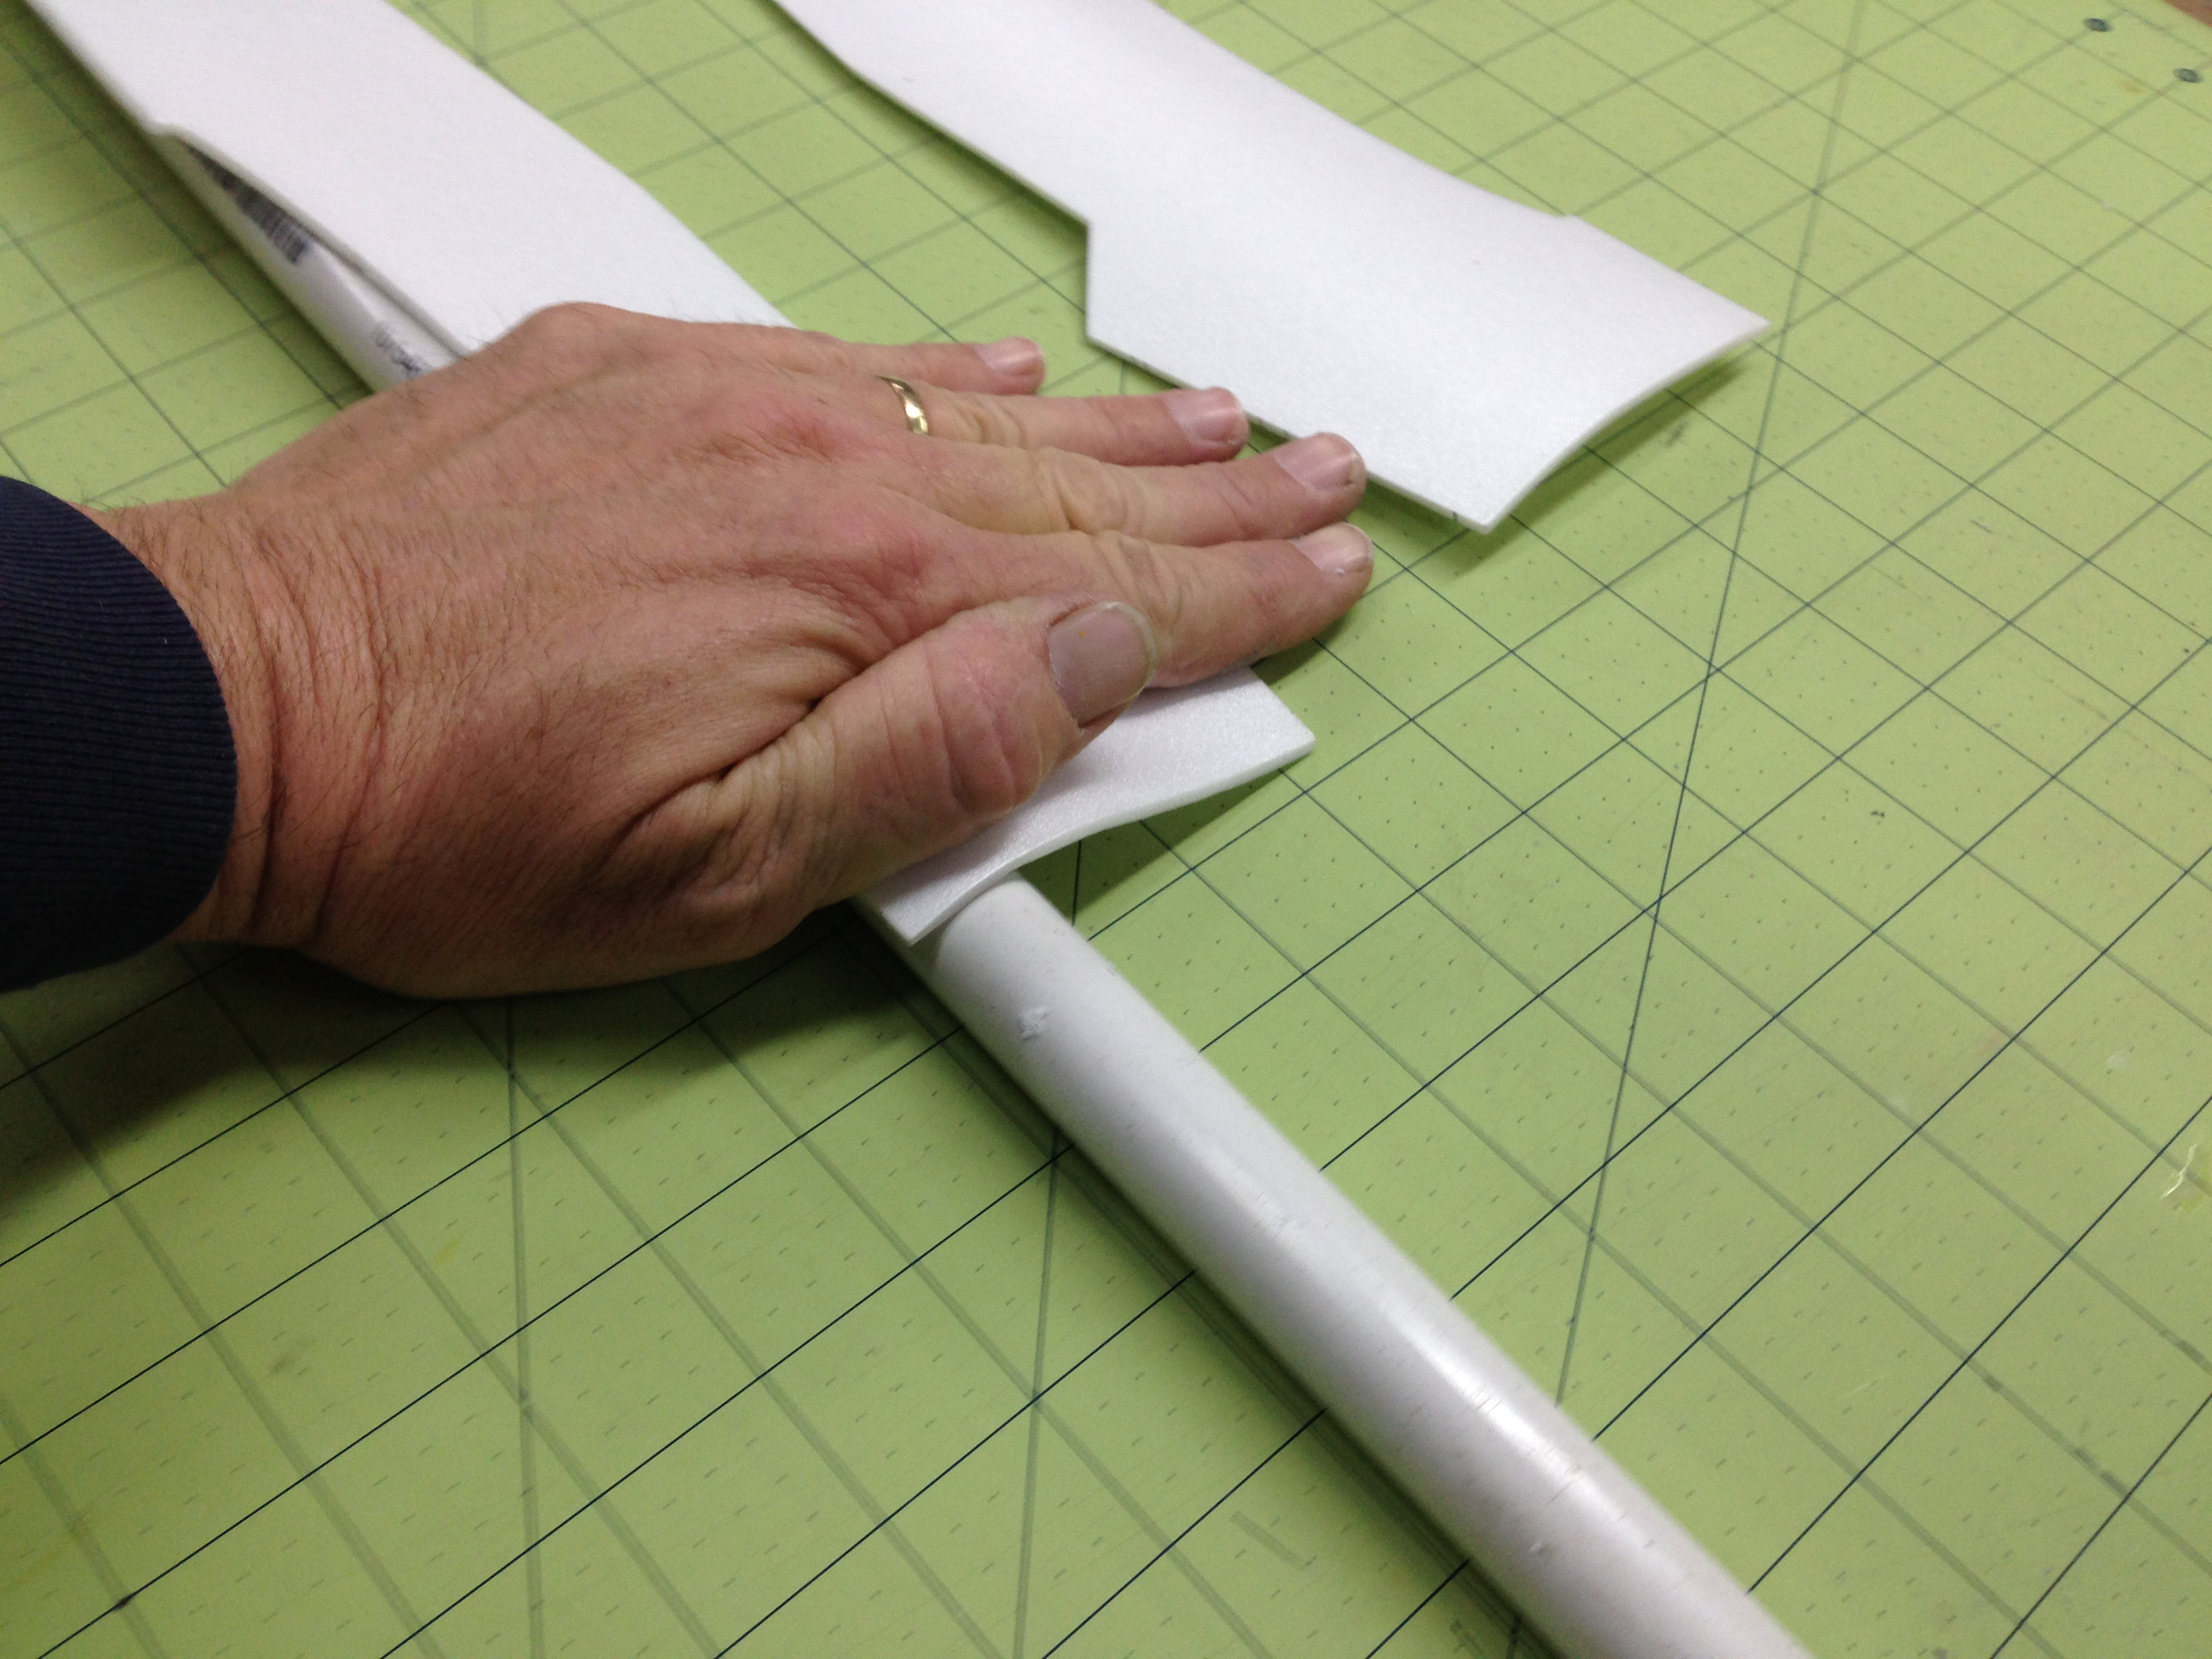
Vacuum-forming
After a trip to Fantastic Models, I got the “skinny” on what is required to vacuumform sheet foam. The process is exact and labor intensive.
SOURCES:
Park Flyer Plastics
[email protected]
www.parkflyerplastics.com


Comments
Add new comment