


Phoenix Model Piper J-3 Cub GP/EP/Gas ARF
Written by Greg Gimlick Yes, this Cub has flaps! Product review As seen in the November 2017 issue of Model Aviation.
Bonus Video
Specifications
Model type: Giant Scale Skill level: Intermediate Wingspan: 90.5 inches Wing area: 1,219 square inches Airfoil: NACA Length: 60.6 inches Weight: 13.2 to 14.3 pounds Wing loading: 25 ounces per square foot Power system: RimFire 1.20 brushless motor; 85-amp ESC; 6S LiPo battery; 17 x 8E propeller; or 20cc two-stroke gasoline or 1.20 glow engine Radio system: Eight-plus-channel transmitter; seven standard size, high-torque servos (two aileron, two flap, one elevator, one rudder, one throttle if using gasoline engine); 6-volt 2,400 to 2,600 mAh NiMH receiver battery Construction: Wood, fiberglass, and Oracover Price: $299.99 Need to complete: Eight-plus-channel radio; seven servos; receiver battery; power systemTest-Model Details
Power system: RimFire 1.20 brushless outrunner; Castle Creations Edge 120 HV ESC Battery: FlightPower FP70 6S 5,500 mAh 70C LiPo Propeller: APC 17 x 8E Radio system: Futaba 14SG transmitter; six Tactic TSX45 Standard High-Torque Metal Gear 2BB servos; Futaba R7008SB receiver; Hobbico LiFeSource 6.6-volt 2,100 mAh 10C battery Ready-to-fly weight: 14 pounds, 5 ounces Wing loading: 27.1 ounces per square foot Flight duration: 8 to 12 minutesPluses
• All-wood construction is beautifully covered. • Fiberglass cowl. • Fully detailed canopy/cockpit with removable pilot. • Includes mounts for electric or gas power. • Excellent hardware package. • Fast and easy to assemble at the field. • It’s a Cub!Minuses
• Landing gear is heavy and the paint didn’t match. • Non-scale wing struts.Product Review
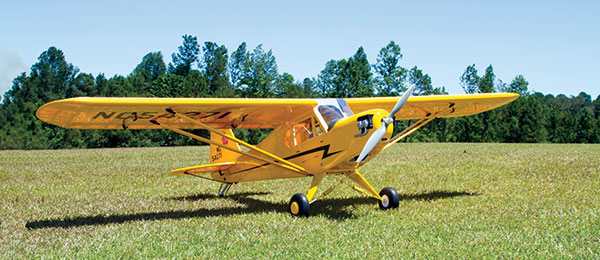
I had good and bad first impressions of the Phoenix Model Piper J-3 Cub GP/EP/Gas ARF—actually only one bad impression. Everything looked beautiful as I unwrapped it. The glasswork and paint on the cowl was a thing of beauty. Then I unwrapped the landing gear and the paint wasn’t even close. It’s yellow, but nowhere near Cub yellow. I’ll get a can of paint and fix that. The covering on the model was flawless and showed no signs of coming loose during shipping.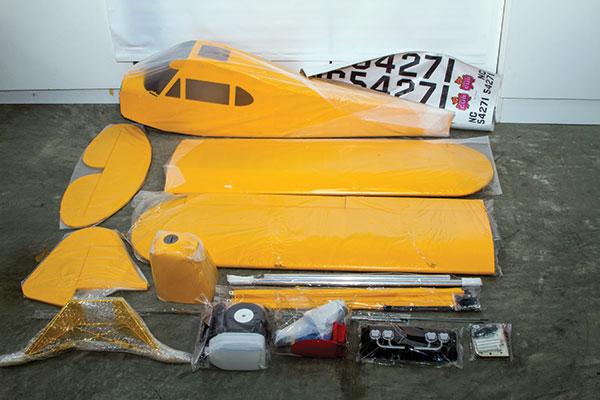
The pieces of the Cub are unpacked, but still in their protective wrapping.
The next impression made me remind myself that this is a sport scale model and not truly scale. This Cub has flaps and the full-scale aircraft doesn’t. The wing struts are also non-scale.
Assembly
As with any ARF model, begin by carefully inspecting everything then spend an hour with the covering iron. Go over everything, even if it looks tight when you unpack it. This will be rewarded when you take it out on a 90° day. Read the instructions and check online to see if there have been any corrections added. There weren’t any when I assembled mine. The wing servos and controls are the first step and probably the biggest. Everything is pre-slit for the hinges and the servo mounts are preinstalled on the hatch covers. All of the control surfaces employ horns that fit precut, keyed holes and slots. They are secure and use backing plates throughout. The wing mounts on two large wing tubes and is secured with a captured bolt at the fuselage. Struts further secure the wing. The landing gear takes only a few minutes to assemble. At 18 ounces, it’s heavy, but it’s extremely sturdy. The strut mounts bolt to the fuselage slightly aft of the gear. Secure the struts with quick-connect pins.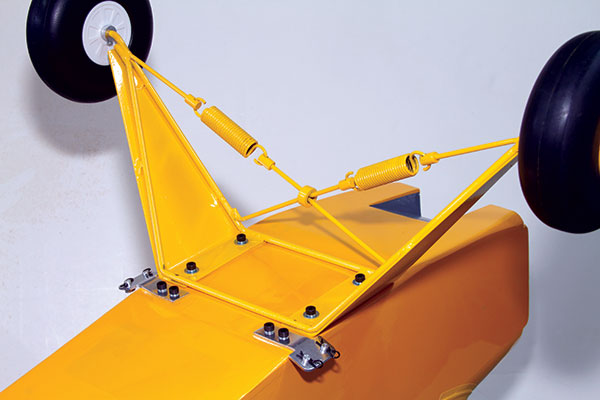
The gear is bolted to the fuselage ahead of the wing strut mounts. All of the blind nuts are preinstalled.
The tail surfaces fit snugly into precut slots. When you remove the covering from the center of the horizontal stabilizer for gluing, save the scrap of covering. The vertical stabilizer installs next and you must be sure to align the trailing edge with the back of the fuselage so that the hinging will properly align. This left a small gap at the front of the vertical stabilizer where it meets the fuselage. I filled that with the scrap of covering that I saved. All of the controls are connected to the servos using L bends and keepers with captured clevises at the horns. The elevator halves employ a “domino” to bring the two control rods together with the servo rod inside of the fuselage. Be sure to secure that with threadlocker! The tail wheel assembly is a spring-actuated system. Be sure to attach the ends of the springs to the connecting points before bolting the mount in place. If you don’t, you won’t be able to rotate them through the ends of the springs. Whether you’re using electric power or an engine, the mounts are included with specific instructions for each. I used a RimFire 1.20 electric motor and a Castle Edge HV-120 ESC that I already had. The ESC is overkill, but that’s okay. Everything bolted into place with the proper measurements because I used the recommended motor. If you use something else, the measurements to fit the cowl are in the manual.
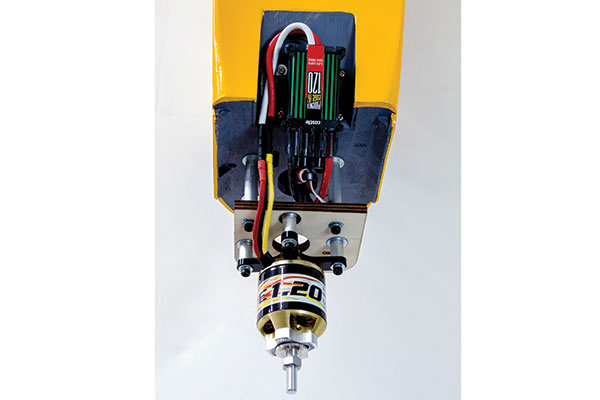
The motor mount is assembled and the motor and ESC are installed on the bottom of the fuselage where they get great cooling air.
The final bits involve mounting the receiver, switches, pilot figure, and motor battery inside of the fuselage. This is accessed through the operational door and there is plenty of room for even the biggest hands. I secured the battery with Velcro on the bottom and a wraparound strap, positioning it as far forward as possible. The pilot is glued to the seat and the seat is held in place with Velcro, so I can easily remove it for radio access.
Control Throws and CG
It was a pleasant surprise when I checked the center of gravity (CG) and everything was exactly where it was recommended, without having to move a thing! I have room to move the battery if necessary, but I was glad to see it balanced the first time. I’ve used a few 6S battery packs that weighed 3 ounces less and there wasn’t a noticeable change in flight. All of the controls were set to the values listed in the manual and they worked well. I increased the flap throws just for fun and added a bit more aileron, but you can adjust yours as you feel comfortable. Begin with the recommendations.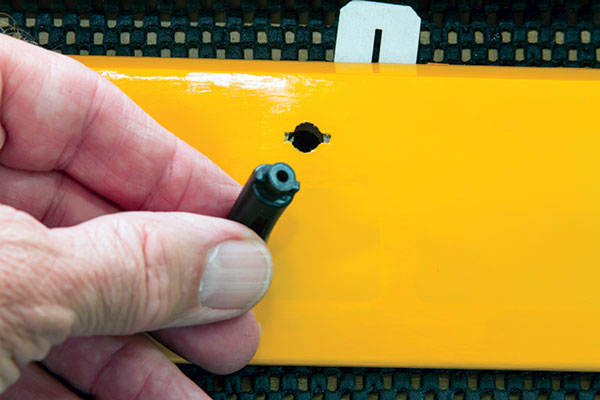
Phoenix Model used a nice, keyed control horn that mates to a hole in the control surfaces. The CA hinges have been fitted, but not glued in, when the kit arrives.
Flying
The day of the test flights was perfect except for the wind. The wind average was 10 mph, gusting to 16, with gusts as high as 22 mph. You work with what you have, and given the Cub’s size and weight, I decided to go for it. As it turned out, the wind wasn’t an issue. There was some excitement on the short final when gusts became extreme, but it never felt out of control. Within a few feet, the tail came up and it trundled down the runway on the main landing gear like a champ—or a Cub! Climbout was solid and the power was more than adequate, even though I hadn’t gone to full throttle. Tracking on the ground and climbout were perfect. A quick check of the CG, stall, and control feel had me smiling. There is plenty of power for any type of aerobatic maneuver you feel a Cub is capable of—and then some. During the stall tests, there was no tendency to drop a wing to either side. The Cub simply mushed along. It recovered easily from spins. My rudder throw is more than what is recommended and proved effective.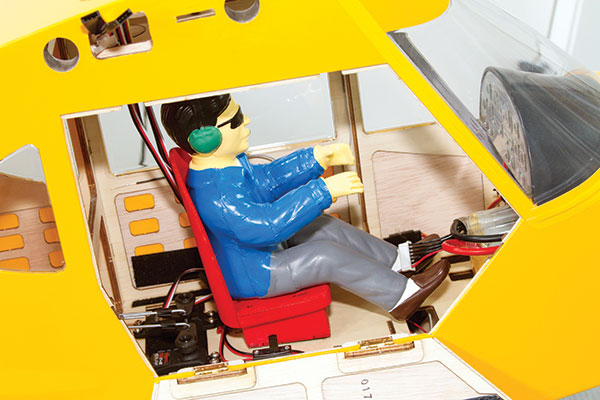
The author fastened the pilot’s seat to the floor of the fuselage with Velcro. It’s easily removed for full access to everything.
I made several approaches without flaps because the full-scale Cub doesn’t have them. It slows nicely and lands like a dream. Landings were easy with or without power, although in gusty conditions, it helps to keep a little extra speed going. My attempt to land with flaps was comical. The airplane floated forever! After I quit laughing at my folly, I adjusted my technique and managed to make some spot landings using full flaps. Loops, rolls, inverted flight, Split Ss, Cuban 8s, spins, and other maneuvers—the 6S-powered RimFire 1.20 and the 17 x 8 propeller will have the power for you. Currents peaked at slightly above 60 amps, and I regularly had 10-minute flights. I suspect I could stretch it to 12 minutes with fewer aerobatics.
Conclusion
This Cub flies well and it looks great on the ground or in the air. It’s easy to swap out the battery between flights and the model easily breaks down for transport. If you desire a more scalelike look, you might consider this as a great platform for kit bashing. Making it a Super Cub would be easy with a change of the cowl and some graphics. An internet search will find many variations and modified Cubs. You could probably document this one as a Scale model for one of them.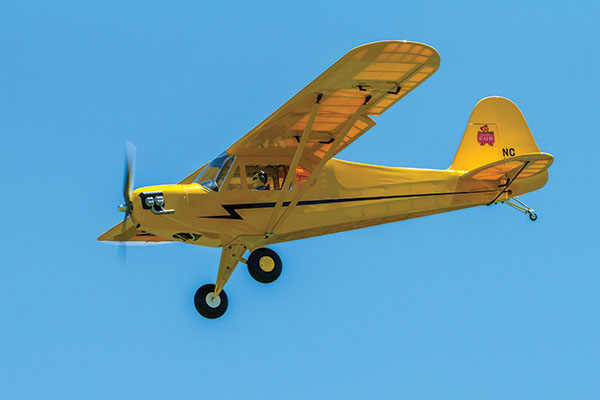
Spot landings using flaps are fun—after you get past the fact that this Cub has flaps.
Phoenix Model has a winner with this Piper J-3 Cub and the company’s attention to construction techniques makes it a joy to assemble. The RimFire power system is perfectly matched to the aircraft. I couldn’t be happier. —Greg Gimlick [email protected]
This Month's Issue

Join the AMA
![]()


Add new comment