


Phoenix Model 1:4-3/4 Westland Lysander Gas/EP ARF

Written by Greg Gimlick This Giant Scale spotter airplane stands out in the air Product review As seen in the September 2017 issue of Model Aviation.
Bonus Video
Specifications
Model type: Giant Scale ARF Skill level: Intermediate to expert Wingspan: 126 inches Wing area: 1,464 square inches Length: 74.8 inches Weight: 23.1 to 26.4 pounds Wing loading: 36.04 ounces per square foot Recommended power system: RimFire 50cc brushless motor; 120-amp ESC; 9S to 15S LiPo battery; 22 x 8E to 26 x 10E propeller; or 50cc to 61cc two-stroke gasoline engine and compatible propeller Radio: Minimum eight-channel; eight to nine standard-size, high-torque servos (two aileron, two flap, two elevator, two rudder, one throttle [if using gasoline engine]); two 6-volt 2,400 to 2,600 mAh NiMH receiver batteries Construction: Wood; fiberglass; heat-shrink covering Price: $599.99 (plus shipping surcharge of $59.99) Requires: Eight-channel radio; eight to nine servos; receiver battery; power systemTest-Model Details
Motor and ESC used: RimFire 50cc brushless outrunner; Castle Creations Ice2 HV 160-amp brushless Battery: Two Revolectrix Go-Pack Graphene Oxide 70C 6S 5,000 mAh LiPo batteries Propeller: Fiala 22 x 12 electric Radio system: Futaba 14SG transmitter; eight Futaba S3071HV servos; Futaba R7008SB receiver; TrakPower 2S 7.4-volt receiver battery; Scorpion 7.4-volt Backup Guard Ready-to-fly weight: 26 pounds, 10 ounces Wing loading: 41.9 ounces per square foot Flight duration: 6 to 7 minutesPluses
• All-wood construction beautifully covered with heat-shrink covering. • Flawless fiberglass parts are painted to match. • Fully detailed canopy/cockpit is easily removable. • Lots of room inside for equipment. • Excellent hardware package. • Super easy and fast to assemble at the field. • It’s gorgeous to look at.Minuses
• CG is difficult to attain without additional weight in the tail. • Plastic spinner is slightly out of true.Product Review
My first impression of the Phoenix Model 1:4-3/4 Westland Lysander came as the UPS driver was struggling to get the large box up the driveway and said, “I came here first to get this big thing out of my truck.” The shipping box is huge! I got my friend, Wayne, to come over to help me unwrap all of the pieces. It was well packed in bubble wrap and tape, so there was no damage. It was slightly unwieldy to unwrap and it helped to have extra hands. As we unwrapped the parts, we couldn’t help but admire the perfectly covered pieces and the quality of the fiberglass parts. Naturally, we couldn’t resist sliding the wings and tail on to see just how big it was—and how small my shop suddenly became. I could hear airplane noises already! It was just beautiful.Assembly
Phoenix Model claims assembly will take roughly 10 hours, and I suppose that’s possible, but mine took much longer. Granted, taking photos along the way slows the process, but taking care to get everything perfectly hinged and positioned makes this more like a 20-hour project. The wing servos and controls are the first step and probably the biggest. Everything is pre-slit for the hinges and the servo mounts are preinstalled on the hatch covers. This speeds up the process and everything seems quite secure. The control surfaces employ horns that fit precut, keyed holes and slots. They are secure and use backing plates throughout. The rod ends are captured ball links that allow smooth action. The wing mounts on two large wing tubes and is secured with a captured bolt within the fuselage. Struts are assembled later and further secure the wing.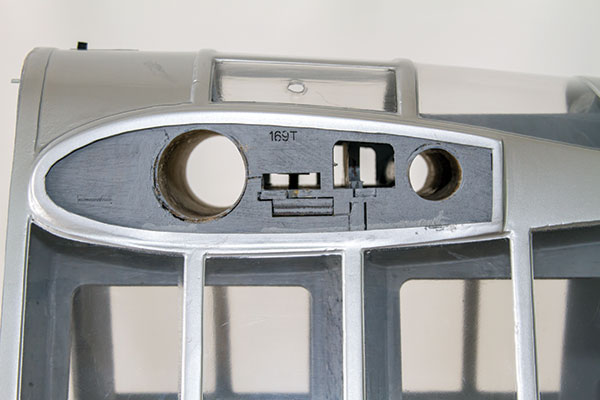
The top of the fuselage has channels for the two wing tubes and a captured retaining bolt can be seen in the middle slot. It stays in place and matches the aluminum U shape on the wing.
The landing gear and pants are next. It’s well designed and goes together easily, but the retaining bolts and nuts protrude quite a bit on the inboard side of the pants. I’ll probably try to 3-D print some covers for those to dress them up, but they are strong and functional. Tail surfaces are hinged in the usual fashion with CA hinges. The horizontal stabilizer sides slide over the joiner into a fuselage recess where they are secured with a bolt and a preinstalled metal tab. An access hatch above the tail wheel allows you to secure the gear and access the pull/pull cables. The rudder and tail wheel each use pull/pull cables and attach to the extended servo arm in the fuselage. Care should be taken with the geometry here because the tail wheel throw can restrict the rudder throw if done poorly. Motor mounting is easy and, from what’s included, installing a gas engine would be equally simple. The motor mount stand-offs gave me exactly the recommended distance. (I suspected it would because I used the recommended motor.) The cowl mounting is slightly fiddly, but with care, some tape, measuring tools, etc., you should be able to mount it perfectly.
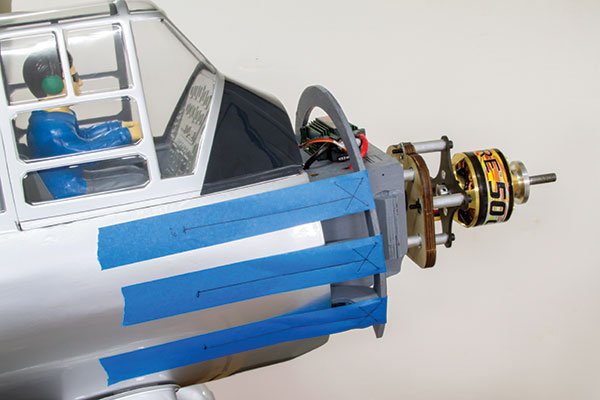
With the motor and ESC mounted, the author used tape to measure back and make a reference mark to later find the cowl mounts.
The dummy engine took as much time as anything else because it needed lots of material removed between the cylinders. Care here will be rewarded later in how good it looks.
Control Throws and CG
Getting the center of gravity (CG) correct was a problem for me. It was quite nose-heavy and I ended up putting a chunk of lead inside of the tail access area. It’s still slightly nose-heavy, but it flies fine. I initially set the control throws up to the recommended levels and the elevator “just looked wrong.” Nothing scientific here—it just didn’t look like enough throw to be comfortable. The ailerons gave me the same impression, but not as bad. I ended up using more throw on both for the highest rate position, and then set two more rate positions to match the recommended ones.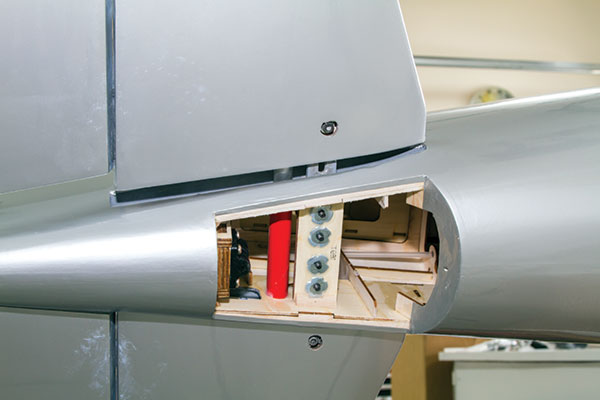
The horizontal stabilizer slides into place and is secured with a captured bolt.
I take off and land at the highest rate for aileron and elevator. After the airplane is in the air, I can comfortably switch to the recommended elevator throws, but the extra feels better during takeoff and landing. I used the same method that Dan Landis uses: “That looks about right …” Then I added my usual 25% exponential to all surfaces.
Flying
The week of my test flights brought 95° temperatures and a heat index of 108°—not ideal! The first takeoff run was a bust and it busted the propeller, too. I suspected that I still needed to move the CG aft, but decided to err on the side of being nose-heavy. I erred too much. It felt a little tippy on the gear and just throttling up to taxi brought it over on the nose. Some additional weight in the tail brought it under control (a total of 10 ounces). The next takeoff attempt was successful and the flight began without any excitement. I have found that it takes off in more of a three-point attitude rather than running with the tail up for a spell. It lands the same way and it’s something I’ve adjusted to.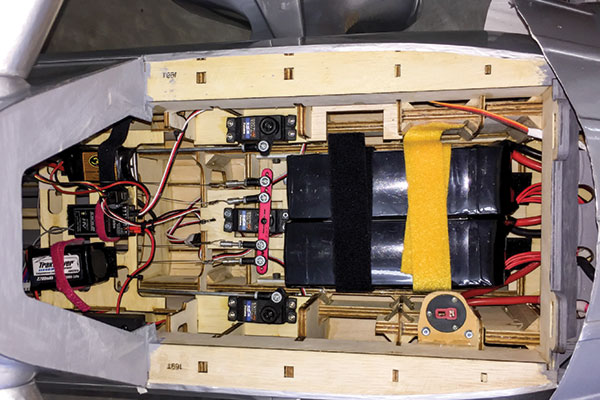
There is plenty of room inside for all of the gear. Be sure to secure wires away from the pull/pull cables or receiver antenna.
Power is more than adequate. Although the recommended 50cc motor is excellent, I would prefer the lower Kv of a RimFire 65cc. My maximum amps tickle 110 and the lower Kv of the 65cc motor would bring that down slightly. I would use a bigger propeller. Control throws listed in the manual are conservative, but adequate. I left the rudder with the maximum throw attained from the setup and it is fine. Aerobatics are possible should you choose to do them, but that’s not in the scale realm of the actual airplane. It loops nicely and rolls are large and almost seem to be in slow motion. Given its somewhat testy disposition when it comes to stalls, I avoid situations that could induce one. I briefly tested a stall—just enough to see the break begin. It’s imperative to come out of the power and use rudder to recover. Any delay in doing so might bring thrills you don’t want. I stalled the Lysander high and it took longer than I thought to recover, but it did recover. It wants to go into a spin with the stall and doesn’t seem to have a preference for which direction it goes. I did not try a stall with full flaps. Landings are beautiful. The Phoenix Model Westland Lysander has a lot of presence at the field. I tend to land slightly faster than necessary, but that’s because of my fear of stalling it low. It slows nicely with flaps and remains controllable at lower speeds.
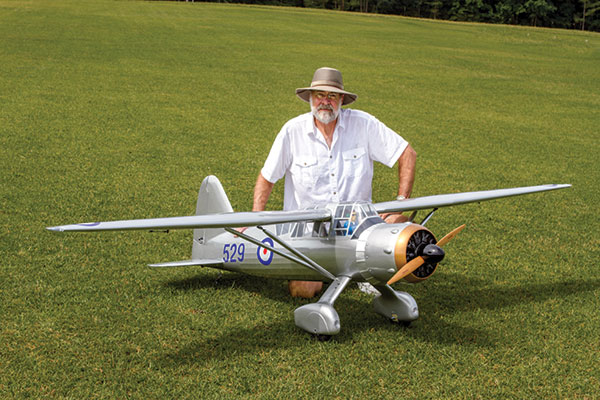
The author displays the Phoenix Model Lysander, providing a good idea of its size.
Conclusion
I love the big old Lizzie! It’s unique and I like that. My early flights were a little pitch sensitive until I dialed in the elevator and CG to my liking. Its size alone garners much attention, but it disassembles and assembles easily in minutes. It’s ironic that I need to use my wife’s Saturn Vue to take it to the field because the fuselage is too long for my short-bed Ford F-150 truck! The Revolectrix Graphene Oxide battery packs provide punch far beyond the other regular LiPo packs that I have for the model. If you’re looking for a big airplane that breaks down easily and makes a statement, this might be the right choice for you. It has some personality when flying and isn’t an airplane for beginners, but if you’re a competent Giant Scale flier, you’ll find it’s a great offering. —Greg Gimlick [email protected]Manufacturer/Distributor:
Tower Hobbies (800) 637-6050 www.towerhobbies.com SOURCES: Castle Creations (913) 390-6939 www.castlecreations.com Revolectrix (301) 829-5533 www.usastore.revolectrix.comThis Month's Issue

Join the AMA
![]()


Add new comment