


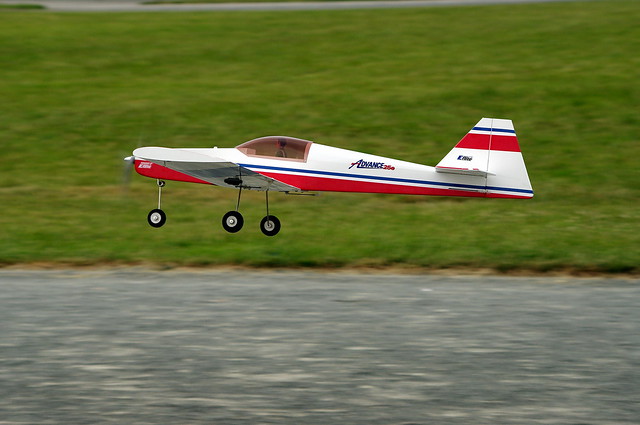
E-flite Advance 25e
Written by Jon Barnes Digital Exclusive Review The E-flite Advance 25e is designed to help newer pilots transition from a high-wing trainer aircraft to a more advanced low-wing aircraft with a broader flight envelope.
Introduction The question most often asked by those interested in getting into the hobby of RC model aircraft is, “What is the best kit for me to start with as a beginner?” Many beginning pilots develop basic proficiency with their first model, then mistakenly conclude that they are now prepared and qualified to fly a wide variety of aircraft. All too often, the cool factor of a warbird or an electric-ducted fan model catches the fancy of newer pilots and he or she excitedly purchases it as the second airplane of choice. Interestingly enough, the question that should probably be asked after one has flown his or her first airplane for a while and started developing proficiency is, “What kit makes a good second aircraft … one that will challenge, not overwhelm me, and thus continue to advance the development of my skills?”
 While the answer to the first question usually involves a kit that is a high-wing trainer, the answer to the second question can be a little more varied depending on who you ask. E-flite has released what they consider to be the perfect answer to question number two: the E-flite Advance 25e ARF.
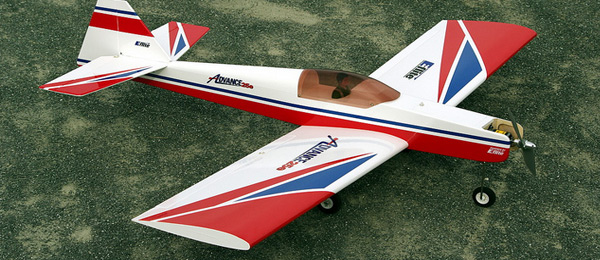
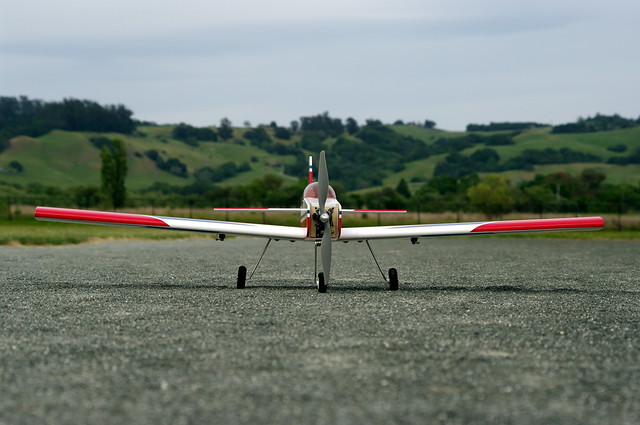
 The Advance 25e is designed to help newer pilots transition from a high-wing trainer aircraft to a more advanced low-wing aircraft with a broader flight envelope. A semi-symmetrical airfoil, combined with tricycle landing gear, helps keep the flight performance predictable and honest. The firewall comes pre-drilled for either an E-flite Power 25 or 32 brushless outrunner motor, which is one hint that more-experienced pilots will also enjoy what the E-flite Advance 25e ARF has to offer.
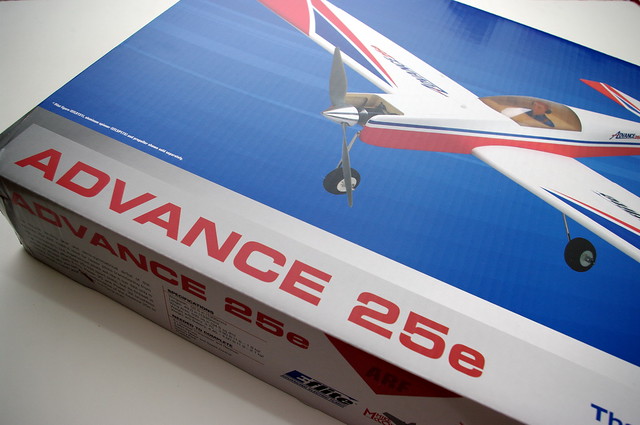
Perhaps the most immediate obvious feature—one that is sure to be attractive to everyone no matter his or her skill level—is the price. The suggested retail price is one penny south of $100!
Kit Contents and Power System Selection
The Advance 25e is designed to help newer pilots transition from a high-wing trainer aircraft to a more advanced low-wing aircraft with a broader flight envelope. A semi-symmetrical airfoil, combined with tricycle landing gear, helps keep the flight performance predictable and honest. The firewall comes pre-drilled for either an E-flite Power 25 or 32 brushless outrunner motor, which is one hint that more-experienced pilots will also enjoy what the E-flite Advance 25e ARF has to offer.
Perhaps the most immediate obvious feature—one that is sure to be attractive to everyone no matter his or her skill level—is the price. The suggested retail price is one penny south of $100!
Kit Contents and Power System Selection
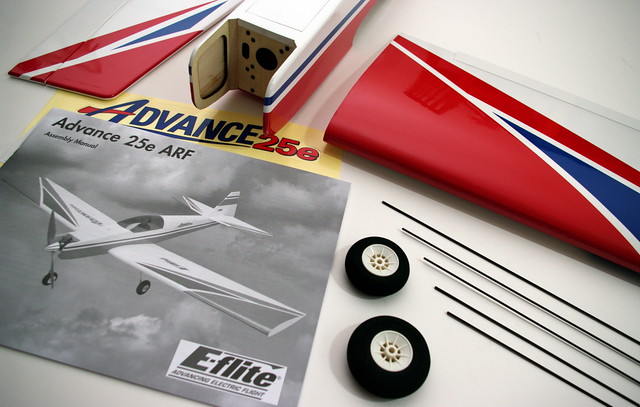
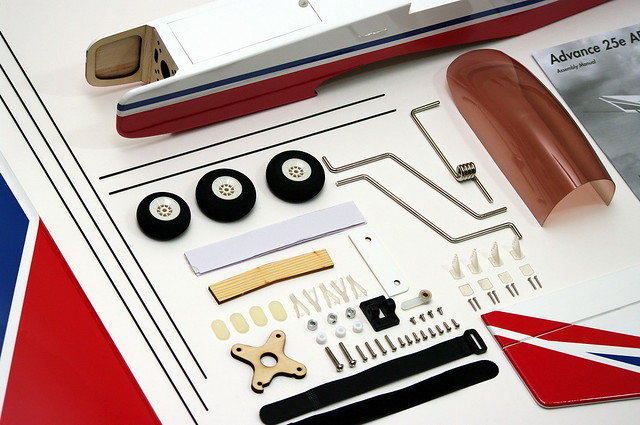
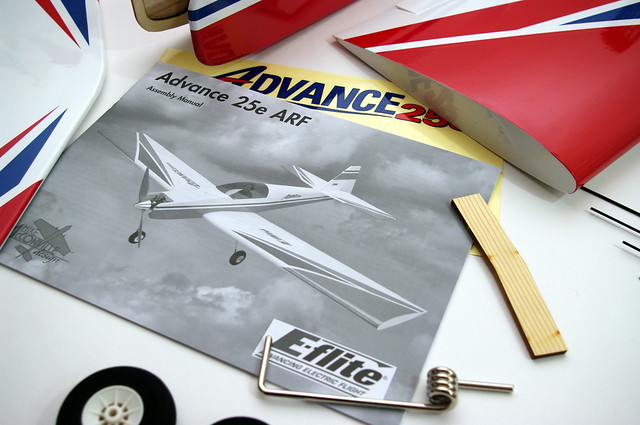 E-flite ARFs have earned a warm spot in my heart for their overall quality and completeness. The Advance 25e adheres to that high standard. The kit comes with everything you will need, save a power system and radio system (minimum four-channel required). The 36-page black and white photo-illustrated assembly manual is available electronically as a PDF. It’s clear and thorough description of the assembly process all but guarantees a successful build.
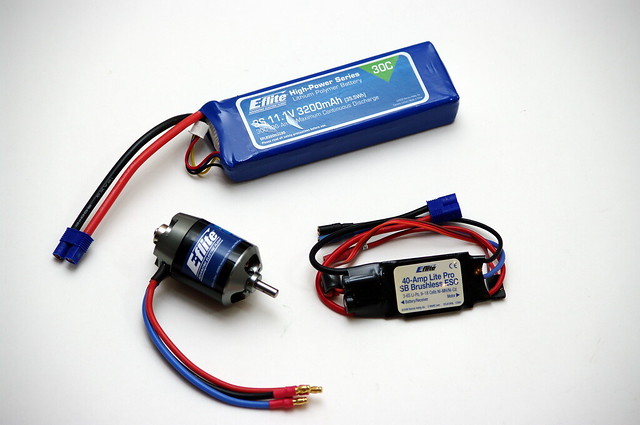 Before launching into the build, the builder has a one critical decision to make. The Advance 25e is seamlessly designed to accept one of two different power systems. Before arbitrarily deciding that more power is always better and springing for the hotter Power 32 configuration, let me aver that flying on less power will assuredly make you a better pilot.
I digress back to my first RC model, a Sig Colt. The Colt was a 15-size high-wing trainer. Though not an ARF, it shared a few features with the Advance 25e. Notably, it had a foam-core wing and tricycle gear, just as the E-flite Advance 25e does. I installed a little Enya 15-size two-cycle engine on that Colt and it would barely roll across my grassy runway at full throttle. Takeoffs were always tricky and a bit of work in energy management. In spite of it all, I learned not only to fly, but to fly well using that model.
The moral of the story is this: Having an abundance of power at your disposal is not necessarily the most advantageous scenario for a beginning pilot. Conversely, having a modest amount of power on tap and learning to fly “on the wing” will teach the beginning pilot valuable lessons, concepts, and physics that will stay with you and benefit you over the life of your involvement with the hobby. You will be a better pilot if you learn early on in your “career” to fly with a modest power system.
Rant off! On to the build!
Assembly
Assembling the E-flite Advance 25e involves basic and fundamental ARF building techniques.
Before launching into the build, the builder has a one critical decision to make. The Advance 25e is seamlessly designed to accept one of two different power systems. Before arbitrarily deciding that more power is always better and springing for the hotter Power 32 configuration, let me aver that flying on less power will assuredly make you a better pilot.
I digress back to my first RC model, a Sig Colt. The Colt was a 15-size high-wing trainer. Though not an ARF, it shared a few features with the Advance 25e. Notably, it had a foam-core wing and tricycle gear, just as the E-flite Advance 25e does. I installed a little Enya 15-size two-cycle engine on that Colt and it would barely roll across my grassy runway at full throttle. Takeoffs were always tricky and a bit of work in energy management. In spite of it all, I learned not only to fly, but to fly well using that model.
The moral of the story is this: Having an abundance of power at your disposal is not necessarily the most advantageous scenario for a beginning pilot. Conversely, having a modest amount of power on tap and learning to fly “on the wing” will teach the beginning pilot valuable lessons, concepts, and physics that will stay with you and benefit you over the life of your involvement with the hobby. You will be a better pilot if you learn early on in your “career” to fly with a modest power system.
Rant off! On to the build!
Assembly
Assembling the E-flite Advance 25e involves basic and fundamental ARF building techniques.
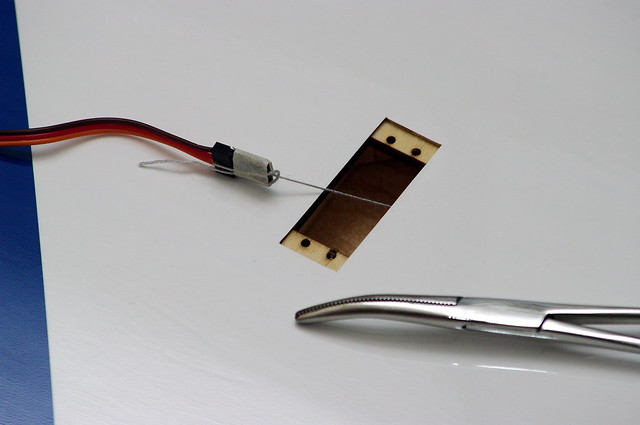 I used five-minute epoxy and both thin and medium CA adhesives. I recommend no tool box be without are a pair of hemostats and a cloth measuring tape. The former is of great assistance any time you need to reach down into the fuselage or wing to route and channel wiring, as well as when you insert the twin hook and loop battery fastener straps. The latter is invaluable in verifying that the tail surfaces are symmetrically positioned prior to permanently attaching them to the rear of the fuselage. A pair of Z-bend pliers can be useful in making short work of assembling the push rods.
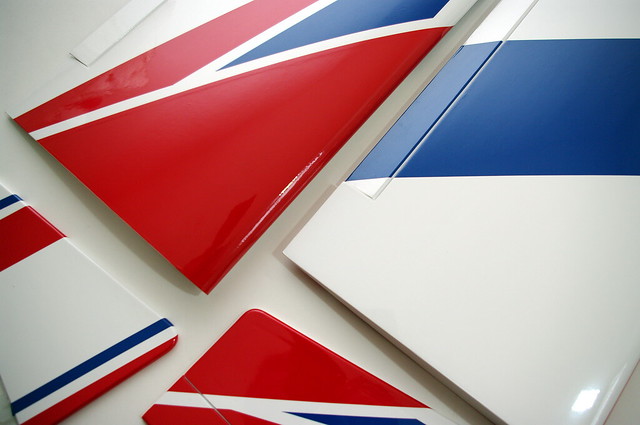 The airframe comes out of the box pre-covered in Ultracote covering. Though red, white, and blue covering schemes are often employed, I found the Advance 25e’s color scheme particularly snappy looking! The assembly manual provides a comprehensive list of spare parts and part numbers, as well as the order codes for the Ultracote covering used on the Advance 25e.
The two-piece wing is, as previously noted, foam-core composition. The ailerons run almost the full length of the trailing edges of the wings. They are attached to the wings by means of CA hinges. The aileron servos slip into servo boxes that are built into the underside of the wing halves.
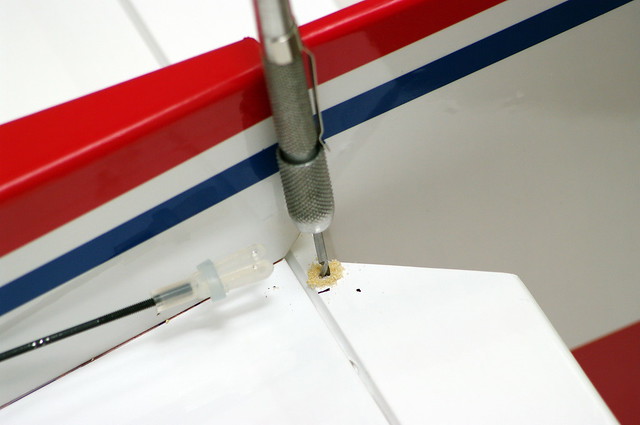
The servo mounting holes are pre-drilled in the lite-ply mounting surfaces and are perfectly spaced if using the recommended JR Sport MN48 mini servos. Always pre-thread the servo mounting screws into the holes, then remove them and apply a few drops of thin CA (without using any accelerator) to harden the threads in the hole. I used my hemostats to reach down into the servo box and grab the servo lead pull string. The servo leads on the MN48 servos were just long enough to reach to the exit holes located atop and at the center of the wing halves.
The photos in the assembly manual will help you get the aileron servo pushrods assembled and properly located towards the outside of the wing assemblies. I used five-minute epoxy to join the wing halves together, although you may be more comfortable using the 15-minute variety, to have a little more time to work before the adhesive begins to harden.
Though the assembly manual suggests that you relieve a line down the center line of the wing bolt plate using a sharp hobby knife, I somehow missed this step. I can report, though, that because the ply-wing bolt plate was flexible enough, and the bond of my medium CA strong enough, it still went together with no problems.
The airframe comes out of the box pre-covered in Ultracote covering. Though red, white, and blue covering schemes are often employed, I found the Advance 25e’s color scheme particularly snappy looking! The assembly manual provides a comprehensive list of spare parts and part numbers, as well as the order codes for the Ultracote covering used on the Advance 25e.
The two-piece wing is, as previously noted, foam-core composition. The ailerons run almost the full length of the trailing edges of the wings. They are attached to the wings by means of CA hinges. The aileron servos slip into servo boxes that are built into the underside of the wing halves.
The servo mounting holes are pre-drilled in the lite-ply mounting surfaces and are perfectly spaced if using the recommended JR Sport MN48 mini servos. Always pre-thread the servo mounting screws into the holes, then remove them and apply a few drops of thin CA (without using any accelerator) to harden the threads in the hole. I used my hemostats to reach down into the servo box and grab the servo lead pull string. The servo leads on the MN48 servos were just long enough to reach to the exit holes located atop and at the center of the wing halves.
The photos in the assembly manual will help you get the aileron servo pushrods assembled and properly located towards the outside of the wing assemblies. I used five-minute epoxy to join the wing halves together, although you may be more comfortable using the 15-minute variety, to have a little more time to work before the adhesive begins to harden.
Though the assembly manual suggests that you relieve a line down the center line of the wing bolt plate using a sharp hobby knife, I somehow missed this step. I can report, though, that because the ply-wing bolt plate was flexible enough, and the bond of my medium CA strong enough, it still went together with no problems.
 The main landing gear are pre-bent and fit into slots cut into the hardwood blocks mounted in the bottom of the wing assembly. It is up to the builder to properly locate and drill the holes for the landing-gear straps. Hardening the holes with CA after first threading the mounting screws in and out once will strengthen them to endure the inevitable less-than-perfect landing.
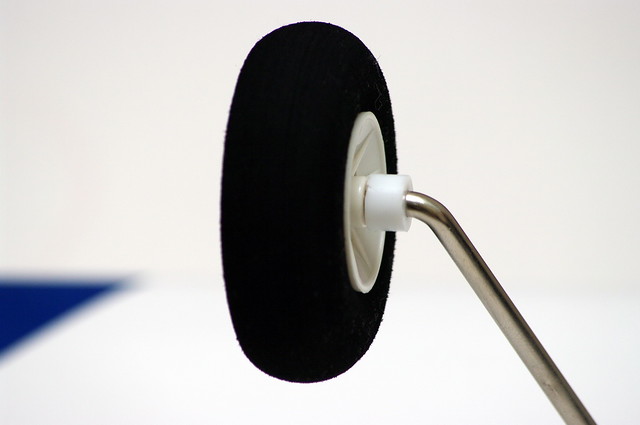 I like the nylon or plastic wheel spacers that E-flite provides as standoffs of a sort. They are used to space the three wheels out from the 90° bends on the gear, while a traditional wheel collar is used to secure the wheel assemblies to the axles.
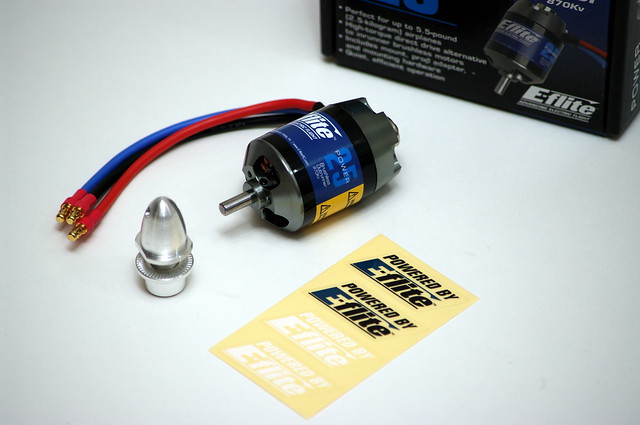
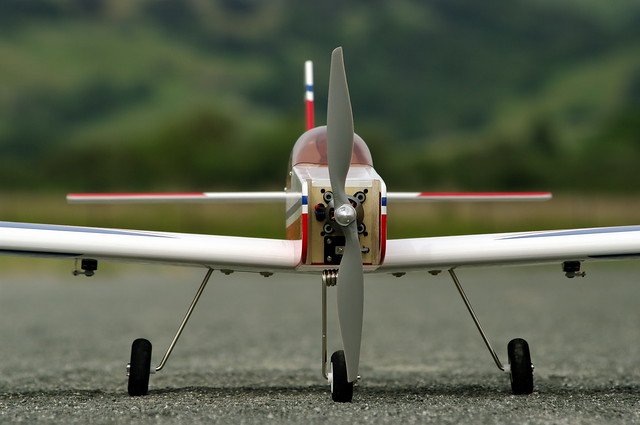
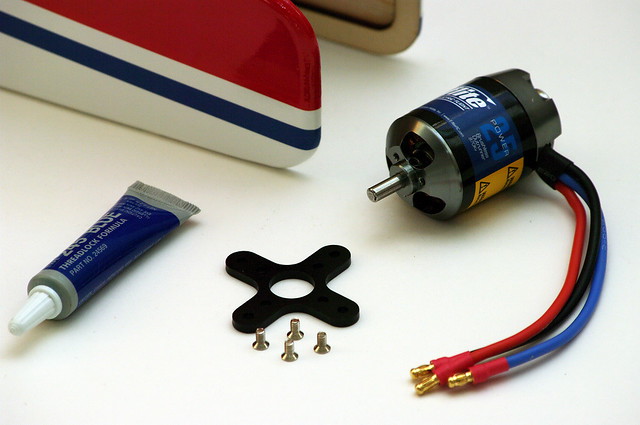 Assembly of the fuselage involves mounting the power system components and radio system components. The Advance 25e is designed to accept either the E-flite Power 25 or 32 brushless outrunners, with no modifications necessary. Though similar in power rating, the form factor of the two motors is different.
The nose-wheel steering assembly is also addressed during the assembly of the fuselage. Though most of the details are handled at the factory, it is necessary to grind flat spots on all of the axles, so the wheel-collar set screws will stand a better chance of keeping the wheels in place. And don’t forget a drop of thread-locking compound on the set screws!
Assembly of the fuselage involves mounting the power system components and radio system components. The Advance 25e is designed to accept either the E-flite Power 25 or 32 brushless outrunners, with no modifications necessary. Though similar in power rating, the form factor of the two motors is different.
The nose-wheel steering assembly is also addressed during the assembly of the fuselage. Though most of the details are handled at the factory, it is necessary to grind flat spots on all of the axles, so the wheel-collar set screws will stand a better chance of keeping the wheels in place. And don’t forget a drop of thread-locking compound on the set screws!
 While making my way through the assembly of my Advance 25e, I found myself consciously impressed with the accuracy of the position of all the pre-drilled holes. All of them were spot on and required no rework to get the components to fit correctly or the mounting holes to line up.
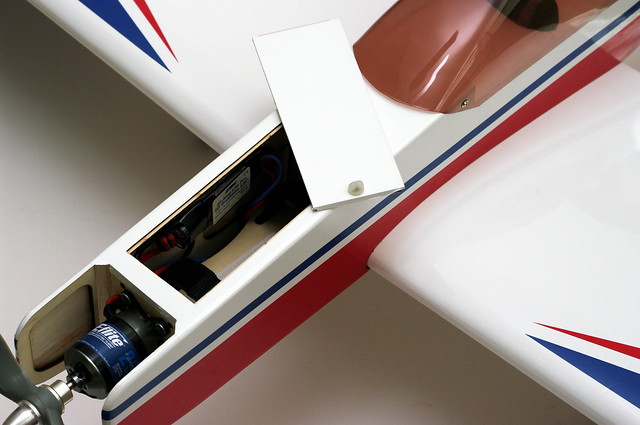 The battery compartment is accessed via a removable hatch on the top forward section of the fuselage. A half turn on the plastic latch will release the hatch for removal. The recommended 3S 3200mAh LiPo battery fits with a little room to spare and can be shifted forward or aft as an aid in getting the center of gravity (CG) correct.
E-flite recommends using twin hook and loop straps around the battery tray, as well as a strip of hook and loop on the battery and battery tray, to keep the LiPo anchored. I found myself a bit frustrated with the mechanics of inserting a battery and getting both hook and loop straps cinched up tightly around it; my small hands had a difficult time navigating the limited space of the battery compartment.
The battery compartment is accessed via a removable hatch on the top forward section of the fuselage. A half turn on the plastic latch will release the hatch for removal. The recommended 3S 3200mAh LiPo battery fits with a little room to spare and can be shifted forward or aft as an aid in getting the center of gravity (CG) correct.
E-flite recommends using twin hook and loop straps around the battery tray, as well as a strip of hook and loop on the battery and battery tray, to keep the LiPo anchored. I found myself a bit frustrated with the mechanics of inserting a battery and getting both hook and loop straps cinched up tightly around it; my small hands had a difficult time navigating the limited space of the battery compartment.
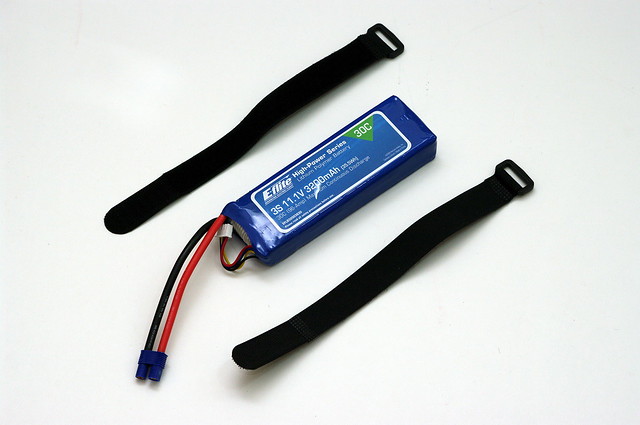 I eventually decided to lighten my battery change workload by going with just one of the two hook and loop straps. This sole strap, coupled with the hook and loop fastener which attaches the LiPo directly to the battery shelf, is more than capable of keeping the battery securely in place.
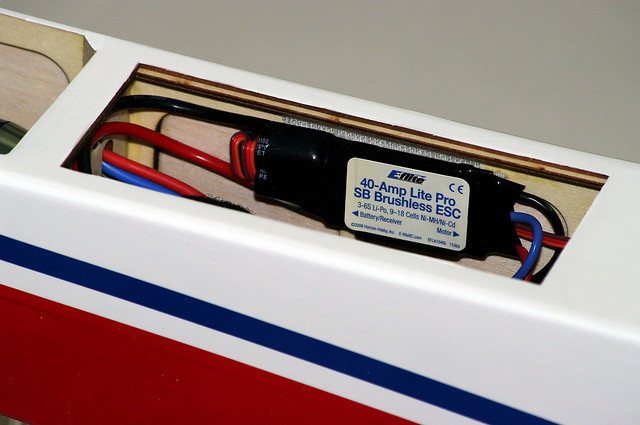 Hook and loop is also used to place the speed controller on the side wall of the battery compartment. The rudder and elevator servos slip nicely into rectangular cutouts that are pre-cut into the plywood radio tray and include pre-drilled servo mounting holes. I used a little hot glue to stick the Spektrum AR7600 receiver to this same wooden tray.
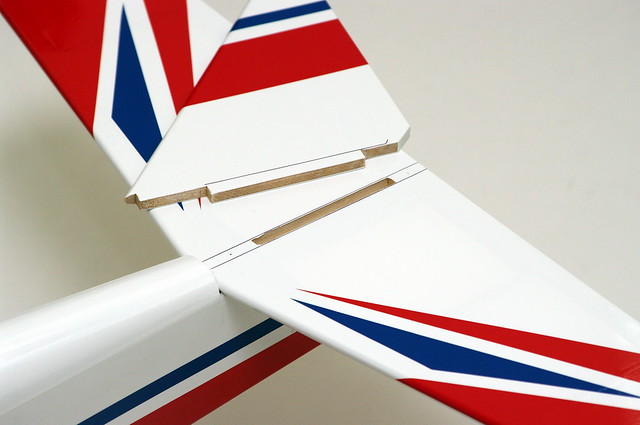 The tail components are attached using 5-minute epoxy. It is necessary to remove a little covering in a few places before they are epoxied to the fuselage. Inserting the push rods into their pre-positioned tubes in the fuselage allows them to serve as a guide for the location of the elevator and rudder servo control horns.
 The payoff for being 100% sure that you have the tail components properly oriented and positioned is an airplane that flies true. The assembly manual clearly lays the process out; sticking closely to its directions will result in a problem-free empennage assembly.
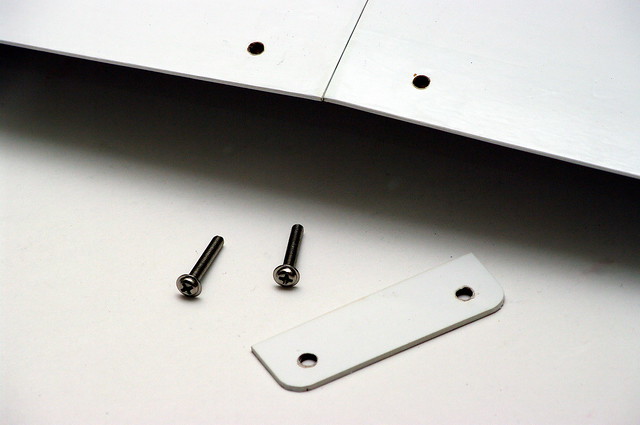
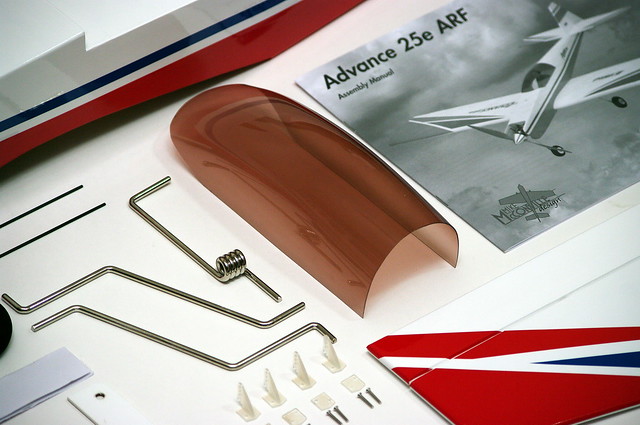 The final assembly of the Advance 25e includes decal placement and canopy installation. The canopy is tinted a reddish-brown color. A pilot figure is not supplied with the kit. I requisitioned one from my box of pilots who are currently without a ride. I used medium CA to get him properly situated in the cockpit, and then used four small screws to lock the canopy in place around him. The assembly manual also offers an alternate method of using canopy glue (RC56) to anchor it in place.
 One smaller sheet of decals is included in the box; it includes brand logos and icons, as well as several Advance 25e monikers. E-flite lists an aluminum spinner as an available option. I like the way a spinner dresses the nose out a bit, too. While mounting the propeller and spinner, however, I was unfortunate enough to have the shaft of the spinner assembly shear off as I tightened the assembly. I was forced to revert back to the spinner nut included with the motor assembly.
Recommended control throws—both high and low rates—are listed in the manual, as is the recommended CG. I usually start with the recommended throws and then retune them to my personal tastes after I have logged sufficient time on the model. The recommended CG must also be verified prior to going airborne with the Advance 25e. There is ample space in the battery compartment to shift the battery forward and aft in order to get the CG correct.
Flying the Advance 25e
One smaller sheet of decals is included in the box; it includes brand logos and icons, as well as several Advance 25e monikers. E-flite lists an aluminum spinner as an available option. I like the way a spinner dresses the nose out a bit, too. While mounting the propeller and spinner, however, I was unfortunate enough to have the shaft of the spinner assembly shear off as I tightened the assembly. I was forced to revert back to the spinner nut included with the motor assembly.
Recommended control throws—both high and low rates—are listed in the manual, as is the recommended CG. I usually start with the recommended throws and then retune them to my personal tastes after I have logged sufficient time on the model. The recommended CG must also be verified prior to going airborne with the Advance 25e. There is ample space in the battery compartment to shift the battery forward and aft in order to get the CG correct.
Flying the Advance 25e
 My Advance 25e came in at an AUW (all-up weight) of 3.75 pounds. The E-flite Power 25 power system is good for approximately 375-390 watts when spinning an APC E 12 x 8 propeller. That makes for approximately 100 watts per-pound of performance.
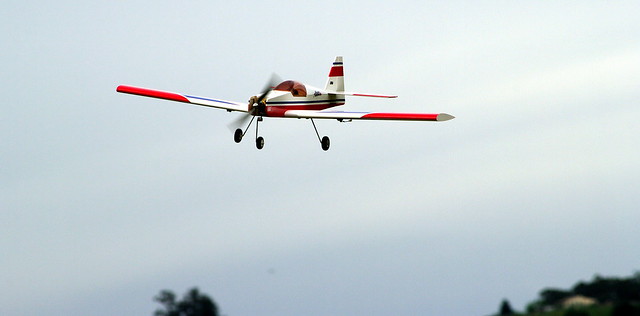
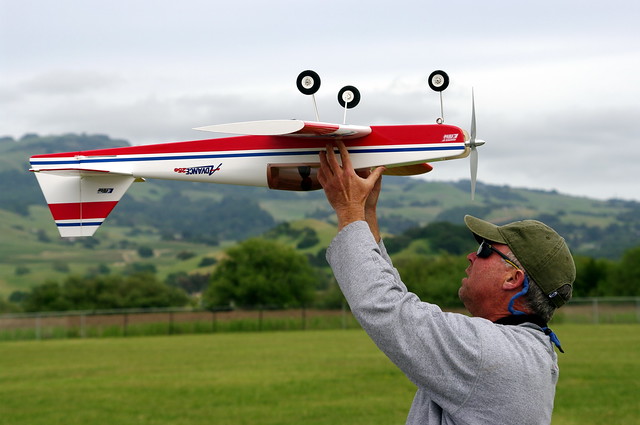
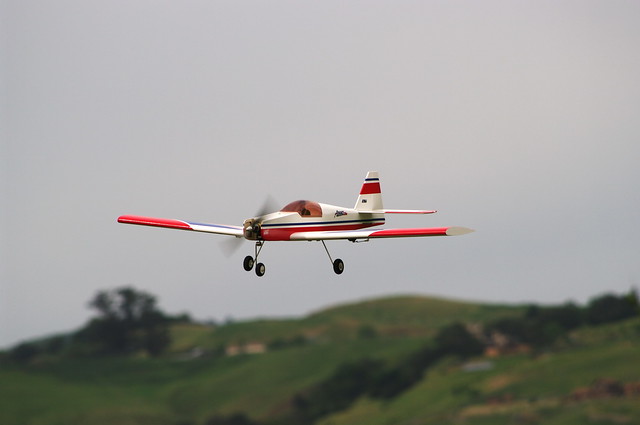
 The field where I often fly suffers from a strong crosswind component, especially during the late spring month of May. A tricycle-gear equipped model such as the Advance 25e serves as an excellent platform to learn how to make crosswind takeoffs and landings. Though the Power 25-equipped Advance 25e has more than enough power to get off the ground quickly, rolling into the throttle slowly and performing a more conventional takeoff will help you develop good crosswind skills.
The light wing-loading of the Advance 25e allows slow and stable approaches. Should you get a little slow on final, the stall is clean, soft, and straight ahead. Modulate the throttle on final to control descent and the Advance will settle in nicely on the mains first, dropping onto the nose gear as the final bit of forward-velocity melts away.
The field where I often fly suffers from a strong crosswind component, especially during the late spring month of May. A tricycle-gear equipped model such as the Advance 25e serves as an excellent platform to learn how to make crosswind takeoffs and landings. Though the Power 25-equipped Advance 25e has more than enough power to get off the ground quickly, rolling into the throttle slowly and performing a more conventional takeoff will help you develop good crosswind skills.
The light wing-loading of the Advance 25e allows slow and stable approaches. Should you get a little slow on final, the stall is clean, soft, and straight ahead. Modulate the throttle on final to control descent and the Advance will settle in nicely on the mains first, dropping onto the nose gear as the final bit of forward-velocity melts away.
 If you need to perform a short-field takeoff, punching the throttle all the way to the stop will have the Advance 25e in the air within a couple of yards. Watch the included video to see several different landings, takeoffs, and even a touch-and-go or two, demonstrated.
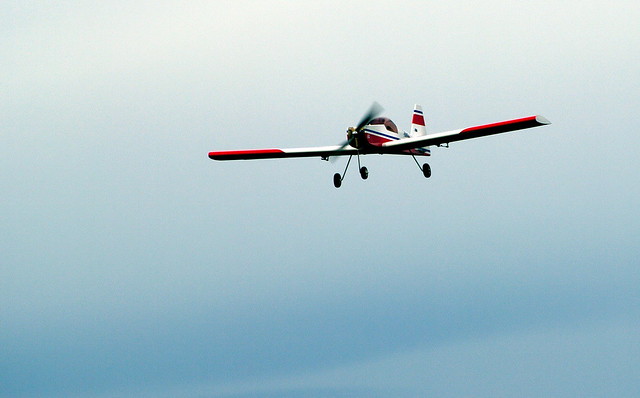
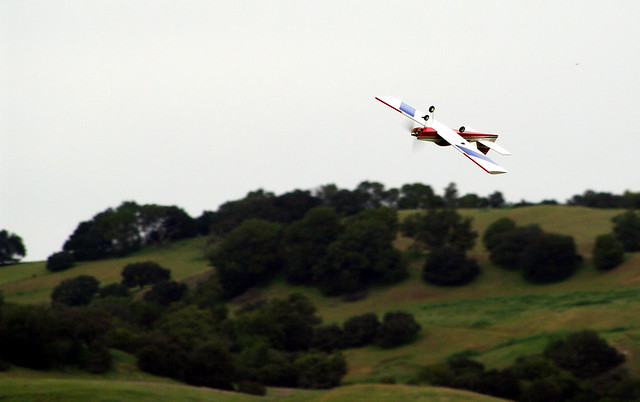 Once in the air, the Advance 25e serves as an excellent airframe to “try new things!” I was pleased with the way it performed knife-edges, as well as its inverted-position performance. While the roll rate is nothing extreme—even on high rates—the Advance 25e will spiral across the sky nicely. Loops, stall turns, Immelmans, Split Ss—if it is an aerobatic maneuver, the Advance 25e is capable of doing it. If you are like me, the real limiting factor may be your thumbs!
 Many of us could use a model exactly like this in our hangars, as it is an all-around capable and honest flier that will reward hard work and practice with results.
Summary
The excitement of developing proficiency with your first model airplane can often lead to a false sense of security and ability as you set about selecting your next airframe.
The E-flite Advance25e can serve as an excellent platform to help pilots develop fundamental skills that will benefit them over the life of their RC “career.” Selecting the Advance 25e as an affordable and capable second airplane is sure to pay off over and over again.
Many of us could use a model exactly like this in our hangars, as it is an all-around capable and honest flier that will reward hard work and practice with results.
Summary
The excitement of developing proficiency with your first model airplane can often lead to a false sense of security and ability as you set about selecting your next airframe.
The E-flite Advance25e can serve as an excellent platform to help pilots develop fundamental skills that will benefit them over the life of their RC “career.” Selecting the Advance 25e as an affordable and capable second airplane is sure to pay off over and over again.
 The output of the Power 25, though not extreme, makes for a plentifully spirited and peppy performance. Move up to the Power 32 and a 4S LiPo for what would surely be an exhilarating power boost! Either motor will bolt right onto the firewall.
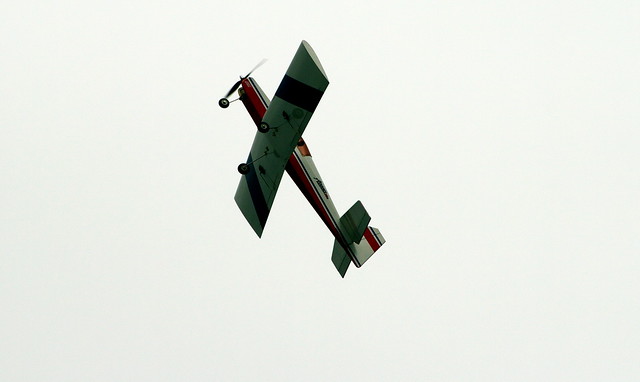
 The sound and sight of the Advance 25e in a sustained knife-edge is just cool! The E-flite 3S 3200mAh LiPo makes for flight durations upwards of ten minutes, with varied throttle settings. Push it hard and you will of course get less time between charges.
The E-flite Advance 25e ARF can be built in 4-6 hours, no doubt in part because of its precise fit and finish. I was a little let down that I could not use the optional aluminum spinner because of the shaft shearing off when I tightened the propeller nut. I also wish manufacturers would include a pilot bust, even if it is only a basic one.
Notable features:
• Amazing price point
• Seamlessly accepts two different power systems, with no modifications necessary
• Predictably stable flight performance
• Fully aerobatic airframe
• Quick assembly, in part due to the precise fit and finish of the kit
Sources:
E-flite Advance 25e ARF
(217) 352-1913
www.e-fliterc.com/Products/Default.aspx?ProdID=EFL4225
Horizon Hobby Distributors
(800) 338-4639
www.horizonhobby.com/
The sound and sight of the Advance 25e in a sustained knife-edge is just cool! The E-flite 3S 3200mAh LiPo makes for flight durations upwards of ten minutes, with varied throttle settings. Push it hard and you will of course get less time between charges.
The E-flite Advance 25e ARF can be built in 4-6 hours, no doubt in part because of its precise fit and finish. I was a little let down that I could not use the optional aluminum spinner because of the shaft shearing off when I tightened the propeller nut. I also wish manufacturers would include a pilot bust, even if it is only a basic one.
Notable features:
• Amazing price point
• Seamlessly accepts two different power systems, with no modifications necessary
• Predictably stable flight performance
• Fully aerobatic airframe
• Quick assembly, in part due to the precise fit and finish of the kit
Sources:
E-flite Advance 25e ARF
(217) 352-1913
www.e-fliterc.com/Products/Default.aspx?ProdID=EFL4225
Horizon Hobby Distributors
(800) 338-4639
www.horizonhobby.com/This Month's Issue

Join the AMA
![]()


Add new comment