


Microaces R.A.F. SE5a
Written by Joe Malinchak Micro-Flying Column As seen in the September issue of Model Aviation.
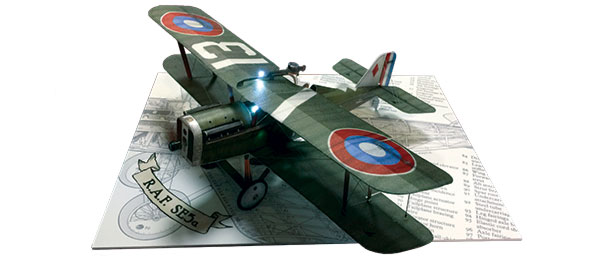
I mentioned in past columns that I am a big fan of the Microaces line of kits. The company is doing a wonderful job of designing model aircraft with amazing details and graphics that are fun to build and stand out from RTF models of the same type. One airplane in the line of Microaces kits is a R.A.F. SE5a. It is designed to be an easy-to-fly, three-channel aircraft that uses a Spektrum AR6400 Ultra Micro Receiver/ESC brick. However, I wanted to see how this model would fly using four channels with a lightweight receiver and lightweight servos for aileron control. The 1/24-scale Microaces Aero R.A.F. SE5a is a nice size with a 14.5-inch wingspan. The kit comes with beautifully printed, laser-cut 1mm Depron foam parts, 200 micron printed and laser-cut polypropylene sheeting, and a polyester sticker sheet. The kit also includes hardware such as pushrods and control horns that are needed to complete the model.
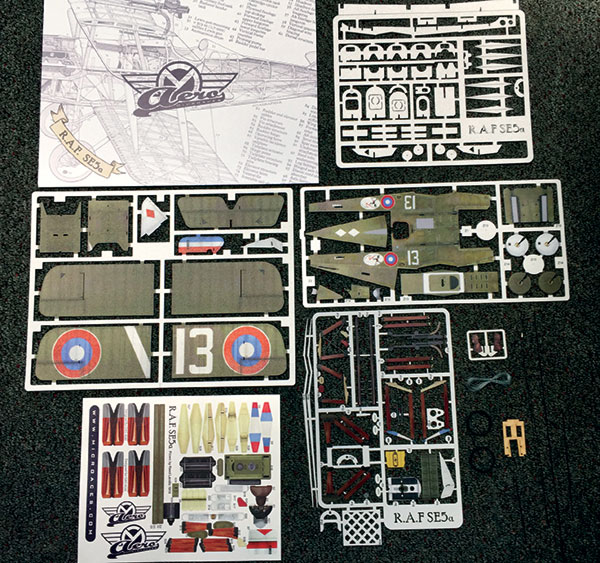
The Microaces R.A.F. SE5a comes with everything shown, including highly detailed printed foam and thin plastic parts, a sticker sheet, and a beautiful display board.
You merely need to purchase one of the recommended receivers, a motor/gearbox, a battery, a propeller, and a propeller adapter to complete the aircraft. A beautiful display board for your model is also included—a nice touch! The construction manual is available online on the Microaces website. I downloaded it to my phone so that I could easily reference it while building the model. I recommend that you read through and familiarize yourself with the manual before starting construction. The aircraft is not hard to build, but some of the construction techniques might be new to you if this is your first Microaces kit. This is the second of this type for me, and I found it much easier than the first because both use similar construction methods. Construction starts with the fuselage. The 1mm printed fuselage is laid over a pattern that is printed from the manual and scored in certain areas using the back of a knife blade. This allows the foam to bend around a Depron frame. I used a #11 knife blade. With a little practice, it is a fairly easy task.
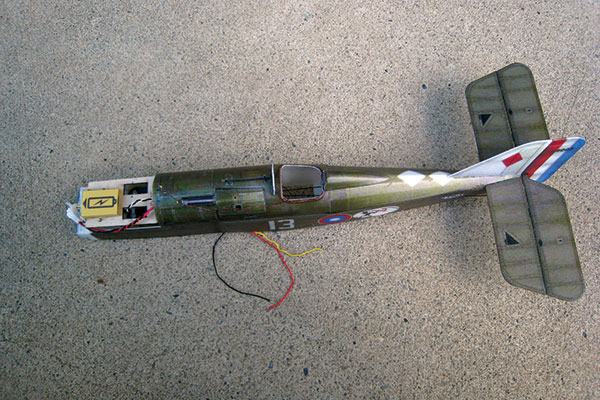
The 1mm printed foam fuselage is created by bending it around a Depron airframe for strong, lightweight construction. The author used two 1-gram muscle wire servos for elevator and rudder control.
Construction of the wings is straightforward, and a dihedral jig is included to aid in assembly. For aileron control, I installed two Micro Flier Radio ultralightweight 0.7-gram servos that I mounted on the underside of the bottom wing. I added linkage to connect the ailerons from the bottom wing to the top wing so that all four ailerons would function. I used 1-gram muscle wire servos for elevator and rudder control. I needed a quality, lightweight receiver with at least five channels for this model. I decided on a seven-channel DelTang (DT) Rx37-F receiver because it weighs only 0.33 grams and has two built-in brushed ESCs. I followed the construction manual for the rest of the model’s assembly.
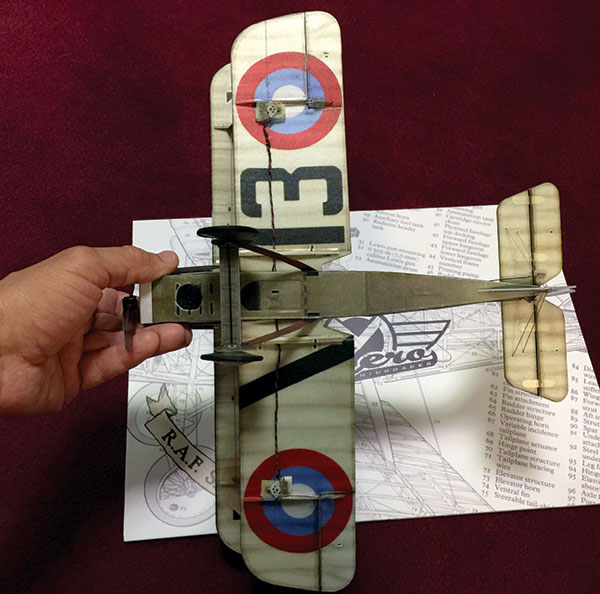
The author used two Micro Flier Radio ultralightweight servos mounted on the underside of the bottom wing for positive aileron control. The Arcox sound system speaker mounted in the nose is visible in this photo.
Arcox Machine Gun Simulator
Richard Cox developed a device that simulates the sound and light of a machine gun for micro RC aircraft. The system consists of a small PC board and an external speaker that is approximately 17mm x 8mm. The connectors are mounted on the PC board for connection to the receiver servo output, the speaker, and the primary LED. You simply need to add a cable for the receiver connection, an LED, and some wire. The system weighs 3.8 grams without the wires. The light system can work with two LEDs that flash together in synchrony with the machine gun sound, or alternately with a sound for each. I had to install this system in my Microaces SE5a. I mounted the small speaker under the nose and cut a small area to release the sound. Richard provided a wiring diagram, and I found that soldering the unit to the DT Rx37-F receiver was easy. I used channel five (for gear) on the DT Rx37-F receiver, so the sound system activates with a flip of the transmitter’s toggle switch. For those who are interested in purchasing the system, you can contact Richard Cox at Arcox Engineering for more information.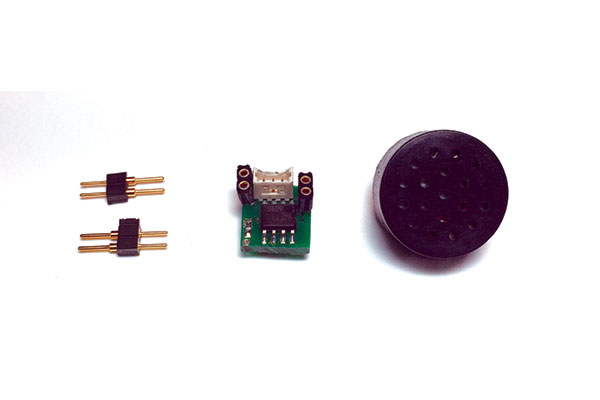
The Arcox Machine Gun Simulator consists of a small PC board and an external speaker. The system can work with two LEDs that flash in synchrony with the machine gun sound, or alternately with a sound for each.
In the Air
My model weighed 44 grams ready to fly with a 150 mAh LiPo battery. I completed my Microaces SE5a right before the deadline of this month’s column, and I put in a test flight. The weather was not that great, with some wind and light rain, but I did get in a few flights. The aircraft flew well considering the conditions. I took it up high and performed some rolls and loops. The roll rate was somewhat slow, even with the large amount of aileron throw I was getting. I will add some rudder/aileron mix before the next flight. Doing flybys with the machine gun sound system firing is loads of fun. With working ailerons and the Arcox Machine Gun Simulator, this model is the ultimate Microaces SE5a! Check out the Microaces website for more information about this airplane, as well as the company’s impressive line of kits. -Joe Malinchak [email protected]Sources:
Microaces [email protected] www.microaces.com Micro Flier Radio (941) 377-9808 www.microflierradio.com DT [email protected] www.deltang.co.uk Arcox Engineering (805) 490-6507 www.arcox.comThis Month's Issue

Join the AMA
![]()


Add new comment