


Top 5 Tips for Building Your First Racing Drone
Written by Matt Ruddick Follow along and be flying in no time How-to As seen in the July 2017 issue of Model Aviation.
Bonus video
It is often said that multirotors are quickly becoming a focal point of the younger modeling crowd. This statement usually elicits images of a dozen different aerial photography drones hovering in the park or somewhere they’re probably not supposed to be. However, there’s another group of enthusiasts that is doing something a little different. These pilots like to strap a pair of goggles on their heads and see who can be the fastest on the racecourse they’ve set up at their flying field. If you’ve ever seen one of the quadcopters used to compete in these air-based Formula 1-style races, you’ll quickly discover that most of them aren’t exactly RTF models that were bought off the shelf. They are custom-built machines that each pilot has put his or her own blood, sweat, and tears into just to get in the air. Hours of researching the latest technology, on top of hours of soldering, bolting, and more soldering allow these aircraft to scream through the course in search of bringing home the top prize. Although the barrier to entry might seem steep at first, building one of these quadcopters isn’t as scary as you might think. With the right know-how and some advice from those who’ve come before you, an FPV-capable racing drone can be part of your fleet in no time. To get you started, here are five tips for building your first racing drone.
So Many Frames, So Little Time
Now that you’ve decided to build your first quadcopter, you need to choose a frame. Believe it or not, you’ll need to give some thought to this decision, and not just because you want something that looks cool! Different frame types and sizes all have their specialties and strengths. They also have their weaknesses. Frames can measure anywhere from 2 to 7 inches (named for the maximum propeller size they can support). With the right motors, you can usually count on the larger frame sizes having a higher top speed, but they will likely be less nimble. Likewise, the smaller frames will have lower top speeds, but can maneuver tight courses easier. To make things more confusing, you’ll need to choose a shape. The three most popular frame shapes today are the H-frame, the True-X frame, and the Stretched-X frame. Like the sizes, these shapes have their strengths and weaknesses. H-frames, such as a Blackout Mini, are favored by pilots who specialize in freestyle and who like to carry a GoPro or similar HD camera on their aircraft. They also generally utilize a top-mounted battery configuration.
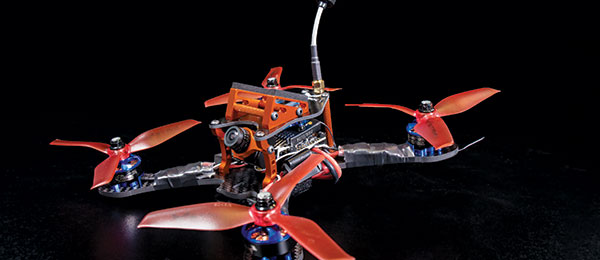
X-frames, such as the Awk210 from Strix, offer a well-balanced handling profile and tighter CG.
True-X frames, such as an AWK210 from Strix, are favored by racing pilots who prefer a tighter center of gravity (CG) for more neutral maneuvering. These aircraft often utilize a bottom-mounted battery configuration. Finally, the Stretched-X frame is the latest style to come onto the marketplace and is favored by racers to replace the True-X. The advantage of this frame is that it offers more stable forward flight and tighter rolls for faster turns. There’s a reason why I’ve made this first on the list: The frame you choose can dictate some of your other components. H-frames offer more room for bigger components. X-frames typically utilize a stacked configuration and will lend themselves to smaller components. In the end, you need to choose a frame based on your needs.
A Test Fit Is a Good Fit
It’s easy to gather all of your parts and start diving into a build. After all, the quicker you finish building, the sooner you can be flying! However, it’s a good practice to test fit each of your components to ensure everything fits neatly inside of your frame.
Before you begin, lay out all of your parts to make sure everything is there. Then do a test fit to ensure you have room for each component.
You might find that your video transmitter doesn’t fit the way it should and needs longer standoffs for your top plate. You could also discover that your wiring gets in the way of your camera. These types of problems can easily be fixed if you know about them before you begin assembly.
Tool Time
It has frequently been stated that you should have the right tools for the job. That tried-and-true sentiment is one you should take to heart when building your quadcopter. One advantage we all have is that most manufacturers utilize similar-size hardware in their kits and accessories. For example, you’ll find that most motor manufacturers use the same size of hex screw for their motor mounts, and most frame manufacturers use similar-size hardware to assemble their frames.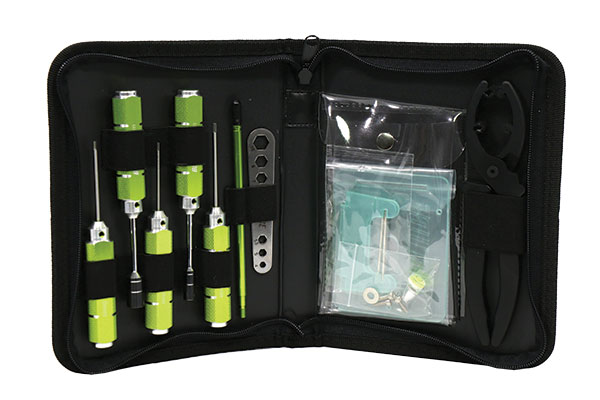
Specialized tool sets such as this Quad Racer Tool Kit from Horizon Hobby have many of the tools you need to assemble your quadcopter.
What this means is that you can pick up a modest tool set that is specifically designed for working on quadcopters from any of the many online shops or local hobby shops. I use a Quad Racer Tool Set from Horizon Hobby. That set contains three hex drivers and two nut drivers, and I’ve yet to need a size that isn’t included. Some other specialty tools to consider having on hand include: • Hobby knife • Wire cutters • Electrical tape • Double-sided tape • Heat-shrink tubing • A good-quality, temperature-controlled soldering iron
Solder, Solder, and More Solder
Did I mention the importance of having a good-quality, temperature-controlled soldering iron? Ah yes, I believe I did. There’s a reason why this tool should be singled out. No matter what kit you choose, you will almost definitely need to solder something along the way. Now if you consider yourself somewhat of a soldering professional, then you’ll likely be fine with your build. However, if you’re not sure of the difference between a soldering iron and a 9-iron, then this might be worth paying attention to. There are parts of the building process that are pretty simple and are difficult to do incorrectly. Soldering, on the other hand, is a skill that, if done poorly, can cause your quadcopter to behave inconsistently. You might find that your aircraft falls out of the sky for no apparent reason, or you could discover that your flight controller won’t even boot up when you plug in your battery. It’s possible that if you’ve shorted the wrong leads on your build, your whole quadcopter could go up in smoke.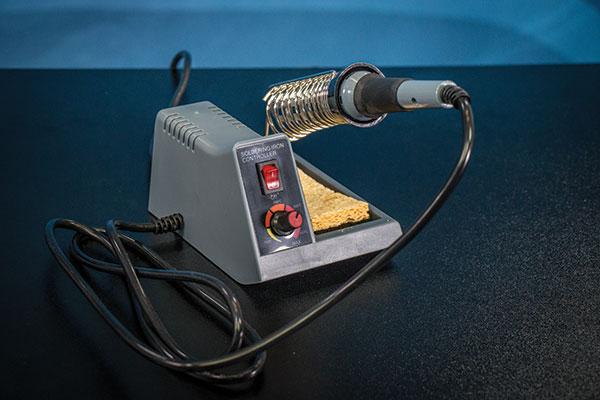
A good temperature-controlled soldering iron such as this one from Stahl Tools is critical to a well-built quadcopter that flies well.
Now, don’t let all of that doom and gloom concern you. Find someone who builds quadcopters who hasn’t had a bit of “magic smoke” fill his or her workbench, and I’ll send you $10. On second thought, maybe I’ll just give you 10 high fives. At any rate, soldering isn’t a scary thing, but it does take some practice! Luckily, there are many soldering practice kits available on the market, and it’s worth picking one up to hone your skills, instead of potentially catching your aircraft on fire. In addition, you could ask for help with your soldering skills. There’s a good chance that a friend of a family member knows how to solder and can show you some tips.
More Motors Please!
While you’re shopping for motors for your project, it will be easy to get caught up in the different brands, colors, and thrust ratings. After you decide which motor suits your build the best, make sure to purchase an extra one to keep on hand in case of a failure. Crashing is inevitable and you will be glad you have an extra motor to make a quick repair. Remember, flying is still more fun than waiting on the big brown truck.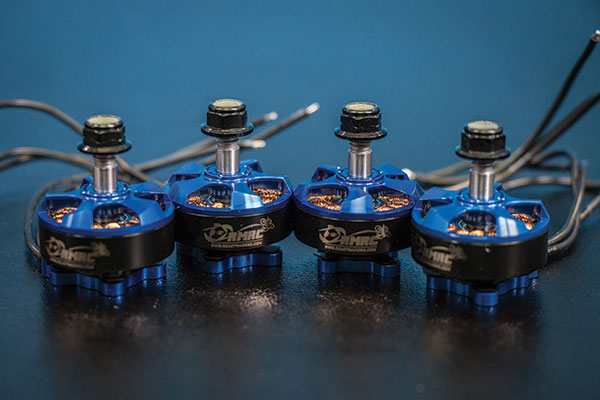
Although you only need four motors to get a quadcopter into the air, you might want to order an extra in case a crash renders one inoperable.
Like generations of builders that have come before can attest, a great sense of satisfaction comes from completing a project such as this. The first time you successfully hover your new quadcopter, you’ll likely feel a combination of elation, accomplishment, and a pinch of fear that you might not have tightened your propellers down enough. Soon that feeling will subside and you will be on your way to racing your drone against the top pilots across the country with the knowledge of how you can fix it once you crash … and you will crash and you will fix it. I’ll see you at the track. —Matt Ruddick [email protected]
Sources:
Horizon Hobby (800) 338-4639 www.horizonhobby.comThis Month's Issue

Join the AMA
![]()


Add new comment