


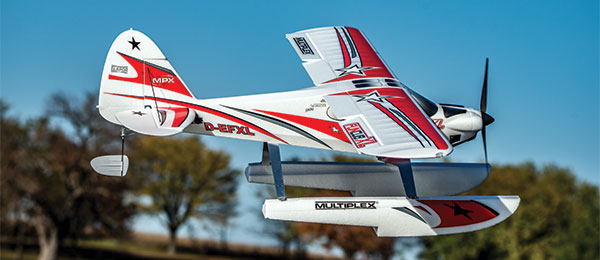
Multiplex FunCub XL
Written by Troy Hamm A Cub that is as enjoyable as it is versatile Product review Photos by Kevin Schmidt and Bernie Nosal As seen in the January 2016 issue of Model Aviation.
Bonus video
Specifications
Model type: Foam aerobat Wingspan: 67 inches Length: 47.25 inches Weight: 6 pounds, 5 ounces Power system: Permax BL-O 4235-0480 brushless motor (included) Recommended battery: 22.2-volt 6S 3,200 to 3,300 mAh LiPos Radio: Five-channel minimumTest-model details
Power system: Permax BL-O 4235-0480 brushless motor (included) ESC: BL 60 brushless with BEC (included) Radio system: Futaba 14SG transmitter; Futaba R6008HS eight-channel receiver; six Hitec HS-225BB servos Propeller: 15 x 8 two-blade Battery: Two GForce 3S 3,300 mAh (40c) LiPos Ready-to-fly weight: 6 pounds, 9 ounces Flight duration: 10 minutes Price: $399.99; floats $43.99Pluses
• Includes high-quality electronics. • Preinstalled decals. • Quick and simple build. • Lots of versatility. • Assembles quickly at the field. • Flies fantastic.Minus
• Construction manual could be simplified.Product review
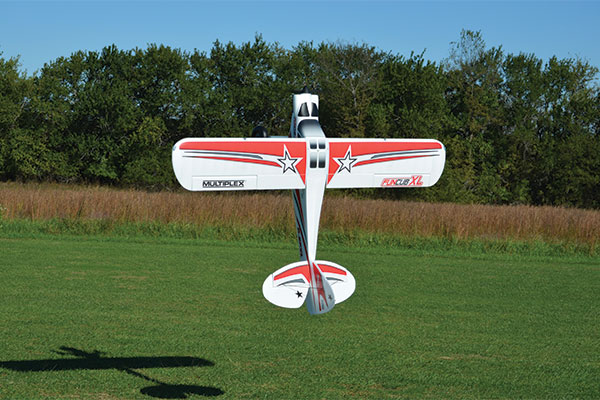
Hitec RCD recently released a larger model of its popular Multiplex FunCub. The 67-inch Multiplex FunCub XL is available in two versions. One is a kit (build it yourself) that does not include any electronics and requires assembling the airframe. For the modeler who prefers a nearly ready-to-fly airplane, the Receiver Ready (RR) version features a prebuilt airframe with preinstalled electronics. The two airframes are identical and are constructed with Multiplex’s Elapor particle foam and feature Multiplex’s “M-Frame technology.” The FunCub XL is designed to be fully aerobatic with oversized control surfaces, plus the large offset flaps provide Short Takeoff and Landing (STOL) capabilities. The FunCub XL is one of the most versatile airplanes available. It can be flown off of water with its optional float kit installed and can be used for aerotowing sailplanes up to 2.5 meters in size. The FunCub XL features an internal cargo bay that can be used for dropping candy or the elective Alfred the Parachutist. The FunCub XL even comes prewired for an optional LED light kit.Assembly
The airplane arrived in a large box. Inside of the box, the airplane was encased in soft foam and was in great condition. A construction manual printed in five languages is included with the FunCub and is also available on Hitec’s website. It covers the kit version’s construction and the assembly of the RR version. The manual does not have separate sections for the kit or the RR model, so when assembling the RR version, the builder will have to weed through the construction segments. There are 12 pages of illustrations in the center of the manual. I found that the airplane can be assembled by using these illustrations alone. The first assembly step is installing the main landing gear. The axles and wheels are preinstalled on the landing gear, so it only takes a couple of minutes to complete this step. Two screws secure the preassembled tail wheel bracket in place. The horizontal stabilizer is installed next. It slides into place in the fuselage and is secured with adhesive.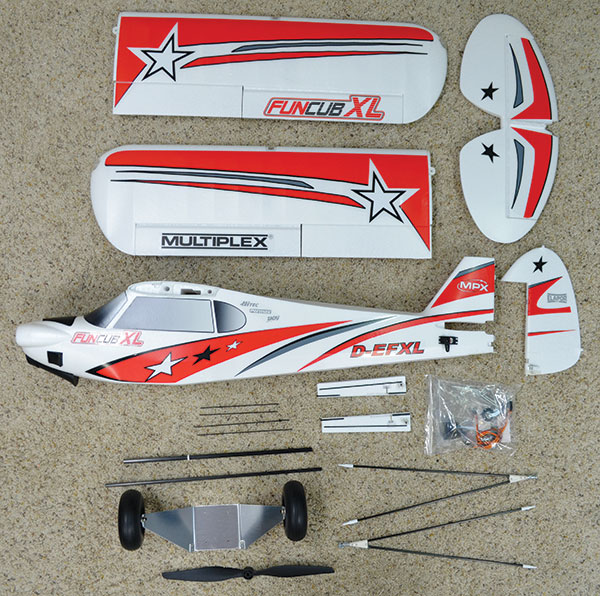
The FunCub XL parts are unpacked and ready to start assembly.

The landing gear, axles, and wheels are premounted. All that is required to complete the landing gear installation is inserting these four screws.
The elevator, ailerons, and flaps come prehinged and already have the control horns in place. The rudder installation takes little time because it merely snaps into place on the vertical stabilizer. Four carbon-fiber rods are used for the stabilizer struts. The two longer rods are glued in place on the top of the horizontal stabilizer and the two shorter ones go on the bottom of the stabilizer. The rudder and elevator servos are premounted in the fuselage, and all that’s left to do is to install the pushrods. The longest pushrod is used for the elevator. The wing requires little assembly. The aileron and flap servos are premounted with the pushrods in place. I recommend checking the tightness of the servo screws. A couple of them were loose on my model. All that’s required to complete the wings is the installation of the wing struts, which simply snap in place. The brushless motor and ESC are premounted in the fuselage. A modeler needs to install a minimum five-channel receiver to complete the electronics installation. The ESC has a BEC, so no receiver battery is required. The FunCub XL requires a 6S (22.2-volt) flight battery with a 3,200 to 3,300 mAh rating. A single 6S pack or two 3S packs in series can be used; a Y harness for using two 3S packs is included with the airplane. The manual suggests control surface throws and exponential settings; however, it does not provide any high-rate settings. I used the suggested settings for low rates, and for high-rate settings I used the maximum surface deflection possible with 40% exponential. The airplane balanced on the suggested center of gravity with two 3S 3,300 mAh battery packs installed. The last assembly step is installing the propeller and spinner. For safety’s sake, I completed the transmitter programming before installing the propeller. An attribute is how quickly the FunCub can be assembled at the field—slide the wings in place on the carbon-fiber wing tube, attach the wing struts to the fuselage with their quick-release fittings, and install the two nylon screws that secure the wing in place. It weighed 6 pounds, 9 ounces ready to fly with the flight batteries installed.
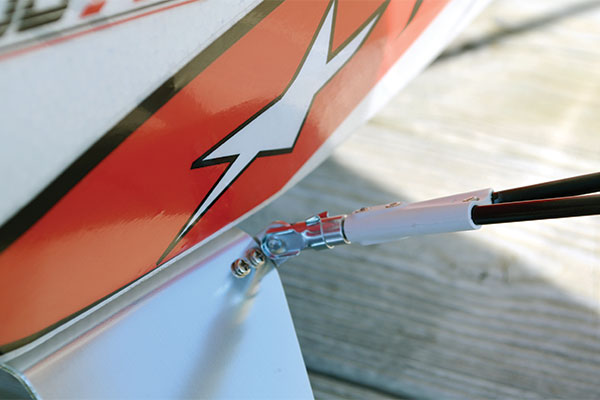
The quick-release wing strut fittings make installing the wings fast and simple.
Flight Report
At the field, the FunCub was given a thorough preflight inspection and range check. The first takeoff was made without employing the flaps. The airplane was airborne before half throttle had been reached. The only trim adjustment needed was a couple of clicks of left aileron. Cubs are not typically known for being precise fliers, but the FunCub is an exception. I was surprised at how straight it tracks and how smoothly it performed aileron rolls. I found no need for aileron differential. I had a blast performing four-point rolls with the FunCub. It is much more aerobatic than other Cubs that I have owned. The Hitec/Multiplex website states that the FunCub will fly “horizon-to-horizon knife-edge passes.” I had my doubts about this claim based on past experiences flying other Cubs. After it was in the air, my doubts were quickly put to rest. This FunCub is right at home flying knife-edge. The aircraft offers straight knife-edge flight with merely a hint of roll coupling. A slight amount of aileron pressure is required to keep the wings vertical while in knife-edge flight. Such a small amount of aileron input was needed that I didn’t even bother programming any mixes in the transmitter. The FunCub flies inverted and it’s extremely stable, requiring little elevator deflection to maintain level inverted flight. The included brushless motor and ESC provide excellent throttle response and plenty of power for hovering and other aerobatic maneuvers.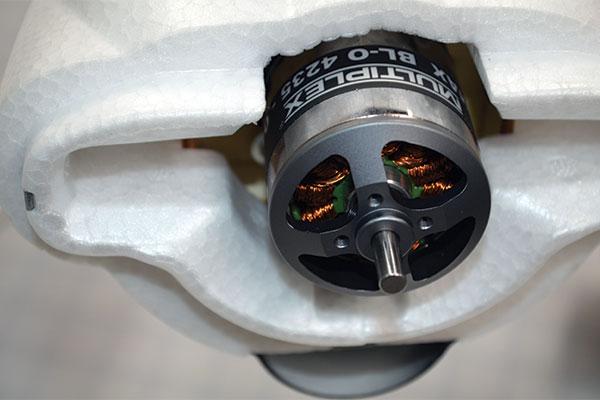
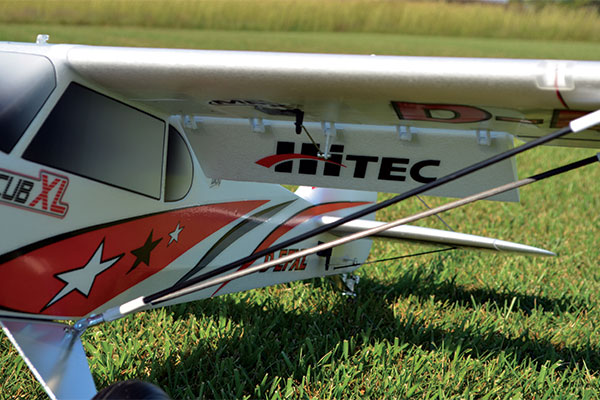
The high-quality brushless motor and ESC come preinstalled in the fuselage.
The FunCub XL’s brushless motor provides more than enough power for hovering.
The premounted Hitec HS-225BB servos produce a lot of torque and provide excellent control surface authority. I found the offset flaps to be quite effective. When they are deployed, the Cub will take off in just a few feet and can be flown at an incredibly slow speed. With the STOL performance that the flaps provide and the large Tundra tires, the FunCub could be flown off of nearly any grass field, beach, and probably even snow. (I plan to find that out this winter.) The FunCub is stable in slow flight and is easy to land; it would make a good trainer.
With the flaps deployed, the FunCub can take off or land in a short distance.
FunCub XL Float Kit
The FunCub XL float kit comes with everything needed to convert the 67-inch wingspan aircraft into a float plane. Included are two floats, front and rear aluminum landing gear, and water rudder, decals, instruction manual, and the hardware needed to complete the conversion. Although the float kit is specifically designed to fit the 67-inch version of the FunCub, it could easily be adapted to other models of a similar size. The instruction manual covers how to use the float kit on other aircraft. The floats are constructed with the same Elapor foam material that’s used in the construction of the FunCub airframe. The Elapor material is durable, but still lightweight. Each float weighs only 4.5 ounces. Assembling the floats is simple and only takes a few minutes. The manual does a good job of explaining the process and the illustrations are clear and helpful.
The float kit includes everything needed to fly the FunCub XL off of water.
The first step in the assembly is drilling two holes in each plastic float bar to secure the floats to the landing gear. The float bars are then glued in place in the recesses on the floats. The front and rear landing gear is then secured in place on the floats. After the conventional landing gear is removed, the float assembly is attached in its place on the bottom of the fuselage. I attached the decals to the floats as they are pictured in the manual. All that’s left to do is to replace the bottom portion of the tail wheel assembly with the water rudder. This completed the float kit installation. With the addition of the float kit, the FunCub’s overall weight only increased by 5 ounces. The entire build took less than 30 minutes to complete. After the floats have been assembled, converting the FunCub from conventional landing gear to a float plane configuration will take less than 5 minutes. A section in the manual devoted to float flying has some good information about how to taxi, take off, and land on the water. Upon arriving at the lake, the wings were attached and a thorough preflight inspection was performed. Following a range check, the FunCub was ready for its first flight in the float plane configuration. I immediately noticed the effectiveness of the water rudder while taxiing. Even on a windy day, it was easy to taxi the FunCub into position. The first water takeoff went perfectly. The FunCub tracked straight in the water and was airborne in less than 50 feet. The extra 5 ounces that the floats added to the overall weight of the FunCub didn’t seem to have much effect on the airplane’s climb rate. It had more than enough power. There was little change in trim settings with the floats attached. One click of up-elevator was all that was necessary to maintain straight and level flight. Having the floats installed on the FunCub had little effect on how well the airplane flies, although I noticed that the roll rate was slightly slower than before and the model pulled a bit toward the floats during knife-edge flight. A small amount of elevator mix made for straight knife-edge flight. I enjoyed flying the FunCub XL on floats. It’s stable in the air and on the water and it’s easy to fly. Takeoffs and landings are no more difficult to perform than when the airplane is operating in the conventional landing gear configuration.
Conclusion
I couldn’t be happier with the flying characteristics of the Multiplex FunCub XL. It’s the best-flying Cub that I have flown in more than 30 years of flying Cubs. It comes with high-quality electronics and assembles quickly. From the workshop to the air only takes a couple of hours. With its aerotowing capabilities, optional floats, and internal cargo bay, there are so many ways to have fun with this airplane. I guess that’s why they named it the FunCub. —Troy Hamm [email protected]Manufacturer/distributor
Hitec RCD USA (858) 748-6948 www.hitecrcd.comSources
Futaba (800) 637-7660 www.futabarc.comThis Month's Issue

Join the AMA
![]()


2 comments
funcub
Available here
Add new comment