


E-flite P-47D Thunderbolt BNF Basic

Written by Greg Gimlick Horizon Hobby's popular foam fighter includes flaps and retracts Product review with video. As seen in the January 2015 issue of Model Aviation.
Video Review
Specifications
Model type: Semiscale foam warbird Skill level: Intermediate Wingspan: 42.2 inches Wing area: 326 square inches Airfoil: Semisymmetrical Length: 39.5 inches Ready-to-fly weight: 44.7 ounces advertised; 44.5 actual Power system: 15-size 950 Kv BL outrunner; E-flite 30-amp Pro brushless ESC; E-flite four-blade 9.8 x 6 propeller (all included) Radio: Spektrum six-channel AR636A DSMX receiver with servos (installed) Construction: Z-foam Needed to complete: Six-channel Spektrum transmitter; E-flite 3S 11.1-volt 2,200 mAh 30C LiPo battery pack Price: $249.99 BNF Basic Flight duration: Approximately 6 minutesPluses
• Easy-access top hatch. • Sturdy Z-foam construction. • Electric retracts installed. • Flaps installed. • Ready to fly in less than an hour. • No glue required to assemble. • AS3X rock-solid stability. • Four-blade propeller and scale spinner hub. • Factory-applied graphics • Dummy engine, gear doors, machine gun, and panel lines.Minus
• Some control horn screws protrude through top of surfaces.Product Review
It’s a P-47D “bubble top,” so I knew I’d be in love when I opened it, and I was right! The E-flite P-47D Thunderbolt BNF Basic arrived in a big foam box that protected it from the abuse that the shipping company put it through. A hole was punched through the side of the shipping carton, but nothing inside was damaged. This is a foam airplane, so I expected to see some beads in the finish, but it’s not distracting, and it certainly looks good in the air. I wish it was a smoother surface, but that’s a matter of personal taste and has no adverse effect on how it flies—which is great!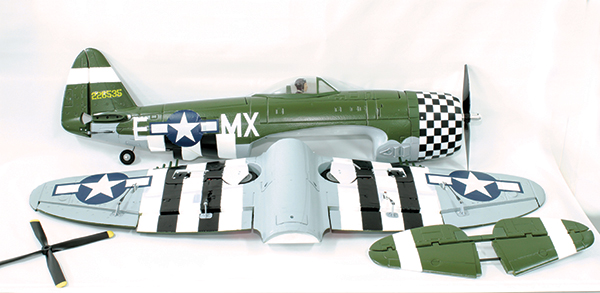
The parts count is extremely low because everything is installed.
Construction
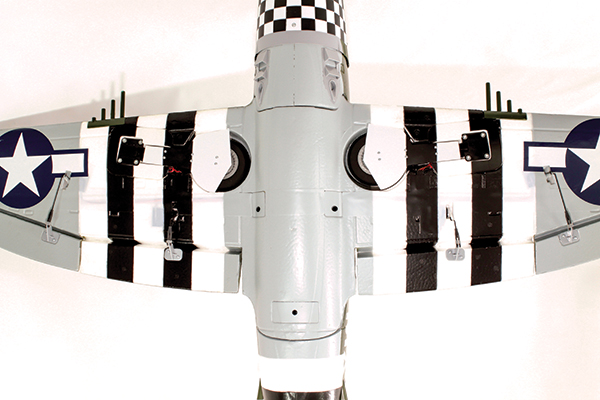
The P-47 BNF Basic doesn’t require much assembly time; in fact, it takes less than an hour. As always, you should begin by thoroughly reading the instruction manual and studying each photograph. Before beginning assembly, go online and check for any updates. When I assembled mine, there weren’t any. I put the battery on my charger so it would be ready when I finished the assembly. Begin by aligning the tail surfaces and sliding them into place. There is no glue required. They slide onto a carbon-fiber wing joiner, and each half has a plastic piece that will mate with the other side. When everything is in place, secure the stabilizer halves with the provided clear tape. Connect the elevator control rod and that’s pretty much it. The main wing can be left attached to the fuselage and the airplane transported in one piece, or you can easily remove the three bolts and carry the parts separately. Because it’s small enough to fit fully assembled into my Smart Car, I carry it that way. A number of wires from the wing servos must be fed through a small hole in the bottom of the fuselage before securing the bolts. These mate with preinstalled Y cords and extensions for the ailerons, gear, and flaps. This is easy enough, but I prefer not to have to do it every time I want to fly, so for me, it’s a one-piece airplane. Most of the assembly time will be spent binding your radio to the receiver and setting the controls. Remember, it’s extremely important that you do not use subtrims to correct any control surface alignment! Make all adjustments at the control horn clevises. This is a requirement of the AS3X system. Do not set up exponential on your transmitter; that is taken care of in the AS3X system. After the first few flights, you can adjust your transmitter to add some exponential or you can do so with AS3X system programming. After you’ve set up your radio and everything looks good, remember to rebind your transmitter a final time. There is a pair of clear belly pans you can affix to the bottom of the fuselage if you’re going to do belly landings instead of deploying the gear. I suggest that you use the included two-blade propeller if you decide to make belly landings regularly.
The stabilizer halves slide into the fuselage brackets and lock together.
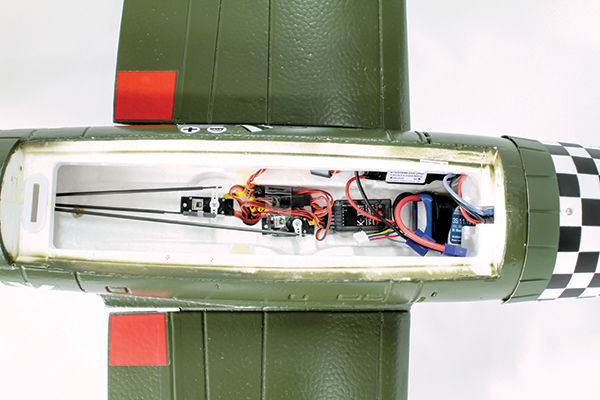
It’s slightly crowded, but there is plenty of room to secure all of the wiring.
The P-47 now comes with preinstalled retracts and flaps. This release also has a new paint scheme.
Control Throws and CG
I used the recommended throws and center of gravity (CG), which worked well. After successful test flights, I set up a three-position switch for each dual rate and slightly increased the throw on my ailerons. The recommended throws work well and I would keep them at that until you’ve flown the P-47D Thunderbolt several times. I set my CG at the recommended setting of 60mm. I don’t recommend moving it back until you’re comfortable with it. I like the way it handles at the 60mm point and will leave it there.Flying
The moment of truth finally arrived and the P-47 rolled down my grass field with authority. I was able to keep the tail planted with full elevator until I was ready to take off, but be careful if your grass is long. The wheels are only 25/8 inches and don’t like tall grass. Easing off the elevator had the tail up and ready to leap into the air. The retracts came up nicely and I knew that I was going to enjoy watching this airplane fly almost as much as I was going to like flying it. I wish I could tell you how challenging the test flight was, but there just weren’t any surprises or problems, and that was a very good thing! It was relatively gusty, but the little Thunderbolt handled it perfectly thanks to the AS3X system. With AS3X stabilization, it doesn’t feel as though you’re fighting the system. It dampens out some of the bumps from the wind and makes the flight look much smoother. Within seconds of leaving the ground, I determined that the CG was right, and seeing that there was plenty of power, I went into aerobatics. This model flew much bigger than its diminutive size would suggest. I attribute that to the AS3X system. Loops, rolls, inverted, stall turns, and Split S maneuvers are all within the normal flight capabilities with the given power setup and settings. I was curious about the four-blade propeller, but it carried the airplane beautifully through all of the maneuvers and it adds to the aesthetics. Horizon Hobby did a great job of matching this propeller to the motor/battery combo. Stalls were a pleasant surprise. The wings are nicely proportioned and they don’t abruptly stall. The P-47D dropped its nose without any indication that it might snap. Recovery was easy and I knew landings wouldn’t be scary—especially knowing it would slow down well with flaps. I flew out my timer set for 5 minutes and had plenty of power if a go-around might be needed. On landing, the only challenge is keeping the airplane from tipping up on its nose in the grass during rollout. It’s not a problem if the grass is short.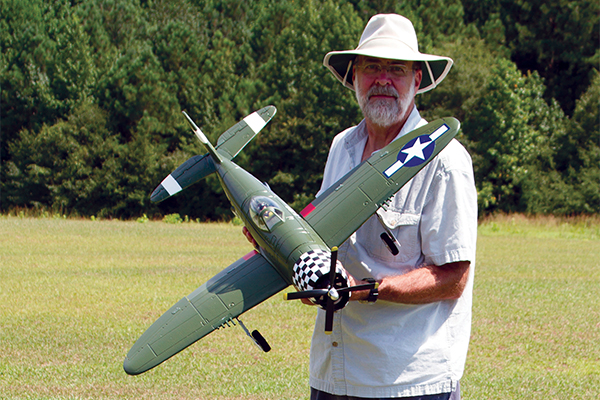
The author poses with the P-47. Other than occasionally ending up on its nose, the P-47 has no trouble flying from a grass field.
Conclusion
I love flying this airplane; it’s as simple as that! My buddy, Wayne Parrish, flew it for my photo runs and he said, “It just doesn’t have any bad habits.” I agree completely! The suggested settings are more than adequate, although I’ve increased my mid-flap setting and added a slight amount of additional aileron throw. Anyone comfortable with a low-wing sport airplane would easily be able to fly this. It looks great in the air and feels bigger than it is. Having a small-scale airplane arrive with BNF capability and AS3X-integrated stabilization for this price is a find. I’ve extended my timer to 6 minutes and the cells on the 3S LiPo battery pack usually measure about 3.8 volts at landing. I have one last tip. If you do add any trim during the flight, be sure to center the sticks and allow the AS3X system to learn the new settings before making any control movements. That means allowing it to go without your input for roughly 3 seconds. —Greg Gimlick [email protected]Manufacturer/Distributor:
Horizon Hobby (800) 338-4639 www.horizonhobby.comSources:
Spektrum (800) 338-4639 www.spektrumrc.comThis Month's Issue

Join the AMA
![]()


1 comments
My cousin had me fly his p47d
Add new comment