


Flitework PT-17 Stearman
Written by Greg Alderman A foam Stearman with aerobatic ability Complete product review Featured in the September 2015 digital issue of Model Aviation.
Specifications
Model type: Electric RxR Skill level: Intermediate to advanced with some building experience Wingspan: 47.2 inches Wing area: 721 square inches Configuration: Low wing Length: 38.2 inches Weight: 3.5 pounds Power system: Brushless motor; 40-amp ESC with Deans Ultra connector (included); minimum 4S 2,450 mAh LiPo battery (required) Radio: Six-channel radio and receiver (required) Construction/covering/finish: Painted foam Price: $229.98Test-Model Details
Power system: Pulse Battery PLU45-22504 14.8-volt 45C 4S 2,250 mAh LiPo Radio: Tactic TTX650 six-channel 2.4 GHz SLT radio; Tactic TR624 six-channel 2.4 GHz SLT receiver Ready-to-fly weight: 3.56 pounds (with 1 ounce of lead to achieve CG) Flight duration: 8 minutesPluses
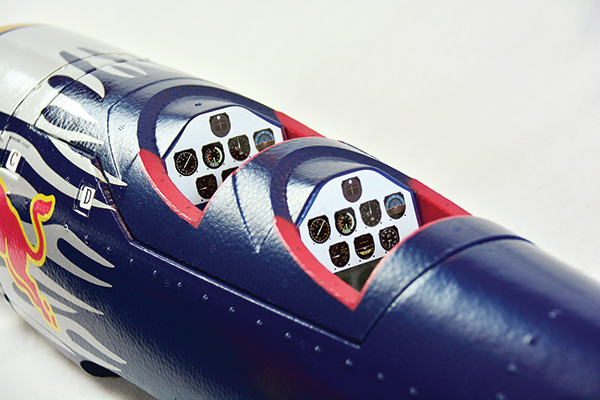
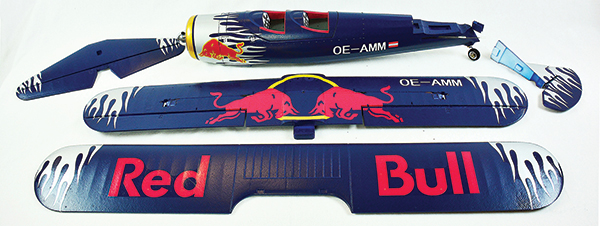
• Scalelike appearance with nice preapplied graphics. • Quick and easy assembly, with preinstalled servos, motor and ESC. • Strong power system using brushless motor and 4S LiPo battery. • Out of the box, can be flown with a four-channel radio and receiver. • Easy access to the radio and battery compartment. • Compact size—fits in the back seat or trunk of a medium-size vehicle completely assembled.Minuses
• Even with the correct size and weight battery installed, aircraft required an additional 1 ounce of lead weight in the nose to get CG in correct position. • No silicone retainers (fuel tubing) for the clevises provided. Failure to secure the clevises with silicone retainers can easily lead to loss of control and a crash. • Holes in control horns are too large for the clevis pins resulting in excess play in control surfaces.Product Review
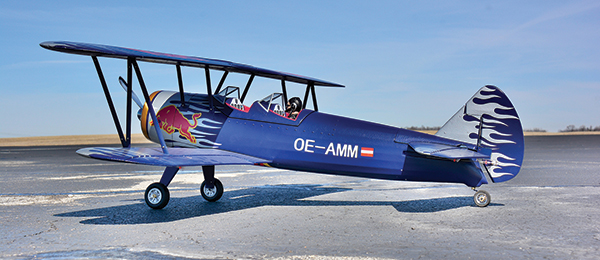
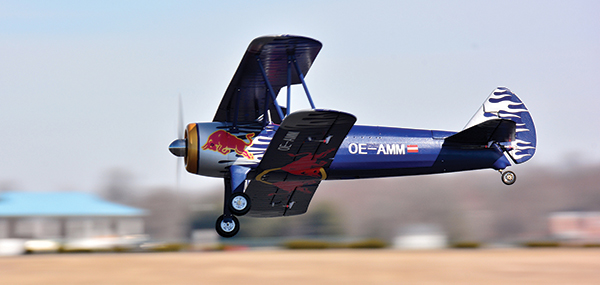
What aviation enthusiast doesn’t like the looks and lines of the PT-17 Stearman? Seeing one in a picture brings up thoughts of the Golden Age of Aviation, with barnstorming, wing walking, and the graceful aerobatics that only the Stearman could perform. The new Flitework Red Bull PT-17 Stearman not only has the charm and lines of a Golden Age Stearman, but also the great looks of the current-day Stearman that is flown by the Flying Bulls European civilian display team at air shows around the world. The Flitework Red Bull PT-17 is an RxR (receiver-ready) aircraft, with preinstalled servos and preapplied decals. Epoxying the horizontal and vertical stabilizers and the wing-strut mounts onto the fuselage and wings takes approximately 2 hours, and most of that is just waiting for epoxy to set. The only additional items needed were a receiver, a 4S 2,200 mAh to 2,500 mAh LiPo battery, and a compatible transmitter. The specifications for the Stearman state that a six-channel radio system is required, but six channels are only needed if you split the ailerons and put each in a separate servo port on the receiver. I only used four inputs on the receiver—aileron, elevator, throttle/BEC input, and rudder—requiring only four-channels. I did, however, use a Tactic TTX650 six-channel radio with a Tactic TR624 six-channel receiver. The Stearman arrived in a foam and cardboard shipping box that was nicely laid out, protecting the parts from damaged during transport. It comes with a 12-page printed assembly manual, but only three pages are actually used in the assembly of the aircraft. Although short, the manual is sufficient and doesn’t need to be any more in-depth.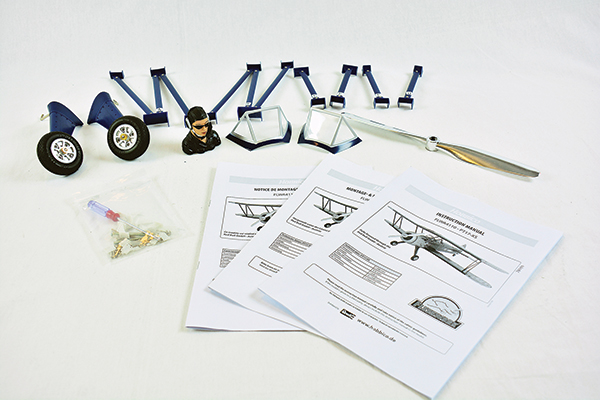
To install the two landing gear assemblies, remove four screws and the cover plate then insert the landing gear into the mounting block and reinstall the cover plate and four screws. I recommend removing the wheel collars and grinding a small, flat spot on the wheel axle then reinstalling the wheel collars using either medium- or high-strength threadlocker to ensure that you do not lose a wheel collar and wheel in flight. Next install the included plastic control horns onto the rudder, elevator, and ailerons. Because the airplane is foam, it is easy to not line up the screws and miss the holes in the opposite mounting plate. I found it was better to first install and remove a screw into each mounting plate to “cut” threads into the plastic. This makes it much easier than trying to get the screw started when it is already in the foam part. It also ensures that you don’t overtighten these screws and crush the foam. They need to be just tight enough to secure the control horn. After the control horns are installed, it is time to install the elevator and rudder. These are both glued on using five-minute epoxy. The mating surfaces need to be sanded so that the epoxy has a good strong hold, but make sure to double-check the alignment before the epoxy sets up. Use a couple of pins to hold the elevator in place while the epoxy dries. Screw the tailwheel in to the rudder then glue the rudder in place. After the epoxy for the elevator and rudder has set you can install the lower wing on the fuselage. This is straightforward and bolted into place. Now comes the trickiest and most time-consuming part of the entire assembly: gluing the wing struts to the fuselage and wings. Flitework has labeled all of the struts with letter designators that match a picture in the manual. Follow the pictures and you shouldn’t have a problem. Although the manual showed fixing the top wing and clamping everything in place while the epoxy set, I found it easier to unscrew the struts from their mounting plates and just glue the mounting plates into the fuselage and wings. Again, be very careful that you put the correct plate in the correct spot on fuselage and wing. After the glue dried, the wings and struts matched up perfectly. The receiver installation is straightforward. I used the Tactic TR624 six-channel receiver, although I only used four of the six channels. The servo wires are marked, making it easy to plug them into the appropriate channels on the receiver. I also found it easier to wait until the receiver was installed and ready to be powered up to install the servo pushrods. This allows you to use subtrim to center the servos and install and adjust the pushrods to the ailerons, elevators, and rudder. Take small pieces of fuel tubing and slide them over the plastic clevises to lock the clevises closed. If you don’t, you run the risk of popping them off in flight and possibly causing a crash. The manual does not mention using retainers on the clevises in the assembly section, but does mention using silicon retainers (fuel tubing) on the last page in the “Check List” section; however, none are provided. The last step is to install the propeller and hub.
Flying
After the Stearman is assembled and the receiver installed, it is time to check for the proper center of gravity (CG). The manual states that a 4S battery weighing 250 grams will balance the airplane correctly. I used the Pulse Ultra PLU45-22504 4S 2,250 mAh LiPo. Pulse doesn’t make a LiPo of at least 2,450 mAh as stated in the specifications, but the 2,250 mAh battery weighed nearly 257 grams—more than the stated balancing weight. When checking the CG with the battery installed, I was still approximately 1/4-inch tail-heavy and ended up needing an additional ounce of lead weight in the nose of the Stearman to attain the CG. I assembled the aircraft in the winter, but the Stearman sat on my workbench for nearly three months while I was waited for a day that was warm enough and the wind was not blowing at gale-force speed! The wait was very much worth it. The Stearman is a joy to fly. It is short coupled, so it can be slightly tricky on the ground, but in the air it performed very well! It does all of the expected loops, rolls, and spins, but in the hands of a capable pilot, the 4S system has enough power to perform more-complex aerobatics such as Harriers, rolling circles, rollers, and some 3-D-type flying! From the great looks, ease of assembly, and great flying performance, I highly recommend this PT-17 Stearman. Because of the short coupling and being a tail-dragger, it is not a trainer airplane, but intermediate and advanced pilots will find it a ball to fly!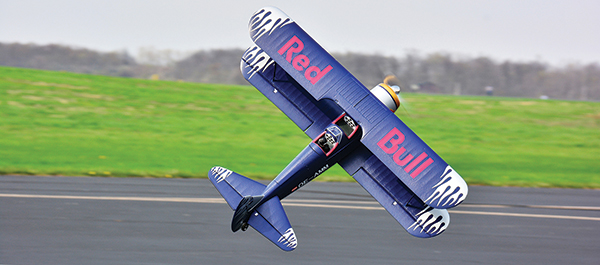
Manufacturer/Distributor
Flitework [email protected] www.en.flitework.at Tower Hobbies (800) 637-6050 www.towerhobbies.comThis Month's Issue

Join the AMA
![]()


7 comments
Centre of gravity
Center of gravity
Thanks
Washer
Prop assembly for stearman
PT-17. Paint
vivo en España y quiero
Add new comment