


Great Planes Kunai ARF
Watch a video and read about this glider capable of high-speed aerobatics or leisurely soaring. Article, photos, and video by Tom Sullivan. Read the full article in the July 2015 issue of Model Aviation Digital.
Specifications
Model type: ARF sailplane Skill level: Intermediate and advanced pilots Wingspan: 55 inches Wing area: 308 square inches Airfoil: Flat bottom Length: 36 inches Recommended weight: 20 to 21.5 ounces; test model (ready to fly): 22 ounces Power system: ElectriFly 22-12-10 motor; 3S 1,200 mAh LiPo battery; 20-amp ESC; 8 x 6 folding propeller Recommended radio: four to five channels; four micro servos; one Y-harness (no spoilerons); or two 3-inch servo extensions (spoilerons) Street price: $129.99 (ARF version); $199.99 (receiver-ready version, as used in this review)Features:
• Built-up wings, fiberglass fuselage, and carbon-fiber tailboom • Precovered airframe • Includes a 1,400 Kv outrunner brushless motor and folding 8 x 6 propeller • The receiver-ready version comes with a 20-amp brushless ESC and four micro servos • All control surfaces are prehinged at the factory • An aileron servo in each wing panel makes installation easy and allows mixing for spoileron and differential • The quick-release canopy/hatch is held in place with a magnet for quick access to the battery • It can go from box to ready-to-fly in just a couple hours • A great combination of a slow-speed sailplane and high-powered, high-speed sport flierNotes:
• There are no provisions for an arming switch; however, if using the power setup in the review, there is a built-in safeguard (see text). • There are a few wrinkles out of the box that can be quickly removed with a heat gun. The top wing can develop a few wrinkles after a day’s worth of flying. So why did Great Planes name this little sport glider Kunai, and what the heck is a kunai anyway? Simply put, a kunai is a Japanese tool, possibly derived from a masonry trowel. This basic tool, in the hands of an expert, could be used as a multifunctional weapon. Great Planes has described the Kunai as “aggressive climbing, exciting, high-speed aerobatics, soaring, offering the best of all worlds.” It seems like a tall order for a little power glider, so let’s see if it lives up to its name.Construction
The Kunai is available in ARF and receiver-ready versions. This review covers the receiver-ready model, which comes with the servos, motor, and speed control all preinstalled. If you’d like to see the steps in detail, the Kunai’s manual is online at http://manuals.hobbico.com/gpm/gpma1815-1816-manual.pdf. To say there is a low parts count would be an understatement. I counted 10 airframe components and a small bag containing a half dozen pieces of hardware. Rounding out the contents are a sticker sheet and 16-page manual. The wing halves are built-up from balsa and plywood. Both the vertical fin and the horizontal stabilizer are from sheet balsa and hardwood. All of the flying surfaces are covered with an iron-on film and all the control surfaces are preattached using some sort of transparent tape. The fuselage is made from a molded fiberglass cockpit section and a long carbon-fiber boom. Joining the wing halves together is the first step. Using a couple of alignment pegs, the two halves are epoxied together. A plastic wing-bolt plate is added to the rear of the center section and that completes the wing. While that’s drying, work moves to the fuselage where the tail surfaces are first dry-fitted, then epoxied into position. The last piece to glue in is the elevator joiner to make the two elevator halves move as one. And just that quickly, the construction of the Kunai’s airframe is complete. Next is installing the receiver. The manual recommends a couple of Futaba receivers, but nearly any small receiver could be used as long as it has end connectors. The small fuselage won’t allow using a receiver with connections that come out of the top. Because of the thick fiberglass and carbon fiber used in the fuselage, I would recommend using a receiver that can work in composite airframes. Because the servos and pushrods are already in place, hooking up the control surfaces a breeze. Up front, you’ll find that the motor and ESC are preinstalled and wired to accept a Deans-type connector. This space is also quite tight and only fits a 3S 1,300 mAh (or smaller) battery. All that’s left is to bolt on the propeller hub that uses a couple of small hex screws to hold it on the motor shaft. The folding propeller is bolted on the hub and the bright red spinner is held in with a single screw. So, that’s it. Other than adding stickers, the receiver-ready Kunai is finished. You can go from the box to ready to fly in only a couple of hours. Because all of the components in the Kunai were the same as recommended by Great Planes, it balanced right on the center of gravity (CG). If you use different items, you may have to adjust the CG, but that may not be easy with the small spaces inside the fuselage. I set up the Kunai for spoilerons, allowing me to throw both ailerons either halfway or all the way up to give the effect of spoilers in case I need them to help with landing.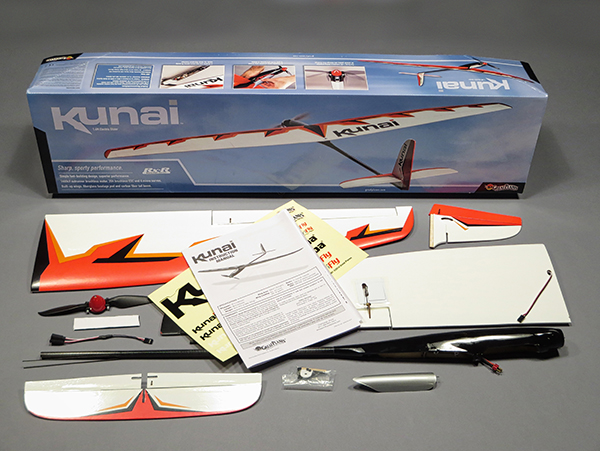
The Kunai’s parts count is quite low. It can go from the box to ready to fly in only a couple hours.
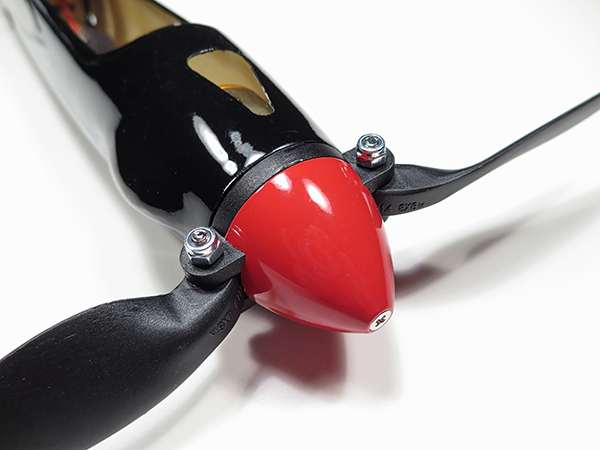
Included in the kit are a nice, purpose-built folding propeller and the spinner assembly.
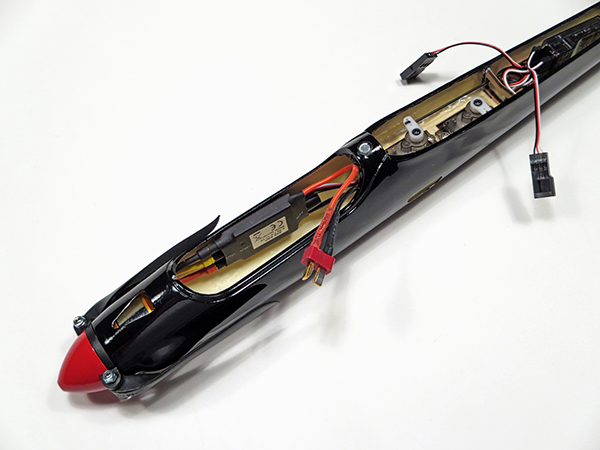
Be sure to consult the manual when selecting your radio gear. Because of the narrow fuselage, there isn’t much room for variation on the components.
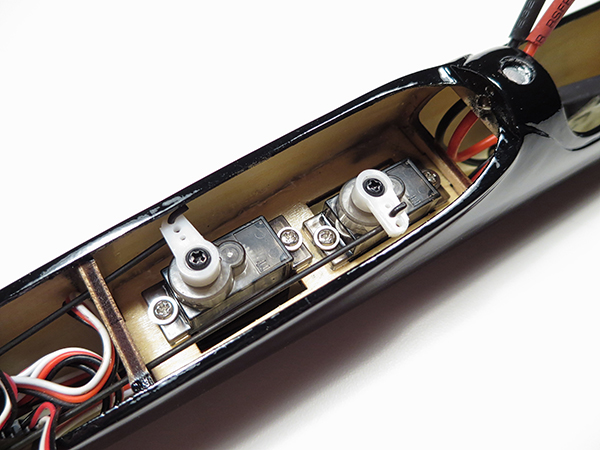
Micro servos are required throughout the Kunai. Tactic TSX5 Micro High-Speed servos were used in the review model.
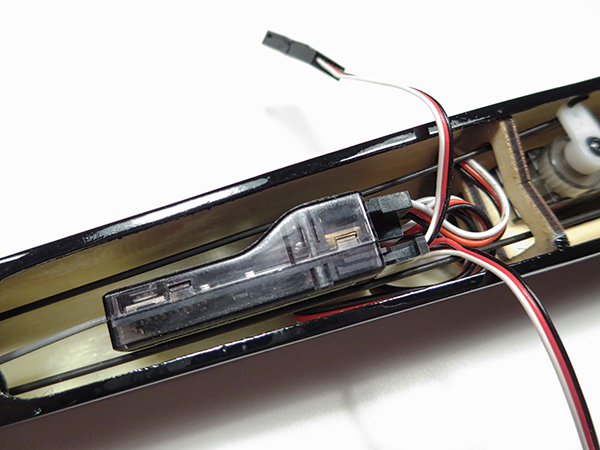
With so little room in the fuselage, the receiver needs to have connectors that plug in on its end. A receiver with top-facing connectors probably won’t fit.
Flying
When putting the Kunai together at the field, take care to make sure the aileron leads are not pinched when attaching the wing. I had to carefully wind the aileron leads around the internal servos, making sure not to interfere with their operation. It’s a tight fit, but take a little time and everything will slide into place. After the wing is in place and the battery is installed, pop on the magnetic hatch and it’s ready to fly. The ElectriFly ESC requires the throttle to be fully low, then fully high, then fully low again to arm itself. If you use a different ESC, use care because you don’t want your fingers in the way of a spinning propeller. For the maiden flight, I throttled up halfway, aimed the Kunai into the wind, and gave it a toss. It quickly gained speed and needed very little trim. After a few passes to get used to it, and with the photo passes out of the way, I threw it in to high speed. As you’ll see in the accompanying video, the Kunai picks up speed in a hurry because of its thin wing and low-drag fuselage. Suddenly I was comfortably doing horizontal Figure 8s, rolls, loops, and more. To check the low-speed capabilities, I climbed up a few hundred feet then cut the power. The Kunai slows nicely and becomes a capable glider. With no power, it needs a bit of up-elevator trim to keep it level (hands off). If it were to glide perfectly level with no trim changes, I believe it needs the CG to be moved slightly aft. But regardless, I found myself riding the thermals for quite a while then smiling when I realized that this was the same airframe I was just rocketing through high-speed maneuvers with minutes earlier. Not wanting to press limit of flight time on the maiden flight, I decided to try the spoilerons while at altitude to see how they felt. When extended, the Kunai initially ballooned, but then reached equilibrium and established a gentle, slow, gradually descending glide slope. I retracted the spoilerons and slowly flew around until the Kunai was at a landing altitude. I set up for landing then kicked up the spoilerons again. This brought the Kunai down at a slow, controllable landing right at my feet! Since that maiden flight, I’ve put many flights on the Kunai. I’m frequently asked about flight times by pilots at my local field and it’s hard to nail down a time. If you’re going to fly full-throttle, high-performance for an entire flight, I would put times at roughly 6 to 8 minutes, but if you use the throttle in bursts, with a combination of aerobatics, speed, and gliding, you can easily stretch that time to between 15 and 50 minutes. Past that, if you merely climb for altitude, glide around catching thermals, and only use the power sparingly to climb back to altitude, flight times could easily expand to an hour or more. After one flight, my transmitter showed a 40-minute flight, and I still had power left in the battery!Conclusion
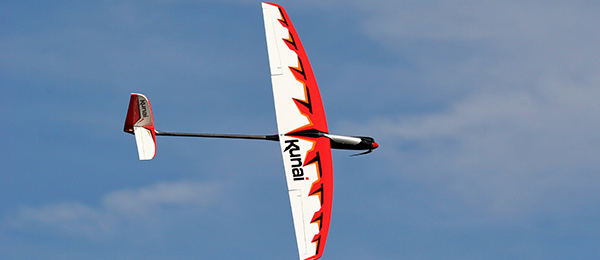
I wanted to see if the Kunai measured up to its namesake, and I think it does. To say it has plenty of power is an understatement because it will climb vertically without breaking a sweat. That same power works well in propelling the Kunai through any variety of maneuvers, even inverted flight. When you want to slow things down, climb up to altitude and enjoy the afternoon gliding around at a nice, relaxing, leisurely pace. It won’t keep up with a purpose-built sailplane, but the Kunai does fine. If you put all this together, and manage to fit it in this small airframe that can be thrown in trunk of most cars, I think Great Planes was spot on with the Kunai.Flight Video
This Month's Issue

Join the AMA
![]()


1 comments
Ersatzhaube für Kunai
Add new comment