
Written by Greg Gimlick
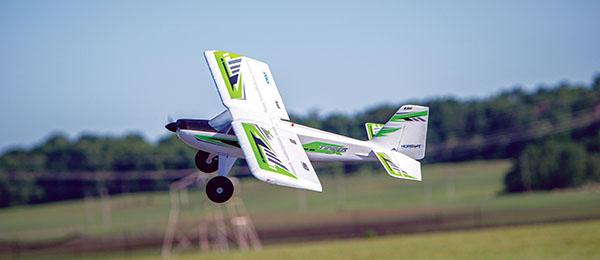
A great fixed-wing FPV platform
Product review
As seen in the September 2017 issue of Model Aviation.
Bonus Video
Specifications
Model type: Flying wing BNF Skill level: Intermediate pilot Wingspan: 78.3 inches Wing area: 1,033 square inches Airfoil: Semisymmetrical Length: 40.8 inches Weight: 67 ounces Wing loading: 9.3 ounces per square foot Power system: E-flite 1,300 Kv 10BL outrunner Battery: 3S 11.1-volt 2,200-3,200 mAh LiPo Radio: Five-channel minimum Construction: Carbon-fiber reinforced, hollow-core construction; Z-Foam material Street price: $229.99Test-Model Details
Motor: E-flite 1,300 Kv 10BL outrunner ESC: E-flite 40-amp BL Battery: E-flite 3S 11.1-volt 2,200 mAh 30C LiPo Propeller: E-flite folding Radio system: Spektrum DX9 Ready-to-fly weight: 69 ounces FPV goggles: Range Video HeadPlay SE Wing loading: 9.62 ounces per square foot Flight duration: 8 to 10 minutesRecommended Settings
Aileron: 22mm up and 19mm down Elevator: 15mm up and 16mm down CG position: At molded dimples, ahead of the finger-hold slotsPluses
• Three camera locations available. • Multiple noses for various camera choices. • Easy to remove and attach wings without tools. • AS3X and Launch modes preprogrammed. • Digital metal gear servos installed. • Stable camera platform for FPV or aerial photography. • Plenty of room in the cockpit for electronics. • It flies like a dream!Minus
• Manual (page four) has setup error for flight-mode switch.Product Review
As I opened the big, foam box and began removing the pieces, I immediately thought, “This is one big, foam wing.” As I began to lay out the parts and saw the upswept wingtips and the vortex generators, I knew someone had put a lot of time into the design. When I found out that George Hicks and Mike McConville designed it, I knew there was a lot of expertise behind it, and my expectations were raised even higher.Image

The parts count on the Opterra is low, and it goes together quickly.
Assembly
Before assembling the airplane, read through the manual. I always mention this, but it’s important. Check Horizon Hobby’s website to see if there are any updates. There is an error on page four of the manual, but I suspect you’ll find a correction by the time you read this. Assembly will only take a few minutes because the aircraft comes out of the box with everything installed. The way the wing attaches to the fuselage and wingtips is innovative. There are no tools required. The wing panels slide over two carbon-fiber rods that slide through the fuselage.Image

Wing panels slide over carbon-fiber rods through the fuselage. A locking pin holds the wing halves in place.
As the pieces are seated, plastic brackets align and are held in place with locking pins. They work similarly to Dzus fasteners. These have thumb tabs that you turn 90° after they are fully seated. If you don’t have the wing panel fully seated, or the locking pin fully inserted, it won’t turn and lock. It’s simple and effective. The Opterra fits in my car in one piece, but disassembling it takes only 5 minutes. Radio setup is a matter of copying the settings from the manual to your radio—all of the mixing is already in the receiver. The error on page four of the manual is for the position of the switched modes; the manual has them reversed. This is obvious the first time you check the controls, so even if you forget to check online for updates, you’ll see this.
Camera Options Galore!
This airplane offers opportunities to satisfy all of your aerial photography desires. Multiple adapters fit in the plastic nose mount. Each is made of foam and easily cut and altered to fit almost anything. Additionally, there is a flat mounting location slightly above and aft of the nose cone location that fits a Mobius or similarly shaped camera. In the center of the fuselage, another mounting location faces straight down.Image

Multiple nose pieces are included to fit almost any camera.
The most popular cameras will fit the precut nose pieces perfectly. If you’re using a GoPro, there is no need to modify anything in the nose or belly mounts. The recommended camera from Horizon Hobby also fits a provided foam adapter. When I ordered mine, the camera was out of stock, so I grabbed an FPV camera from another airplane. It fit one of the adapters with a slight bit of foam trimming. Once again, the beauty of this airplane is how adaptable it is to whatever you want to mount. If you mess up an adapter, sets are available for less than $10.
Image

One of my cameras fit this piece perfectly, and the weights were preinstalled.
Control Throws and CG
The center of gravity (CG) range is not listed because the two molded dimples in the bottom of the wing are the balance points. The company recommends that the nose be slightly low when balanced at this point. There are also extra weights to accompany the various camera mounts. It comes with a closed nose already properly balanced, but when you opt for different mounts, the means are there to compensate. I set my control throws as listed in the manual and have left them there. They provide sufficient control authority—the idea is to be a stable camera platform, not an aerobat.Flying
Flying wing designs are challenging to launch because it is hard to hold onto anything. The Opterra has finger grip holes built into the bottom of the wing, slightly behind the CG location, to make it easier to hold. The other fear with such designs is the pusher propeller. Although some wings are launched with the power off and then throttled up after release, that’s not necessary with the Opterra. If you use a good overarm throw with a follow-through, a full-throttle launch as recommended is not a problem. I’ve yet to smack my hand or wrist with the propeller during launch. I also utilize the launch mode that activates SAFE technology to stabilize everything. After I established a comfortable climb, I switched the mode to AS3X, and it felt like an old friend. The AS3X does a nice job of stabilizing the little things that ordinarily affect video. Launch mode is almost surreal because it is incredibly stable as it leaves your hand. My test flight was made in a 10 mph crosswind, and the AS3X receiver compensated beautifully for the wind when it tried to roll one wing up. One trip around the field was all that I needed before trying a couple of loops and rolls. One of my friends commented, “It looks like you’re rolling a 747,” because it has a quite controllable slow roll. Stalls weren’t a problem, and mine never snapped into a spin, but the manual suggests a specific technique if a spin does occur. When I forced a spin, it worked nicely.FPV
I’ve done a fair amount of FPV flying with my quadcopters, but I have not done a lot of fixed-wing FPV. The Opterra will change that! What a dream it is to fly this airplane through my new HeadPlay SE goggles. I think it’s much easier than my 250-size quadcopters. The HeadPlay SE’s RHO-Lens lenses offer a clear field of view, and the option to mount any FPV camera you might have makes it a perfect platform. The little 25-milliwatt camera and video transmitter unit I temporarily mounted on the front deck of the airplane worked better than I could have imagined. This was a temporary fix while I waited for the permanently mounted nose camera to come back into stock.Image

This temporary setup for FPV flying is mounted on the top deck
With launch mode activated, even a hand launch wasn’t a challenge while flying FPV. The airplane reacts positively, but not so quickly that FPV is scary. It also reduces stress for the spotter pilot because if he or she does have to recover, it’s easy to do.


Comments
GoPro mount
Hi, is it possible to mount a gopro on the mobius platform and an fpv camera in the nose or can I mount both cameras in the nose together? Thanks
Add new comment