


Draw Your View
Written by Ferrell Papic An original starts on paper, even if it's virtual How-to As seen in the November 2010 issue of Model Aviation.
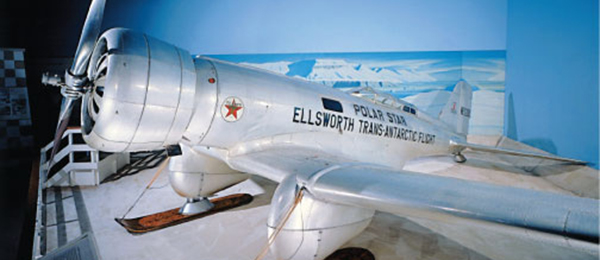
Inspiration is everywhere that fuels the passion of aeromodeling. Drive by a general-aviation airport sometime; you might be amazed by what types of aircraft you see. If you are inspired, take a photo or two. While flipping through an aviation book or magazine, you could see eye candy throughout. Sometimes the inspiration to construct a model of a full-scale airplane is so original that no drawing, of any kind, exists. If you want take on such a project, there’s a way you can be sure to start off on the right foot: make a three-view drawing from a photograph. Read on to learn how.
Step 1: Trace a photo of your favorite airplane. When you’re at an airport or an air show, take photos from several angles including the rear. Detail photographs will help you def ine the complex shapes later. A handy tool for draftsmen is a light table.
Using a CAD program or a drawing board, trace the outline of the aircraft in the photo. That’s Step 1. Follow the illustrated steps and you’ll get the idea of the process that follows.
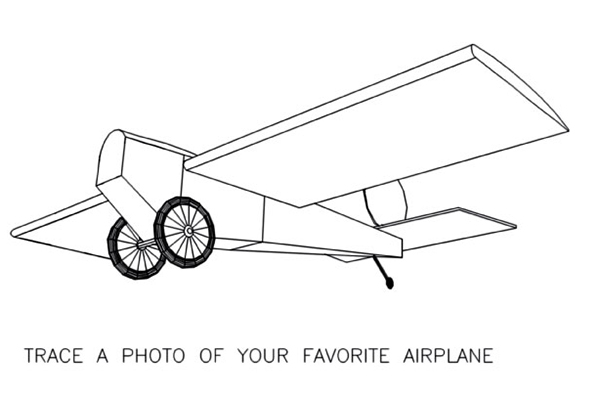
Step 2: Establish vanishing points 1 and 2. These vector from the tail and wingtip on both sides. For easy corrections, draw in pencil if working from paper. Mistakes are much easier to fix in a drawing program.
Overlay projection lines to find points 1 and 2. Draw a line from Point 1 to Point 2. From the center of that line, draw an arc below the airplane from Point 1 to Point 2 or above the aircraft if your picture is a top view of the subject.
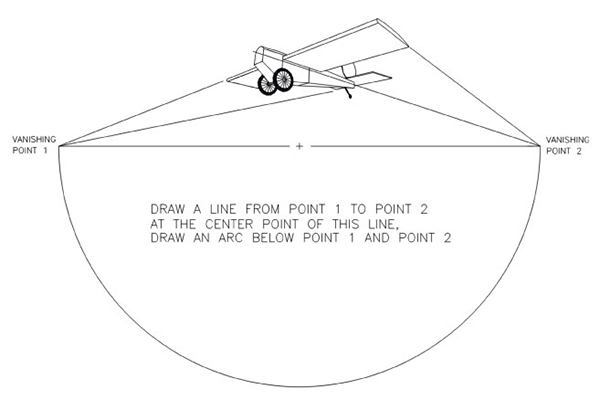
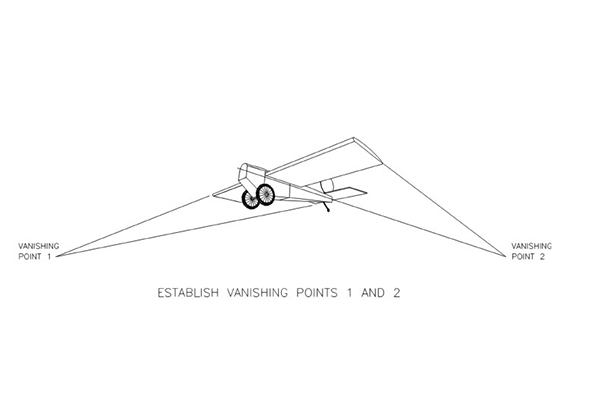
Step 3: Draw a line from Point 1 to Point 2 at the center point of this line. Draw an arc below Point 1 and Point 2. If working on paper, don’t freehand this; a set of drafting tools including a compass, rulers, and drafting templates makes professional work.
Select an observer point on the arc drawn. Draw lines from the observer point to points 1 and 2.
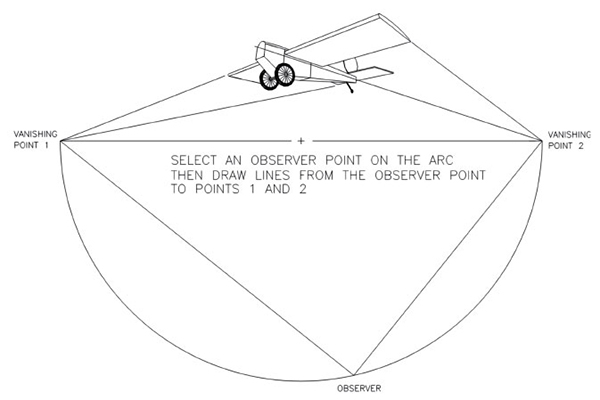
Step 4: Select an observer point on the arc and then draw lines from it to points 1 and 2. This spot is where you remember standing at the time the picture was taken.
Draw projection lines from photo centerlines and edges to the line from Point 1 to Point 2. Make projection lines from the observer point to the photo projection lines.
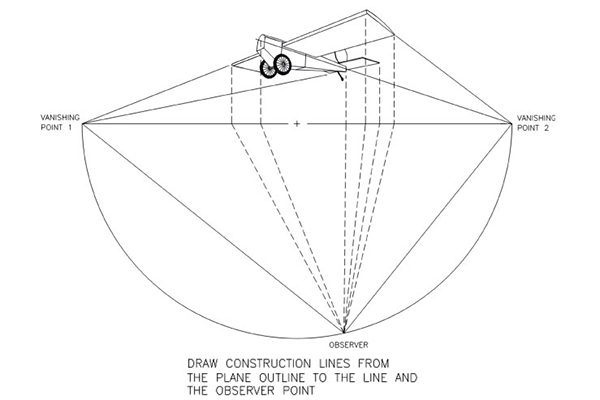
Step 5: Draw construction lines from the airplane outline to the line and the observer point. Now the aircraft dimensions can be translated.
Find a position for your three-view drawing on the projection lines that will allow you to pick side-view dimensions from the traced image. Then generate the three-view from the typical points, as shown in the diagram.
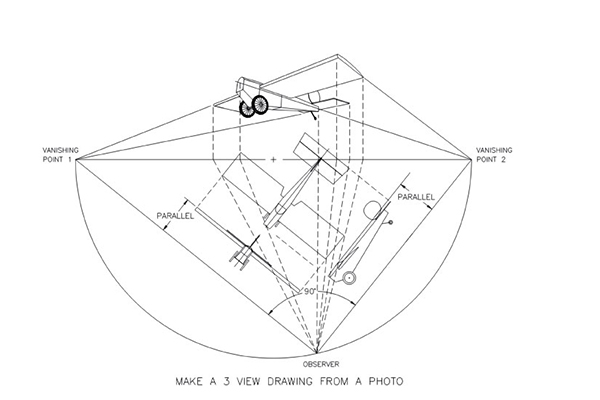
Step 6: Make a three-view drawing from a photo. This result can be considered more of a rough draft, but it’s the start of a plan that soon will produce a construction drawing.
Compare the drawings to the picture and perhaps other detail photos that were taken at the same time. Compare the lines and moments for accuracy. A photograph of the wing root will help determine the airfoil shape. Revise the three-view as needed to make it correct. Add callouts and specifications that are typical of a commercial illustration. Now you have the beginnings of an Expert Scale project. From this point you can develop building plans for a given scale. A flat foam model would be fun with a wingspan of 18-32 inches. A full-body reproduction could have a .25-size glow engine and a 40-inch wingspan or a Zenoah G-62 gas engine and an 86-inch wingspan. Your options are endless, so have fun!
This Month's Issue

Join the AMA
![]()


2 comments
thanks for posting this
Your Subject matter of HOW TO MAKE SCALE AIRPLANE PLANS
Add new comment