


3D Printing A Fully Functional RC Aircraft
Written by
Find out what is involved to bring your creation to life
As seen in the November 2020 issue of Model Aviation.
A huge part of my childhood (as I am sure many readers can relate to) was spending time with my dad building and flying model airplanes. We would spend weeks, or sometimes months, building an RC airplane from a balsa wood kit. Honestly, I use the word "we" loosely. Dad would do the bulk of the building and I would fly them. It was a pretty sweet gig for a teenage aviation nerd.
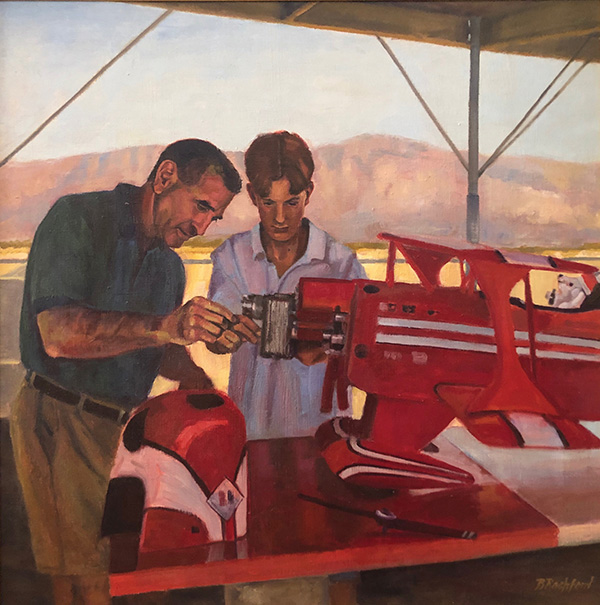
Those experiences of watching my dad hone his building skills, and eventually taking part in the building process together, have shaped my life in several ways. First, and most importantly, he taught me by example how to be a supportive father as he dove headfirst into this hobby with me to support my passion. That support, from both of my parents, is part of the reason why my passion for aviation is alive and well today. Secondly, those experiences building airplanes and developing problem-solving skills are a major reason why I pursued a career as a product development engineer (see Photo 01).
I’ve been a practicing engineer for more than a decade, initially for a large jewelry manufacturer in the Texas hill country, and eventually transitioning to my own product development consulting business. I have very much enjoyed the results of my work throughout the years, but sometimes the process required to get to those results has been a grind.
As I develop in my career, I constantly look for work where I enjoy the process just as much as the final result. This is where I am today, as a YouTube content creator and 3D-printable RC aircraft designer. How is that previous sentence even a thing?
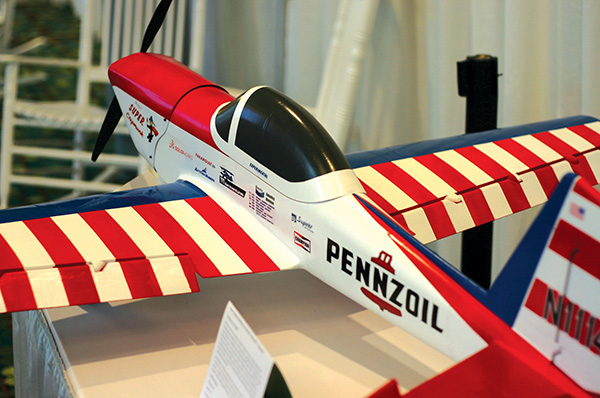
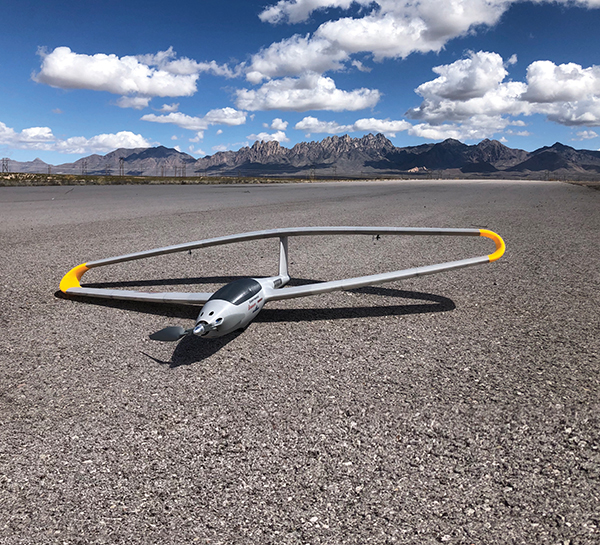
What a world we are living in—I mean, for an aviation and engineering nerd, being able to take a reel of plastic filament and transform it into a fully functional RC airplane is what dreams are made of. In 2020, however, it is something that hundreds of RC pilots worldwide are doing successfully. We are seeing some unique-concept model aircraft designs and seldom-modeled scale aircraft designs thanks to 3D printing (see Photo 02).
This article is partially intended to give you a taste of how 3D-printed model aircraft are designed, but I mostly hope to encourage you to do a little research on 3D printing as a possible building technique.
Designing a functional, 3D-printed model aircraft is a perfect blend of art and science. The aesthetics of the aircraft are important, but it needs to be designed specifically for the 3D printing process, which includes its own set of challenges when it comes to weight, strength, and the assembly features designed into the parts.
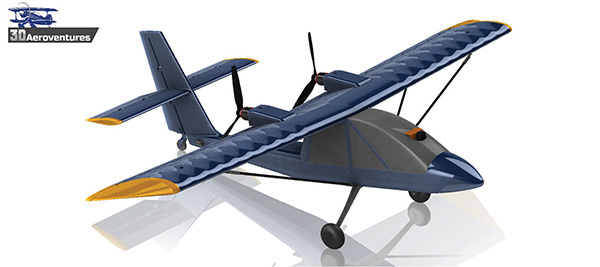
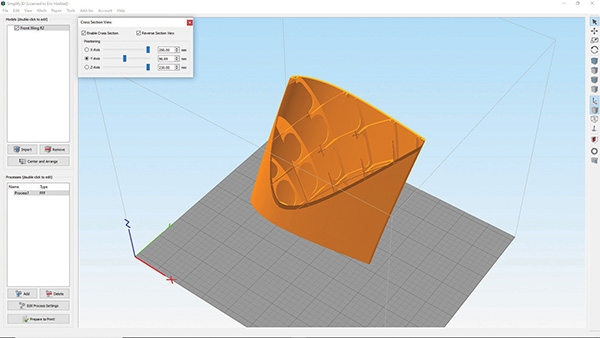
Designing the outer, aesthetic shell of the aircraft takes only 20% of the process, while working out the internal ribbing structure, splitting the parts into manageable, 3D-printable chunks, and designing them to key together takes up the bulk of the design time (see Photos 03 and 04).

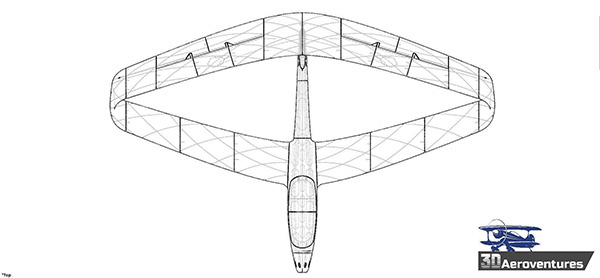
With a traditional, built-up wooden aircraft, building the skeletal structure of the aircraft is one part of the process. It is typically covered with an iron-on film or fabric covering to create the skin. One benefit of 3D-printed aircraft is that the outer shell (or "skin") and the internal skeletal structure are joined as one, but the internal structure must be designed to support itself as it prints. Instead of having traditional horizontal ribs and long spars, the wing’s skeletal structure is made up of a sparce, interwoven ribbing design that prints in a zigzag fashion (see Photos 05 and 06).
The skin is typically designed to be the thickness of a 3D printer’s nozzle diameter, which is most commonly 0.4 mm, although areas of structural concern, such as wing roots, firewalls, and areas where parts join together, can be designed thicker for added strength. Plus, just as with traditional RC aircraft, using a carbon-fiber tube as a wing spar or running through the fuselage for added strength is common.
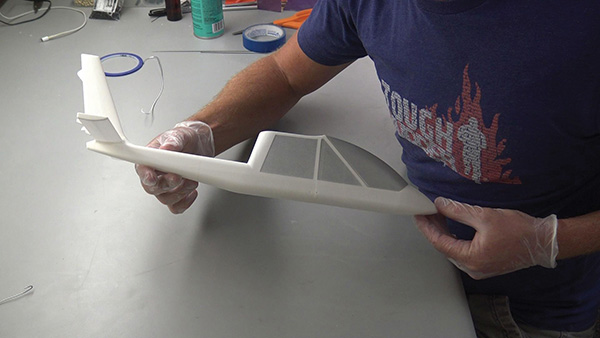
After the outer shell and internal structure have been designed, the aircraft is split into manageable, 3D-printable components. The most popular desktop 3D printers on the market have a build area at or above 8 × 8 × 8 inches (approximately 200 × 200 × 200 mm), so parts are typically split to fit within that build area. Finally, to make the assembly process easier, a male/female keying system is designed into the parts (see Photo 07).
I wanted to give you an idea of what goes into designing a 3D-printable aircraft, but you do not have to be a design engineer or a CAD expert to take advantage of this technology. Several vendors sell the digital files needed to 3D print an airframe at home. These aircraft are designed to work with a hobbyist-level 3D printing technology known as Fused Deposition Modeling (FDM), or Fused Filament Fabrication (FFF). During the FDM printing process, a thermoplastic filament is heated to its melting point through a small-diameter nozzle and extruded onto the print bed, layer by layer. It is essentially a hot glue gun on a gantry.
By far, the most common material used for 3D-printed aircraft is polylactic acid, or PLA, which is an easy-to-print, rigid plastic that is available in dozens of colors. PLA can be brittle and is not very heat resistant, so many builders are experimenting with other materials such as acrylonitrile butadiene styrene (ABS), acrylonitrile styrene acrylate (ASA), or polyethylene terephthalate glycol (PETG) with good results.
What is the most exciting is that materials manufacturers are starting to take notice of those who want to print strong, lightweight parts. ColorFabb, a Dutch materials manufacturer, now produces a material that it calls LW-PLA (lightweight PLA). This material is printed at an elevated temperature that causes it to foam as it prints, thus producing a low-density part.
Parts printed properly with this material are typically 30% to 40% the weight of standard PLA parts. I have personally begun offering aircraft designed specifically for this material, which makes printing micro-size aircraft with great flying characteristics a possibility (see Photos 08 and 09).
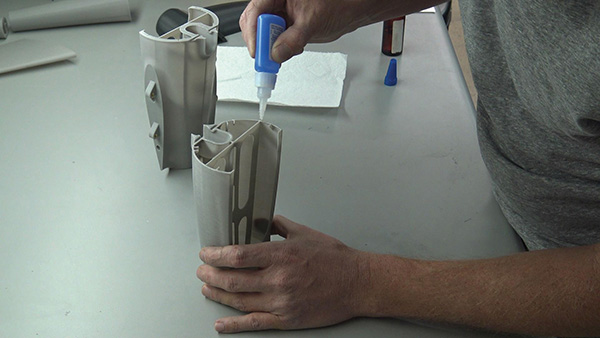
After the parts are printed, assembly is straightforward. As previously mentioned, the parts are designed to key together and glue together well with a medium-bodied CA adhesive and accelerator. In this case, the use of accelerator is a big benefit because it increases the exothermic reaction of the curing glue and bonds the plastic parts together more effectively (see Photo 10).
I don’t want to suggest that 3D printing is the best way to build an RC aircraft. As with every building technique, 3D printing comes with its own pros and cons.
Pros
- The digital files and materials needed to 3D print an aircraft are inexpensive.
- After your printer is dialed in to produce high-quality parts, the printing process is relatively hands-off.
- The assembly process is simple using adhesives that RC modelers are used to working with.
- 3D printing opens the door to unique concept aircraft designs or seldom-modeled scale aircraft.
- Scale details can be molded directly into the parts.
- Parts can be sanded smooth and painted with excellent results.
- Replacement parts can be easily reprinted.
Cons
- 3D-printing plastics are typically heavier than traditional wooden, foam, or fiberglass models.
- Parts printed with LW-PLA are comparable with the weight of traditional build techniques.
- 3D-printed aircraft are not as impact/crash resistant.
- Care must be taken in high-heat environments. Prolonged, direct sunlight on hot days can cause PLA parts to warp.

Another adhesive that has proven to be effective with PLA and other thermoplastics is a product called SCIGRIP Weld-On. It is an acrylic adhesive offered in a medium/thick-bodied cement designated as #16 and a thin, waterlike formula designated as #4. Although these two adhesives are slightly harder to work with and have longer drying times than CA, they create a strong bond.


Finishing and painting 3D-printed aircraft can also be done with impressive results. An unfinished part pulled straight off the printer will have the telltale signs that it is 3D printed: layer lines. These are subtle, horizontal lines on the surface of the part that are inherent to FDM 3D-printed parts.
These can mostly be eliminated by sanding initially with 150-grit sandpaper and working your way up to 400-grit sandpaper. Larger surface imperfections can be filled with an autobody filler, such as Bondo, and minor surface imperfections can be filled with a light coat of an automotive filler primer, which is typically available in a spray can at most automotive parts stores.
After a final sanding with 400-grit sandpaper, parts can be painted with off-the-shelf acrylic spray paint or other types of paint using an airbrush (see Photos 11, 12, and 13).
There are some critics in the aeromodeling world who say 3D printing is not a viable building technique for full airframes. Yes, there are some downsides to the process, but to totally discount it seems shortsighted. I can’t tell you how many times I’ve heard, "3D-printed airplanes are just too heavy to fly well," from those who have never personally given them a chance. I am here to tell you that this is not the case.

With hundreds of builders out there who are having fun printing some nice-flying, unique designs, it is hard to argue with the technology’s viability. Part of our duty as aeromodelers is to have the heart of a teacher and to pass our knowledge on to the next generation. If 3D printing is an avenue with the potential to attract a new generation of pilots to the hobby, even if users move on to more traditional building techniques, I call that a win.
SOURCES:
3DAeroVentures (free sample parts and build guides for available designs)
YouTube 3DAeroVentures Channel
www.youtube.com/3daeroventures
By Photos and artwork by the author [email protected]
This Month's Issue

Join the AMA
![]()


3 comments
3d printed airplane
Great article about the ins
the red pusher
Add new comment