


A Beginner's Guide to Electrics

Written by Greg Gimlick Demystifying the terms and technology used in electric flight Technical As seen in the February 2014 issue of Model Aviation.
It’s that simple! All you need to do is be able to rewrite Ampere’s Law using Stokes’ Theorem and you can get right into electric flight without any problem at all! Get online, grab your credit card, and enjoy the hobby! That’s the way it feels to many people who are new to electrics and those of us who have been around the technology for a while are partly to blame. In our excitement and zeal for electrics, we tend to dump a ton of minutiae on newcomers to the point of running them off. There is no way I can teach you all there is to know about electric flight in the next couple of pages, but I can get you started with a little effort and no fear.
Terminology
Don’t get bogged down and overwhelmed by the new vocabulary and terms. Here is a basic list of the most important terms and what they mean—in non-engineering terms. • Volts: This a term with which most are familiar. Your automobile battery is 12 volts and your house wall sockets are generally 120 volts. You use 9-volt batteries in smoke detectors. Think of voltage as water pressure and if there is no pressure, there will be no water. Without voltage, our systems wouldn’t have the power to fly. This is abbreviated as “V.” • Current: This is expressed in amps and is what makes things go. This is the electron movement through the wire and might be compared to water moving through a pipe. It is measured in amperes (amps) and abbreviated as “A.” In electrical equations you’ll see it as “I.” (That confuses new and experienced modelers.) • Power: This is expressed in watts and what we refer to often. Watts and horsepower are different units for measuring the same thing: power (1 hp = 746 watts). Electric fliers use watts because input watts are easy to measure with a wattmeter. Gas or glow fliers use horsepower, because internal combustion engine output power is measured with a dynamometer (dyno), which can also be done with electric motors. If you were to compare input watts with output horsepower, you would know the motor’s efficiency. We abbreviate it as “W,” but in electrical equations, the symbol is “P.” The important thing to remember is that we determine power in our models by multiplying volts by amps and get the total watts our systems produce (P = IV). • Resistance: This is expressed in ohms and abbreviated as the Greek letter “Ω,” but in our equations we use “R.” Think of resistance as a crimp in a hose causing a restriction. Low resistance is always our goal to make sure we get the most out of our systems. • Gauge: This refers to the size of our wires in the system. It’s measured in American Wire Gauge (AWG), and the bigger the diameter, the lower the AWG number. A 10 AWG wire is thicker than the 22 AWG we see on servos. A bigger wire means lower resistance. • Power loading: When discussing the power in our electric airplanes, we refer to it as how many watts per pound are being produced. If our airplane weighs 5 pounds and we have 500 watts of input power, we have 100 watts per pound (500 watts/5 pounds = 100 watts/pound). • Kv: This is a term commonly referred to when people discuss motors and is known as a motor constant, specifically voltage constant. It indicates how quickly the motor would turn at a given voltage if there were no internal resistance. It’s expressed as rpm/volt. When you see motors listing a Kv of 500, for every volt applied to the motor without a load (no propeller), the motor will turn 500 revolutions per minute. • Efficiency: Being efficient is better, but when applied to our electric airplanes, it’s bantered about like the Holy Grail. Nothing is 100% efficient, but we do our best to reduce things such as resistance that affect our systems. I referenced input power earlier and efficiency is the ratio of input power to output power. For all purposes, we determine basic power requirements using input power. • ESC: This is the electronic speed control that connects between the battery and motor. It is also connected to the receiver-throttle channel and controls the motor. It is generally rated by the number of cells and current the system can handle.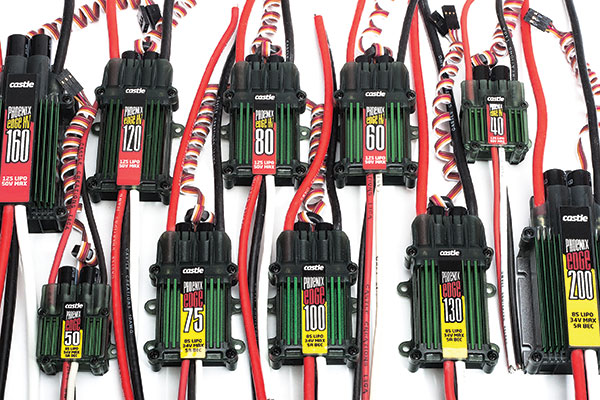
Castle Creations has a wide range of ESCs with clearly labeled ratings.
Battery Terminology
If you are using LiPo batteries, which have become the standard in electric flight: • 3S, 4S, etc: Battery packs are made up of a number of cells in series and this number represents that. If the pack is listed as a 3S pack, then it has three individual cells connected in series within the pack, each with a nominal voltage of 3.7 volts. The pack’s total will then be listed as an 11.1-volt pack. A 4S pack would be 14.8 volts, etc. (4 cells x 3.7 volts = 14.8). • Pack capacity: This is the capacity in either milliampere-hours (mAh) or amp hours (Ah) of the pack. A typical 3S pack might be listed as either 2,200 mAh or 2.2 Ah. A large pack with more capacity might be shown as 5,000 mAh. • Discharge rating: “C” represents the capacity of the LiPo pack. Labels will typically show the discharge rating of the pack as 25C, 30C, or whatever the manufacturer believes the pack will handle during discharge without degrading the pack. Discharge ratings, sometimes mistakenly referred to as C-ratings, are often overly optimistic. A 2,200 mAh pack rated as a 30C pack, however, could be discharged at 66 amps (30 x 2.2 = 66) without being damaged. This is optimistic, but the number is a guideline. Packs with higher discharge rates have lower internal resistance, which is a good thing. • Charging: The important thing to remember is to buy a balancing charger. This ensures that each cell within the pack matches the others. Get one that will do the maximum number of cells you expect to charge at the rated pack capacity. A 2,200 mAh pack would be charged at 2.2 amps, a 5,000 mAh pack would be charged at 5 amps, etc.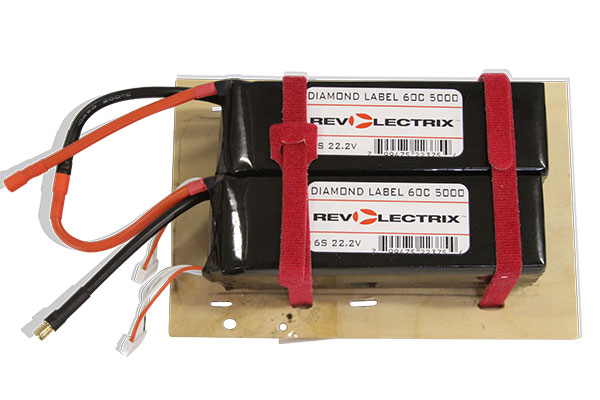
A 12S pack was made with two 6S packs in series for the Ag Wagon. Note that the label shows they are 6S and 5,000 mAh packs capable of 60C discharge.
I Thought It Was Simple!
It is! Electric power can be as complicated as you want to make it, and some pilots like to get into the details. But it can also be simple. You’ll see and hear the terms listed often and it’s important to have a basic understanding of them, but a degree in electrical engineering is unnecessary. You will appreciate knowing them if you call for technical support and the manufacturers begin asking questions. If you want to try an electric airplane or helicopter and learn as you go, call a reputable hobby shop or online vendor and select a system that has been fine-tuned to work. There are plenty of glow-powered Plug-N-Play setups and most work well. If you have an airplane that is powered by a glow engine, you can convert it to electric power without having to earn a degree. Many of the current kits on the market have already been converted by some of the manufacturers. You simply need to tell them what it is and get the system they suggest. Knowledgeable vendors can easily make recommendations if you give them some basic information about your conversion.Figuring It Out Yourself
Most of us eventually want to understand our systems and how to figure out a particular one for a project. This is the section where you’ll see how easy it can be. The bar graph on the next page is a basic listing of requirements for various types of performance using power loading. These guidelines make it easy to select the right motor, battery, and propeller combination for any project.Motor Sizing Voodoo
If you’ve used glow- or gas-powered engines, or if you are new to RC, the motor-sizing nomenclature can be a nightmare. It’s also a nightmare for many experienced aeromodelers, so don’t despair. It is getting better, but there is no standard for naming motors in regard to capability. In the glow-fuel world, you may be accustomed to seeing .40 or 1.20, etc., and in the gas world, 50cc, etc. Some manufacturers have tried to name their motors with similar names to equate them with the engines they replace. This is unpredictable, but most come close. Another common naming method is to use the dimension of the outer case of the motor or the stator dimensions. This is a system I like, but I wish companies would agree to use either case or stator size as a standard and not mix them. Motor stats tell us that X motor on Y volts will turn Z rpms. The motor must be rated for the proposed power, and size matters—take two 1,500 Kv motors, and the bigger motor (length times diameter) will comfortably turn a larger propeller, assuming both are of similar quality and efficiency. Some helpful vendors list the motors with both dimensions. In a perfect world, all motors would be listed as Innov8tive Designs lists its Cobra motors. Here is an example of a Cobra C-4120/12 motor: Cobra C-4120/12 Motor Specifications Stator diameter: 41.0mm (1.614 inches) Stator thickness: 20.0mm (0.787 inches) Number of stator arms: 12 Number of magnet poles: 14 Motor wind: 12 Turn Delta Motor Kv: 850 rpm/volt No-load current (Io): 2.77 amps @ 14 volts Motor resistance (Rm) per phase: 0.021 ohms Motor resistance (Rm) phase to phase: 0.014 ohms Maximum continuous current: 75 amps Maximum continuous power on 3S LiPo: 830 watts Maximum continuous power on 4S LiPo: 1,110 watts Maximum continuous power on 5S LiPo: 1,390 watts Weight: 293 grams (10.34 ounces) Outside diameter: 49.8mm (1.961 inches) Shaft diameter: 6.00mm (0.236 inches) Body length: 51.8mm (2.039 inches) Overall shaft length: 74.5mm (2.933 inches)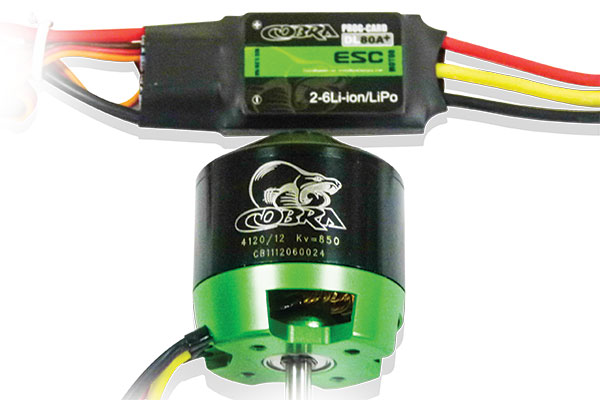
A Cobra motor and an ESC show designations.
This may appear to be more information than anyone needs, but it is perfect for someone wanting to know what the motor is and what it will do. The numbers in the name represent the dimensions of the stator and the motor wind (as a beginner, let the vendor help you with wind if you want more information). The motor (stator) size is 41mm diameter and 20mm long, and the Kv is 850 rpm/volt. Another manufacturer might list this motor as “5052-850” because it uses the outside diameter of the motor instead of the stator size and lists the Kv rather than “wind.” That is why it’s important to know if a manufacturer’s numbers represent the outside dimensions or the stator.
Selecting Your Power System
This is why you read this far, isn’t it? Let’s use an example of a standard .40-size trainer-style airplane that weighs 51/4 pounds, uses a glow .40 engine, and spins an 11 x 6 propeller at approximately 11,000 rpm. Experienced glow pilots often look for a motor combination that will spin the same propeller at the same rpm and that works, but that’s not always the best way to do it. Electric motors are often more efficient when spinning larger diameter or deeper pitch propellers or a combination. I created an example using an old trainer we have in the club from Hangar 9 called the Easy Fly 40. I removed the .40 glow engine and replaced it with a Cobra 4020/12 motor. Using a 4S 4,000 mAh pack, this will spin an 11 x 6 propeller at 10,700 rpm, similar to the old glow engine. The airplane will fly much as it did with the old glow engine, but by tweaking the propeller, I was able to make it fly much better. The old glow engine was listed as producing 1 hp, which is the equivalent of 746 watts. With loss of efficiency, it’s likely approximately 3/4 hp or roughly 560 watts, which works out to 106 watts per pound. The Cobra motor, with the same propeller, produces 488 watts or 93 watts per pound—barely a noticeable difference—and it flew well. The beauty of the electric was being able to experiment with propellers and come up with a 12 x 8 that produced 659 watts or 126 watts per pound and more thrust from the larger propeller. Thrust increased from 72 to 92 ounces, and that’s a huge jump in performance! Pitch speed also increased.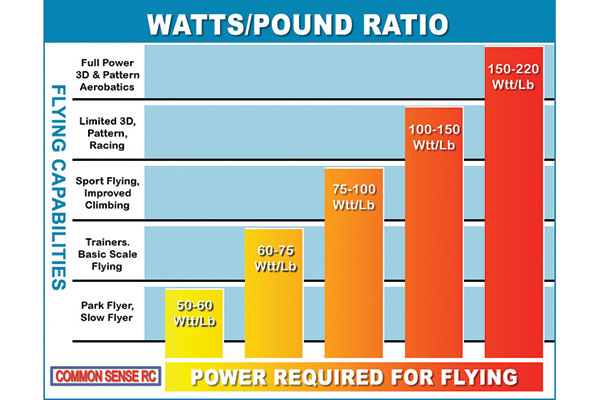
Guidelines for projecting power systems for electric airplanes are courtesy of Common Sense RC.
Keep It Simple
Keeping it simple is always the best way to go. In the previous example, I got into some efficiency factors, but I was working on the computer and letting it figure those. As a beginner, you can work with only the input numbers and still be satisfied with the results. Multiply your voltage (14.8 volts for our 4S example) by the projected amps. The propeller will draw 56 amps (available from many manufacturers’ sites) and you’ll come up with 828.8 watts or 158 watts per pound for the 51/4-pound airplane. It’s higher than my computer-generated projection, but the computer figured several factors to project an 80% efficiency, which is the lower number and close to reality.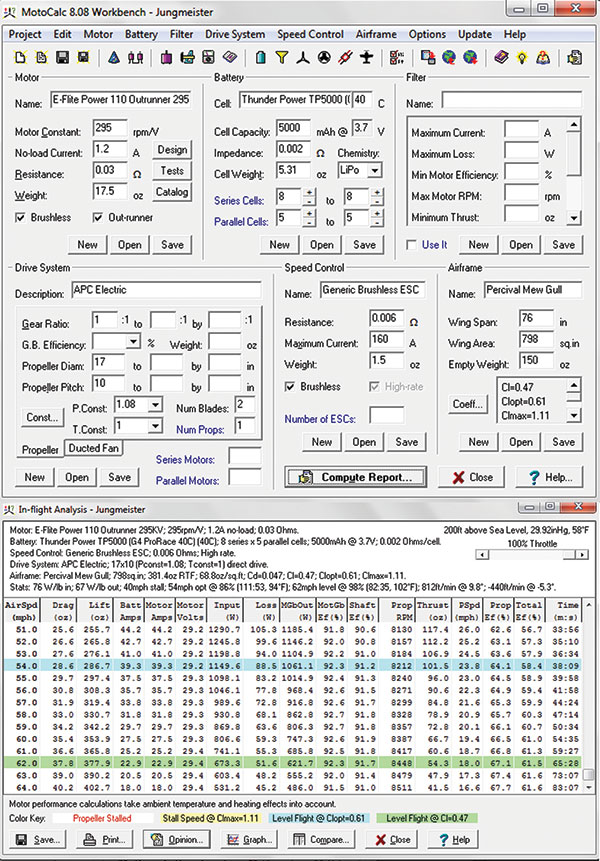
A MotoCalc screenshot of the input data screen (top) and results screen (bottom).
Tools
I primarily use two computer programs when I’m working up a new system that hasn’t been done before. ElectriCalc and MotoCalc will allow you to get as deep into the planning phase as you wish. These programs do all of the math and have huge databases of motors, batteries, propellers, etc. to use. The help files alone are worth the purchase price and are constantly updated. Many vendors and manufacturers also have online drive calculators.
A screenshot of an ElectriCalc forecast of a project.
The Bottom Line
Select your airplane, decide what performance you want, and choose a motor system. Don’t like math? No problem! If your airplane is a 700-square-inch sport aircraft that will weigh 6 pounds and you want to do great aerobatics, try to find a system that the vendor says will produce 900 watts. That’s 150 watts per pound that will make you happy. Try not to select a system that requires you to constantly run it at its maximum capacity and you’ll have a system that will last for years. —Greg Gimlick [email protected]Sources:
ElectriCalc [email protected] www.slkelectronics.com/ecalc MotoCalc [email protected] www.motocalc.com Common Sense RC (866) 405-8811 www.commonsenserc.com “Getting Started in Electric Flight; An Introduction and Some BASICS” http://theampeer.org/e-basics/e-basics.htm RCGroups www.rcgroups.comThis Month's Issue

Join the AMA
![]()


5 comments
what is needed for electric flight
Simple my foot!!! I believe
This article was just what I
Electric RC
great article
Add new comment