


Fix or 86 It
Written by Walt Wilson. As featured on page 46 in the April 2012 issue. Read the excerpts of the review and share tips.
If you fly long enough, eventually one of your models will meet the ground in an unscheduled landing. One of my club’s best fliers says, “All aircraft have an expiration date, some earlier than others.” Often the airplane will be mostly confetti and unfixable, but frequently a few hours’ work may restore it to its previous beauty and usefulness.
Always gather all the parts and pieces after a crash and take them home. You may need them later so that they can be glued back in place, or you can use them for reference. The field maintenance crew will appreciate it. Who wants their flying field littered with yesterday’s misfortunes?
When you are ready to tackle the project, lay the parts out on your workbench and evaluate the damage. What is broken, bent, or missing? What parts can be glued back together or in place, and which ones are totally destroyed?
It’s a good idea to strip the covering off the major damaged areas to look for split wood and allow you better access to the interior. If internal parts are broken or out of place, remove enough covering or sheeting to permit access for accurate reinstallation or replacement.
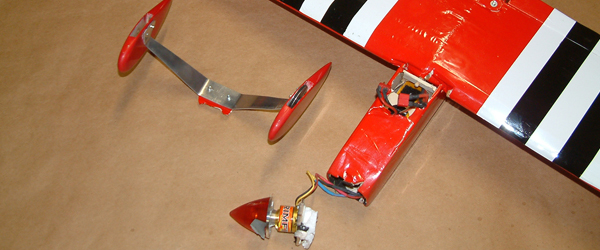
Do a thorough evaluation of the damage to determine if repair is feasible. In this case, the airplane was readily repairable. A quick evaluation of the airplane’s damage shows some of the internal bulkheads are broken and the front edge of the wing’s center section is crushed.

The lower sheeting, battery tray, and F-2 bulkhead were broken loose or shattered and require replacement.
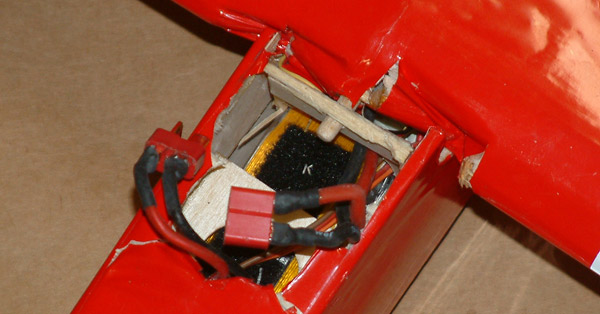
The lower front fuselage sheeting was removed and the area sanded smooth. Loose splinters were removed from the firewall and F-2 bulkhead areas.
The firewall, lower part of the F-2 bulkhead, and landing gear block were carefully aligned and epoxied in place.
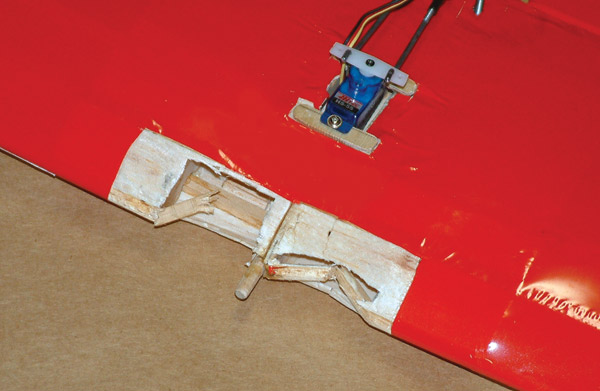
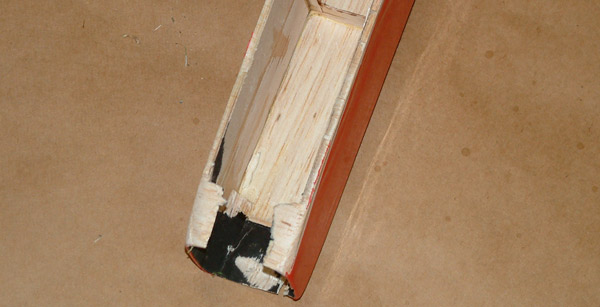
The extent of wing’s LE damage was more apparent after the covering was removed. Broken parts were removed and the edges trimmed smooth.
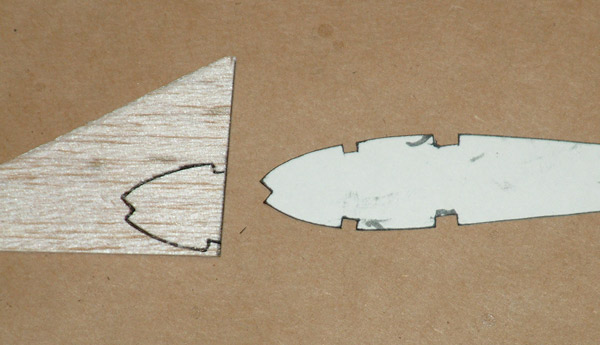
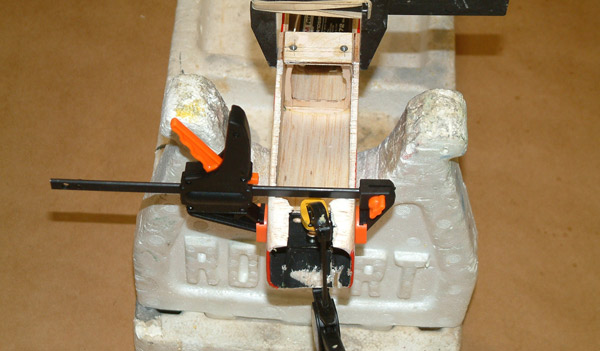
Four sub-ribs were made to match the wing’s LE sheeted area. This airplane was scratch-built, so rib templates were available.

Install the sub-ribs to support replacement sheeting. Install new LE stock to replace the broken parts. CA is a good adhesive for this application.

After the damaged area was fixed and the wing re-covered, it was as good as new.

The battery tray was reinstalled along with a new piece of foam behind the firewall for battery protection. The aircraft received a light sanding before installing sheeting.
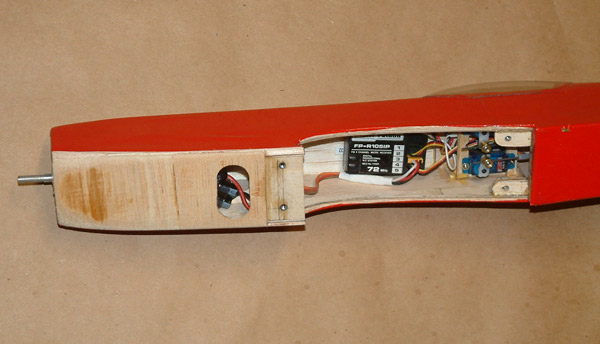
After installing new balsa sheeting, sand the corners to the original contours. Install the motor and ESC if access might be difficult later.

After installing the propeller and spinner, check the motor, all controls, and the CG before flight.
Share your tips and thoughts about how to prevent your aircraft from being permanently grounded.
This Month's Issue

Join the AMA
![]()


3 comments
aeromodelling
What airplane is this?
What airplane?
Add new comment