


Gee Bee Model E
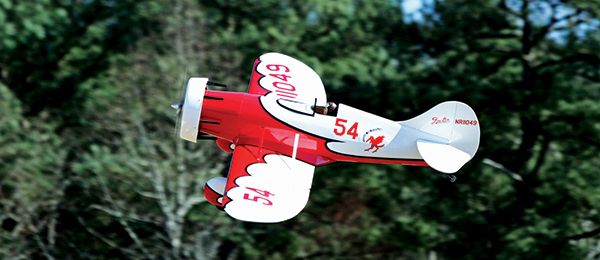
The fourth production Sportster is available as an ARF Online and tablet app bonus flight video Photos and article by Greg Gimlick.
SPECIFICATIONS Model type: Sport Scale ARF Skill level: Intermediate builder; intermediate pilot Wingspan: 59 inches Wing area: 529 square inches Airfoil: Semisymmetrical Length: 39 inches Weight: 58 ounces (ARF weight); 85 ounces ready to fly Power system: 35425 outrunner brushless motor; 60 amp-brushless ESC; 14.4-volt (4S) LiPo battery; 12 x 8 electric propeller Radio: Four-channel radio system with four servos Construction/finish: Built-up wood with MonoKote covering Street price: $219.99 (airframe only) TEST-MODEL DETAILS: Radio system: JR 9503 transmitter; Spektrum AR6210 DSMX receiver; four Power Up 12-gram metal gear servos; six-inch Y harness. Ready-to-fly weight: 85 ounces POWER SETUP #1 Motor: E-flite Power 32 brushless outrunner (4250-770) ESC: Castle Creations ICE 75 Battery: 4S 4000 mAh Propeller: APC-E 13 x 8 Flight duration: 8-9 minutes POWER SETUP #2 Motor: Heads Up RC Firepower Sport 40 (4248-06) ESC: Castle Creations ICE 75 Battery: 4S 4000 mAh Propeller: APC-E 15 x 8 Flight duration: 10-12 minutes PLUSES • It’s a Gee Bee! • Easily removable battery hatch held by magnets and dowels. • Perfect covering job. • Online updates for manual. • Flight performance. • Overall ARF quality. MINUSES • Gear legs needed shimming to reduce play.
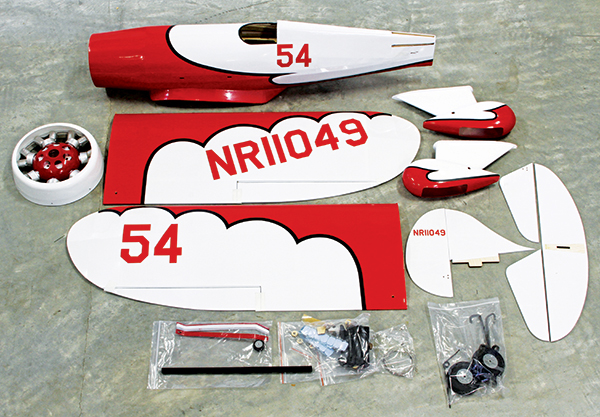 The kit’s contents taken from the box. The covering job is perfect: no wrinkles or crooked seams.
It’s no secret that I’m a big fan of Gee Bees. I’ve had Gee Bee Model R aircraft ranging from micro to 1/4 scale and I loved them all. When I found out that Maxford USA was releasing a new Gee Bee Sportster Model E, I had to have one! Having built a couple of Maxford’s unique offerings in the past, I had high expectations. Granville Brothers Aircraft operated in Springfield, Massachusetts, from 1929 until 1934. The brothers—Zantford, Thomas, Robert, Mark and Edward—built 24 aircraft. Although the R models come to mind for most, the Gee Bee Model E is considered by many to be the definitive member of the Gee Bee Sportster family. Its seven-cylinder, 110 hp Warner Scarab radial engine and its Townend Ring stood out as unique features. The narrow-chord cowling ring fitted around the cylinders was theorized to reduce drag and improve cooling, a theory still argued by some today. All four of the Model Es produced were destroyed in crashes, including one flown by Zantford “Granny” Granville who was killed in February 1934 while landing in Spartanburg, South Carolina. The ARF arrived in a double-layer box inside an outer box, so not even the roughest treatment would have damaged the contents. Everything was unwrapped within minutes so I could examine the parts. The well-done fiberglass wheel pants are things of beauty. The engine cowl with cylinders already painted and attached was a nice surprise, too. The covering job was perfect—no wrinkles or crooked seams, and it shined. If I had one negative first impression it would be that the black striping between the red and white surfaces is much too wide for scale accuracy, but that’s a minor quibble.
Construction
The kit is an exceptional ARF and continues the reputation of quality for which Maxford USA is known. Its built-up balsa and plywood construction is covered with Mylar. There are stick-on decals to finish the look. As always, you should begin with a thorough read of the instruction manual and study each photograph. Before beginning actual construction, be sure to go online to download the latest update. The addendum clarifies a couple of minor changes that have been made to improve the production version of the kit.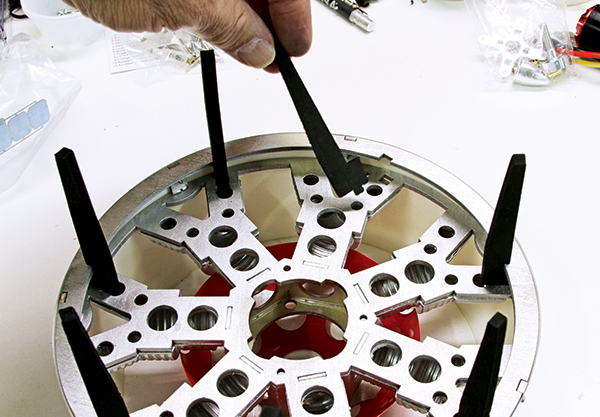 The foam exhaust stacks are positioned around the Townend Ring.
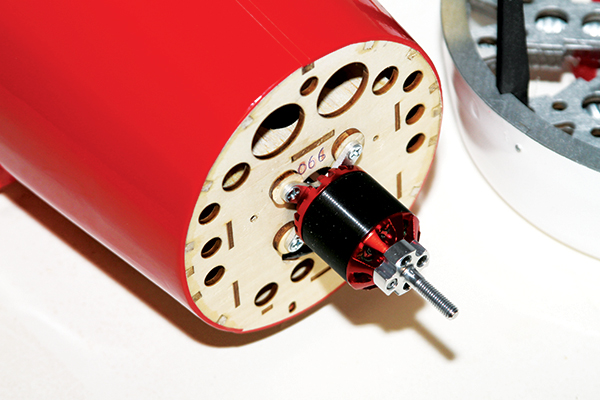 The motor is mounted and shimmed to fit the Townend Ring and scale engine.
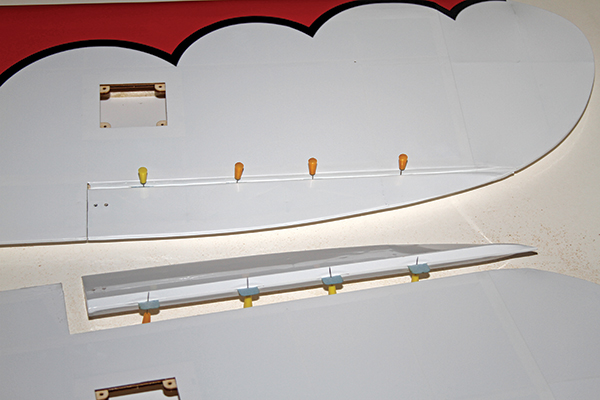 Ailerons are positioned and CA hinges glued in place. Pins help keep the hinges positioned while inserting both surfaces.
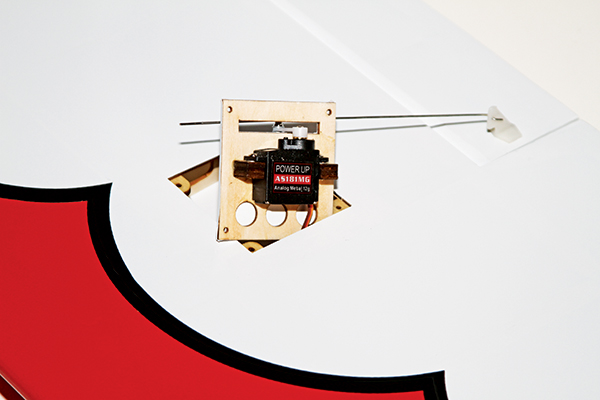 The wing has servo cutouts provided and ample room to snake the servo wires through to the center section. The aileron servo is mounted on the hatch cover.
This ARF is a straightforward assembly process, but it’s not a model for beginners. Mounting the motor is one of the first steps in the assembly so you can find the proper spacing needed to mount the Townend Ring. The exhaust stacks are a stroke of genius, made of foam preshaped and tabbed to fit in precut slots behind the radial cylinders. Three holes are drilled in the ring mount that align with holes in the firewall so it will be properly oriented. Carefully align your motor and the ring so the motor wires run into the fuselage without interference. The wing has servo cutouts provided for you and ample room to snake the servo wires through to the center section. I used a piece of lamp chain extension to make the job easier because it easily finds its way around obstruction and through holes. Servos are mounted on the hatch covers in the usual way. The upper metal wing struts fasten inside the fuselage through precut slots and the screws securing them are accessed through holes that align with the mount points. The outer strut ends are then fastened to the wing at designated points. The landing gear assembly is one of the steps included in the updated addendum, so be sure to check that. It’s not a big change, but the wire size has been increased and Maxford suggests sanding a groove into the wood block to ensure a firm fit. I needed to dry fit the wheel and pant assembly to see what sort of shimming would be required to stiffen the gear movement. This is expected in nearly any airplane employing wheel pants to ensure proper clearance when loaded and flexing. The cosmetic fiberglass wheel pants are gorgeous and fit the wing perfectly. They are finished off with flying wires that go from the wing outer panels, through the wheel pants, and to a screw at the center of the wing. The addendum suggests some simple, well-thought-out modifications to the pants to avoid wear. The tail section is assembled the same as most ARFs, but be sure to put the elevator joiner wire in place before gluing the horizontal stabilizer. The usual cautions apply to making everything true to the main wing and square before the epoxy sets. The access hatch on the bottom of the fuselage front allows easy access to the motor battery and ESC. The rest of the radio and tail servos are installed inside the roomy fuselage.
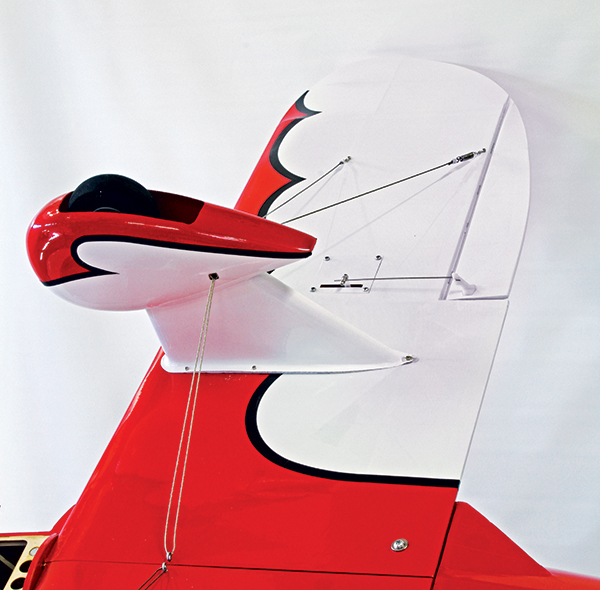 The wheel pants are fitted and tires installed along with cosmetic flying wires.
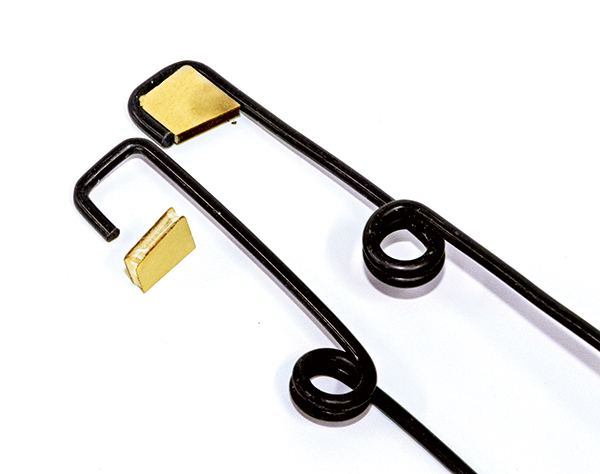 The addendum addressed modifying the landing gear blocks to fit the new wires.
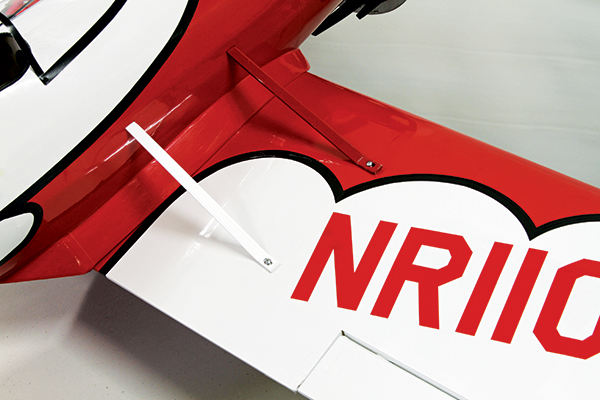 The outer ends of the strut are attached by drilling hard points on the wing.
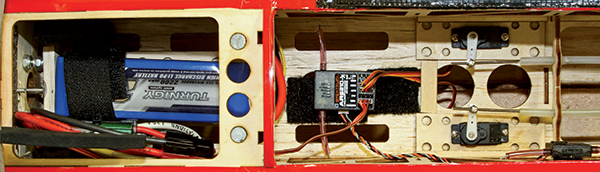 The fuselage provides plenty of room for the radio gear and battery.
Control Throws and CG
I used the recommended throws and CG, which seem to work fine. I added 1 ounce of nose weight behind the Townend Ring to get the CG forward to the needed location.Flying
This was the moment of truth. A couple of circuits and a click or two of trim and the airplane felt like a stable, low-wing, sport model, but it begged for full throttle to attain a comfortable speed. I fly from grass and the low clearance between the ground and pants slightly concerned me, but it turned out to be fine. Controls were set for the recommended high rates and I chose 60% for the low setting. I used my standard 20% exponential on high and low, which worked for me. I fly it using the high-rate settings, but it can be made quite docile by using the low rates. Controllability remains good as long as you’ve kept your CG at or forward of the recommended position. After a few flights, I even increased my aileron throws on high rate. Ground handling was fine and the take-off roll was easily controlled with rudder. It worked best to ease into the throttle and accelerate rather than “firewall” it. The airplane lifted off easily and climbed out with a nice, scale angle of climb. Turning downwind showed that the model appreciates a touch of rudder for trim and it tracked nicely through the turns. With a click or two of trim to the ailerons, I was ready to see how it would behave in more aggressive flight. After all, this is a racer. This isn’t my fastest model, but it looks great in the air and low, high-speed passes make me feel as though the Golden Age is back. Stalls were uneventful and the nose dropped off gently, but it never dropped a wing. Loops, rolls, Cuban 8s, and inverted flight were all fun to do and the power was there for them. With the original motor, I pushed the limits of my battery slightly at 55 amps for full throttle. Knife-edge is slightly more challenging with the big wheel pants and wires, but a respectable maneuver can be performed. Power-off glide is good at this low wing loading of roughly 24 ounces per square foot, so dead sticks aren’t a problem.A Tale of Two Power Setups:
The front end of this model is well thought out, and there is plenty of room for various motors. Maxford USA recommends one of its motor/ESC combinations or any motor providing 400 or more watts on a 4S LiPo pack. I like that the manufacturer gives a range of power suggestions so the modeler can choose his or her own motor. I looked at various motors I had in the shop and decided to try the E-flite Power 32 and a Heads Up Firepower Sport 40. Both fit well within the allotted room and I only used 1 ounce of lead for balance. It balanced perfectly and utilized the 4S packs and a 13 x 8 or a 15 x 8 APC-E propeller, depending on which motor was installed. The Townend Ring fit nicely over both motors and looked perfect.Which Is the Right Motor?
Maxford doesn’t lock you into one particular setup, offering the modeler a great choice of motors, depending on individual preference. I prefer the larger propeller setup, but the choice is yours.Flight Video
Conclusion
When I tried the E-flite Power 32, I was a very happy flier! This motor isn’t being pushed and the larger propeller’s thrust makes the Gee Bee come alive. The number of watts per pound doesn’t always tell the whole story when outfitting a model that has a big frontal area and wheel pants. There is much drag to overcome. The Gee Bee Model E is an honest-flying airplane that any accomplished sport pilot will enjoy. The Firepower 40 Sport motor allowed for a larger 15-inch propeller and lower Kv. This is my favorite setup because of the way the Gee Bee lumbers off the ground on takeoff in such a realistic style. The thrust from the huge propeller provides great power for any maneuver and the system is only slightly stressed. The 15-inch propeller looks “right” on the nose of this beauty. This is a gorgeous airplane! The colors jump out in the air and the model’s unique look garners attention from everyone who sees it. The quality of the built-up ARF and its little details make it a gem. Maxford USA has again produced a great offering of a unique subject. Besides, there’s just something about a Gee Bee ...[dingbat] —Greg Gimlick [email protected] MANUFACTURER/DISTRIBUTOR: Maxford USA 15939 Illinois Ave., #C Paramount CA 90723 (562) 529-3988 www.maxfordusa.com SOURCES: Castle Creations (913) 390-6939 www.castlecreations.com Horizon Hobby (800) 338-4639 www.horizonhobby.com Heads Up RC (352) 624-0282 www.headsuprc.com Landing Products (APC Propellers) (530) 661-0399 www.apcprop.comThis Month's Issue

Join the AMA
![]()


3 comments
take off
greg
Wing
Add new comment