


Flying Without Wings

Written by Jay P. Smith Video, photos, and full-length feature You can also find the feature on page 67 in the October 2011 issue.
IF YOU HAVE been around the RC hobby for a while, you have probably owned a Swamp Buggy. They came in glow engine sizes from .049 to .60 and were a blast to run. With nothing in the water creating drag, they excelled at blasting over water or wet grass while sliding through the turns with an air propeller providing the thrust.
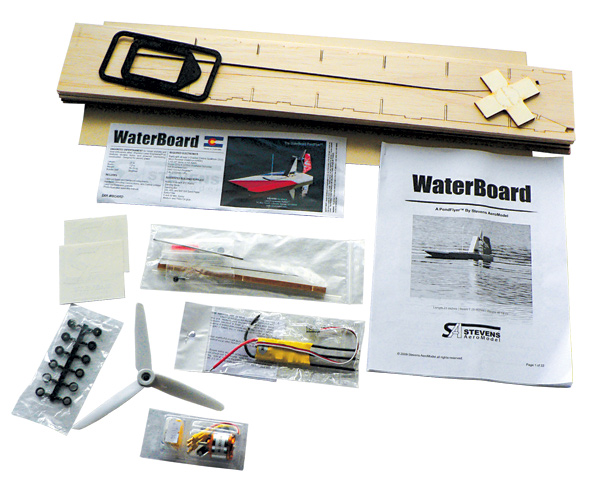
Jump ahead to today and here is a laser-cut, brushless-powered airboat kit that will put a smile on your face. The WaterBoard is an easy-to-build kit that any first-time builder can complete by just following the excellent instructions and pictures provided.
Stevens AeroModel can provide a power kit that is perfect for this project and is complete from propeller to speed control. I chose this power kit for my WaterBoard.
Construction: I haven’t built a kit for a while and I was impressed with the quality of the wood and the awesome laser cutting. I am not going to go over every step of the build, but I will point out important details. If you follow the step-by-step kit instructions the build is a breeze.
The main hull’s framework is assembled without glue using the tabs and notches and is glued after checking that everything is straight. Then the bottom and deck is added. This hull is strong and builds quickly.
The instructions call for using a waterproofing product called Deft clear wood finish. I could not locate this product locally and substituted Minwax water-based Polycrylic instead. It is available in spray and brush application and it worked well for me. Be sure to follow the recommendations on where to use the waterproofing.
A very important step is the radius of the chines and deck sides. A guide is provided to check the recommended radius as you sand. Spend time on this step because it is critical to have a great-performing hull.
The motor mount has different size servo cut outs in each side. Only open the one that fits your servo choice and pay attention to which side of the mount it goes on before you glue it.
When you glue the rudder hinges/control horn, be sure the control horn is on the same side of the rudder as the servo cutout on the motor mount.
When you are ready for sanding sealer on the parts, you can use baby powder in the clear sealer. I wanted a deeper tone to the wood so I used some Minwax stain under the clear on the hull. It worked well as a sealer and the balsa parts looked more like hard wood. I used red enamel on the hatch cover, rudder, motor mount, and graphics. Then I put a couple more coats of clear on everything.
It’s now time for the final assembly. Pay careful attention to how the gaskets are positioned. The pointed end of the motor mount faces the rear of the boat. Note that fuel tubing is used on the right-side motor lugs for thrust correction and that the motor leads must be lengthened 6 inches to reach the speed control.
Since the motor is facing the back of the boat, the propeller must be mounted with the lettering facing forward for correct operation. Also note that the boat has a CG range of 6.5 to 8.5 inches. Mine worked great with the 2100 2S battery all the way forward which was mid-range.
At the pond: Now it is time for the real fun. After checking the rudder direction and buttoning the waterproof hatch, it was time to pond fly. I picked a calm day with minimum ripples on the water. The boat accelerated quickly to an airplane and drifts the corners in thrilling slides.

Start slowly and work up to full throttle as you get used to the handling. Using varying throttle I got 15-18 minutes run time with no problem.
The power setup from Stevens AeroModel is perfect for this boat. Be sure to stick with a 2S battery with the three-blade propeller or you will let the smoke out of the motor.
Pond flying, as Stevens AeroModel calls it, is addictive and will put a huge smile on your face.
Three of my flying buddies tried the boat and we had smiles all around. I can’t wait until we can race multiple boats. The instructions have a lot of tuning information to set the boat up for your driving style, but I was happy with mine right from the start. I would recommend this project to anyone looking for a lot of fun and bang for your buck.
video by Stevens AeroModel online at https://www.youtube.com/user/stevensaero
This Month's Issue

Join the AMA
![]()


2 comments
boat
Video
Add new comment