Focke-Wulf 190


Written by Tom Sullivan As featured on page 40 in the January 2013 issue of Model Aviation. As featured in the Model Aviation tablet app.

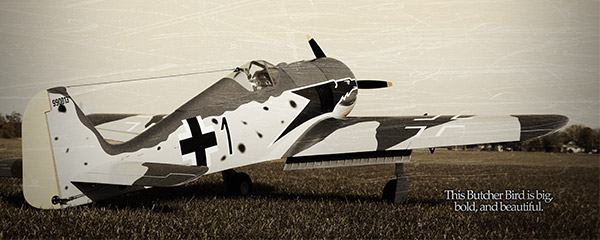
Until recently, if you wanted to add the Fw 190 to your RC hangar, the only options were small, electric ARF models, or building a larger one from a set of plans. Fortunately, the people at Top Flite introduced this Luftwaffe legend as an ARF in Giant Scale!

With a wingspan of 85 inches, the Fw 190 meets the guidelines for International Miniature Aircraft Association competition, and because it’s modeled after the full-scale Fw 190, it can be used in fun-scale competitions and warbird fly-ins everywhere.


SPECIFICATIONS
Model type: Semiscale ARF
Skill level: Advanced builder; advanced pilot
Wingspan: 85 inches
Wing area: 1,198 square inches
Airfoil: Semisymmetrical
Length: 73.25 inches
Weight: 22 to 24 pounds
Engine requirements: 50cc to 55cc gas engine
Radio: Seven- to eight-channel radio with 9 to 12 servos
Retail price: $749.99
Price as flown: $2,550


TEST-MODEL DETAILS
Engine: DLE-55cc gas engine
Radio system: Futaba 8FG radio; Futaba R6008HS receiver; eight Futaba S3305 servos; two Futaba S9001 servos; one HydriMax 3600 mAh (receiver) and one 1600 mAh (ignition) NiMH batteries; two heavy-duty switch harnesses; two 24-inch servo extensions; two 12-inch extensions; six 6-inch Y harnesses
Ready-to-fly weight: 24.875 pounds
Flight duration: 12 minutes
Construction: Laser-cut balsa and plywood with balsa sheeting
Finish: Fiberglass and plastic parts and iron-on covering
Time to completion: 45 to 50 hours


PLUSES
• Prehinged control surfaces.
• Functional and scale split flaps are included.
• Prepainted fiberglass cowl, top hatch, landing gear, and tail wheel covers.
• Designed for Robart retracts (pneumatic or electric).
• Machined aluminum two-blade spinner, cannons, and antenna mounts included.
• A complete, good-quality hardware package, and a vacuum-formed cockpit that includes recessed gauges, a pilot’s seat, and side panels.
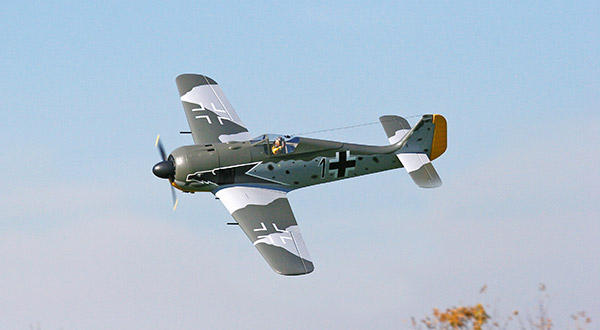
• In the air, it has a wide flight envelope—fast when you want it, and slow when you need it.


MINUSES
• No pilot figure included.
• Fitting the Robart tailgear retract requires trimming wood inside the fuselage to properly fit.
• Minor problems with the electric Robart retracts (see the text for details).


BUILD OVERVIEW VIDEO

FLIGHT VIDEO


Similar Articles

Scale Modeling
Written by Rob Caso
13 video tutorial


A Higher Call
Written by Model Aviation Staff
One-on-one interview


Indiana Warbird and Hoosier Dawn Patrol 2011
Written by Model Aviation Staff
Online exclusive event coverage


Facebook Twitter Share

7 comments

I expected the "BUILD OVERVIEW VIDEO" to be a documentary of the Chinese factory and the Chinese workers who were the ones that did the actual building. At most, the reviewer assembled the built parts, except for "trimming wood inside the fuselage" to fit the tailwheel, which is actually listed as a MINUS! OMG the next thing you know, we'll need real sandpaper.

Similar to how out the TF P-47 50cc... I think I will do the same to this one, already have a unique scheme in mind. You can view the P-47 build thread here http://www.flyinggiants.com/forums/showthread.php?t=22980&highlight=tf+p+47 Now if I could just get TF to sponsor me already it would help my budget!

I was hoping there would be some more follow up info on the electric conversion included here. I am an all electric flyer and have the TF giant corsair with the same set up and was really hoping to see some more on the build/conversion to electric.

I just finished FW190. The article is just a thumb nail sketch of what you really have to do. I opted to put in a DA 60, Robart el retracts, battery backup with two batteries. The wing assembly was ok. I'm not crazy about the hardware. Thought it could be somewhat more robust. Had a great deal of problem with the fuse push rod tubes as they required a lot of work to free them up to reduce friction. Cowling required beefing up the fan ring...very fragile. Also beefed up the cowl ring...again very fragile. Won't take a lot of abuse at all. The DA 60 required additional firewall mods to install, i.e. additional plywood plates to bring out to required distance.Used the Blazing Star DA 60 1.5" aluminum standoff. Installed a RotoFlow 16 oz tank. Did not use a servo for the choke. Used a 90 degree bellcrank/plate to accomodate a pull/push rod out of the r/h side of the airplane. Put my ignition led there as well. Used Smart-Fly Batshare and Wike R/C products Ignition Battery Eliminator. Used JR R1221X DSMX receiver and Spektrum A6030 servos all around. In the process of putting decals on, then CG checks.

Any weight in the nose? Final weight of plane ? I installed a G62 to make up for the nose weight and will swing a 22-8 three blade prop.Anthying else I should know about this plane before flying?any help you can give will be greatly appreciated.Thank you.

The plane was 22-1/2 pounds build per the instructions. Flying weight was 24-7/8 pounds with the nose-weight added. For my impressions on flying and the rest of the review, please see the writeup in the January issue. It's all in there.

Did you have any issues with mounting the G-62? Im about to build one and I'm not sure what power plant I'm going with. Can you maybe send pictures of the engine mount. My email is [email protected] Thanks

Add new comment