Strong, lightweight ribs that are beautiful and functional
By Scott Copeland | [email protected]
Photos courtesy of the author
As seen in the April 2023 issue of Model Aviation.
Light enough to fly, yet strong enough to survive … such is the paradox of flight. Ever since people have taken to the sky, the qualities of strength and weight have been at odds with one another. Model flight relies on the same principles on a smaller scale. Free Flight (FF) modelers live by the adage, "When in doubt, leave it out," thus producing models that are exceptionally light.
Building too light, however, can lead to an airplane’s untimely demise. On the other hand, it is easy to build strong structures that should theoretically withstand the stresses of flight. In actuality, building too strong produces heavy airplanes, which do not fly well, if at all. The old-timers called these "lead sleds." Successfully blending the virtues of strength and lightness is the quest of the model designer and builder.
"First, it’s got to fly."
—Dave Platt
Sometime in the early 1980s, I first set eyes on Fulton Hungerford’s Loening OL-9 that was featured in an old copy of Flying Models magazine. The airplane was a seldom-modeled amphibious biplane, but what really captured my interest was the structure. Much like a full-scale aircraft, the ribs were built-up and not simply cut from a sheet of balsa.
Although the structure was gorgeous and functional, the prospect of building 40 individual ribs from thousands of tiny sticks seemed beyond ominous. Furthermore, the model was a rubber-powered Scale design, which I knew from experience would be subject to the fickle fates of FF. It seemed to be an excessive investment in time (and the builder’s soul) to complete a masterpiece that could so easily be destroyed.
I tipped my cap to Mr. Hungerford and didn’t consider his construction methods again until I came across an article by AMA Model Aviation Hall of Fame member Mitch Poling in the April 1984 issue of Model Aviation. Mitch was a pioneer of electric-powered RC and had constructed a Sopwith Tabloid that could be flown indoors. This feat might seem unimpressive by today’s standards, but 39 years ago there were only brushed motors and NiCd batteries available to RC modelers.
To succeed in such an endeavor as designing and flying a scale indoor electric-powered RC biplane, the airframe had to be extremely lightweight, yet rugged enough to carry the heavy power system. There, within the article, was a description and accompanying photos of the built-up rib method that Fulton Hungerford used! I was enlightened to learn that the technique is actually quite simple and not particularly time-consuming. In fact, you might be able to produce built-up ribs in the same amount of time as tracing templates on balsa sheet and cutting the ribs by hand.
The sliced-rib method involves building a "slab" with an airfoil shape and the internal structure of the built-up ribs. Individual ribs are then sliced off one by one. The key to success is keeping the grain of the balsa pieces running in the same direction. Not only does this allow the ribs to be cut easily (the cut is made with the grain versus across the grain), but it also provides structural strength. For the sake of demonstration, I have chosen the Heath Super Parasol as my modeling subject.
The Heath features a constant-chord wing and utilizes a Clark Y airfoil with a flat bottom. The method presented could be modified to produce built-up ribs with nearly any airfoil profile and wing shape (tapered/elliptical wings), but for ease of construction, a constant-chord wing with a flat-bottomed airfoil will suit our purpose nicely.
Fulton Hungerford’s Loening Amphibian was the inspiration behind the sliced-rib method.
This shows Mitch Poling’s version of sliced ribs that he used in his Sopwith Tabloid indoor electric RC model, circa 1984.
A photo of the rib construction from the Gere Sport project illustrates how uprights are measured and cut according to the plans. Note the grain direction of the wood.
Individual ribs are easily cut on the bandsaw with the help of a rip fence.
Uprights are glued to the slab base. Copious pins are required.
Because I am "old school," I traced the rib outline onto a piece of paper and drew the internal structure to resemble the full-scale airplane. Those who are well-versed in CAD might decide to go the digital route.
You might notice an extra line on the rib plans in the photos. This represents the capstrips that will be glued to the top and bottom of each rib during construction. With plans in hand, it’s time to build the rib slab. This is a flat-bottomed airfoil, so the base is cut first. Six-inch wide, 1/16-inch sheet balsa was used for the base and also the top of the rib slab. The width of the slab can be virtually any dimension, with wider sheets being made by edge-gluing balsa sheets together. Just always remember that the wood grain should run chordwise.
The locations of the upright structure are marked on the base, with care taken to make sure lines are square. Upright dimensions are taken from the plansview and cut from 6 × 3/32-inch balsa sheet. Use a square and a straightedge to ensure that the uprights align according to the plans. Use spar stock to ensure proper alignment of the spar slot.
Take care not to glue the spars to the structure. Diagonal structural members are cut according to the plans-view and glued in place between the uprights. Some sanding with a bar sander might be required to get a proper fit. After the internal structure is complete, the top of the slab can be glued in place.
Before proceeding, check the rib slab for alignment and test-fit the top piece to confirm the proper airfoil shape. A builder might find it necessary to wet the balsa to allow it to contour to the shape of the airfoil. For the Heath Parasol, 1/16-inch sheet was used for the base and top sheeting, so wetting the wood was not required.
I prefer to use aliphatic resin available from Deluxe Materials. It is water-based, sets up quickly, and produces a very strong bond. There are also no noxious fumes to deal with. Builders are encouraged to use their favorite adhesive.
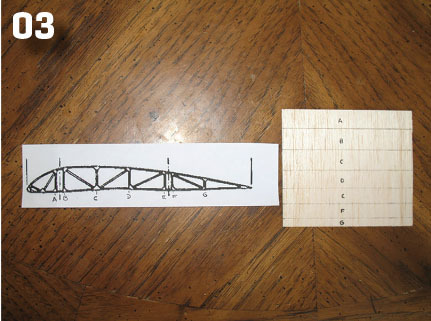
The basic rib outline of the Heath Super Parasol, alongside the plans drawn, shows the built-up structure.
The bare bones of the E-2 Taylor Cub show the use of builtup, sliced ribs. The aircraft has a 6-foot wingspan but weighs only 3.5 pounds ready to fly, with a heavy, geared Astro Flight 15 motor.
The rib slab base is cut and the spar locations are marked according to the plans.
Forty-two roughsawn ribs weigh 1.24 ounces. The ribs have a chord of 12.25 inches.
The slab is ready for top sheeting, with all of the internal structure complete.
This shows the completed rib compared with the plans.
It was definitely worth the effort! The E-2 won Best Civilian Scale at the 2022 Northeast Electronic Aircraft Technology (NEAT) Fair.
I have successfully used CA glue many times to build rib slabs and, although it does the job quicker, I find the joints are sometimes brittle. Titebond would be a good alternative, as would a balsa cement such as SIG-MENT or Ambroid (nitrocellulose glue). I would not use epoxy in most cases because of the added weight.
With the completed slab in hand, it’s time for the fun part: slicing ribs! The tool used will depend on personal preference and the inventory of tools in your workshop. A bandsaw with a fence will make short work of the rib slicing. Alternatively, a table saw could be used with a thin blade/kerf to minimize wood loss while cutting. I have successfully used a Japanese backsaw and a razor saw to cut ribs by hand. If the dimension of the ribs is small enough, an X-Acto blade will work well.
Repeat until there are enough ribs for your current build. All ribs should be inspected for structural integrity and reglued as necessary. Occasionally, a glue joint will come free during the cutting process. A light sanding might be required, and then you’re ready to build your wing!
After a builder is comfortable with this technique, he or she will find that it is applicable to many designs. With slight alterations in building methods, nearly any airfoil shape can be produced. For Scale modelers, there are myriad full-scale subjects that use built-up ribs—perhaps the most recognizable is the Piper J-3 Cub.
Nearly every aircraft from the Golden Age of Aviation used built-up wing ribs. Glider pilots trying to conserve weight and perhaps add structural beauty to their next build might wish to consider this technique. Most vintage designs, such as the Quaker, Buzzard Bombshell, and others, would lend themselves well to sliced ribs. For Giant Scale, where saving weight is not as critical, ribs could certainly be built from plywood. The possibilities are as vast as a builder’s imagination.
The Randy Randolph-designed Bee-Tween was built using sliced ribs.
I have built a number of Sport and Scale models with built-up ribs using the sliced-rib method. My E-2 Taylor Cub, with a 72-inch wingspan, weighs only 3.5 pounds ready to fly, with a 4S battery and ancient Astro Flight geared 15 motor. It flies slowly and realistically because of its light weight, part of which can be attributed to its built-up ribs.
The method presented here is simple and not nearly as time-consuming as one might think. The result is a stack of strong, lightweight ribs that are both beautiful and functional. Pat Tritle stated that he "builds lightness" into his models, and the success he has achieved with his designs is difficult to argue with. Build light. Try the sliced-rib method—you will not be disappointed.
SOURCES:


Comments
Add new comment